Adam, Chris and Jamie agreed to play Populous, Rich and Rebellious. As I hope you recall this is a Campaign set in the English Civil War. Chris, representing Parliament, invaded the East Midlands from London. The Royalists rose to the challenge and Adam tried to take it for the King.
Summary: At the “Battle of Ely”, the heavily outnumbered Parliamentarians defeated the Royalists in seven game turns.
Strategic Situation
We quickly did the pre-campaign house keeping. Chris and Jamie declared for Parliament. Adam and I went for Royalists. Parliament got the initiative and the order of player ended up:
- Chris (Parliament)
- Steven (Royalist)
- Jamie (Parliament)
- Adam (Royalist)
In the early round was Chris and Steven. Chris chose to invade the East Midlands and Steven attacked Wales.

Game 1 was Chris’s strategic attack into East Midlands. Adam was the strategic defender.
Campaign Cards
Given the battle was in the East Midlands, between the two capitals, each faction got 3 campaign cards.
Parliament = 3 Campaign Cards
+1 for being the strategic attacker
+2 for control of the adjacent Parliamentarian Capital (i.e. Lower Thames Valley)
Royalists = 3 Campaign Cards
+1 for being the strategic defender
+2 for control of the adjacent Royalist Capital (i.e. Upper Thames Valley)
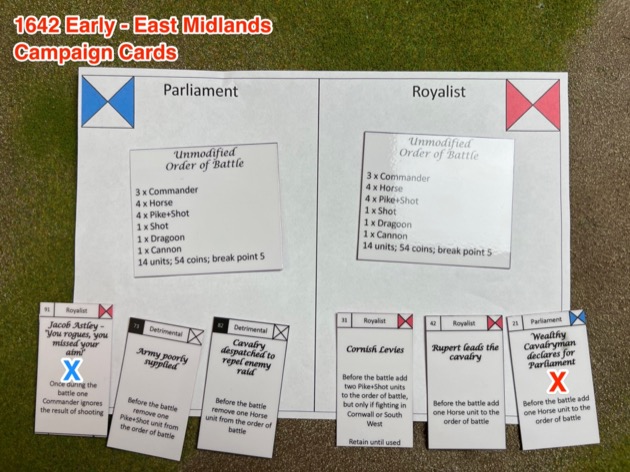
Both sides got a campaign card that didn’t match their faction. These get discarded. Adam gained a unit because he drew the Royalist campaign card, “Rupert leads the cavalry: Before the battle add one Horse unit to the order of battle”.
Adam also drew another Royalist card: “Cornish Levies: Before the battle add two Pike+Shot units to the order of battle, but only if fighting in Cornwall or South West. Retain until used.” He couldn’t use this card for the battle in the East Midlands but it was going to be useful later on in the campaign.
Chris wasn’t so lucky and got two detrimental campaign cards:
- “Army poorly supplied: Before the battle remove one Pike+Shot unit from the order of battle”
- “Cavalry despatched to repel enemy raid: Before the battle remove one Horse unit from the order of battle”
Orders of battle
Because of the campaign cards, the two orders of battle were unbalanced. The Royalists got a generous 15 units, compared to the Parliamentary array of 12 units.
Royalist Order of Battle
|
Parliament Order of Battle
|
Initiative
Parliament (Chris) was the strategic attacker but the tactical defender. This is because Chris’s modified army was smaller. You can explain that any way you like, but as I see it, campaign events had tipped the balance against Parliament (lack of supplies, distracted by enemy action) and the Royalists had sought to take advantage of the situation.
Map and Table
We used Terrain Cards to generate the map and hence the table.

One big wood. One big town (Ely). Chris, as defender, had the option to rotate one of the cards, but declined. With the smaller army he liked the congested terrain.
Tactical initiative, weather, etc
Being 1642 the early round started in Autumn. There was fair weather and the battle started at noon (9 game turns not the normal 10).
Pre-game
Being a scenario most of the pre-game phase was ignored. But the Parliament cannon did score a hit in the bombardment step. Oh, and we figured the town needed name: Ely.

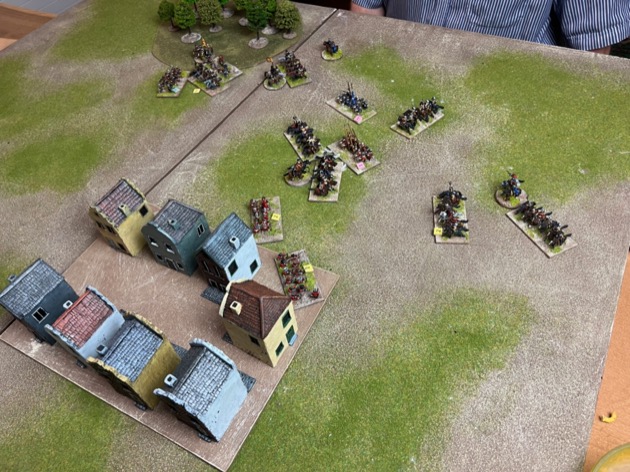
Turn 1
Chris, with the smaller Parliamentary side and as the defender, deployed behind the town and with the wood protecting his flank. Adam set up from the town to the left. This overlapping deployment meant Adam had to pivot his army into the gap between wood and the town.

Chris also pivoted so that he could dominate the space the Royalists were advancing into.

Turn 2
Adam kept advancing. Chris was content to move his shot and dragoons to the edge of the wood.

As an indicator of things to come, Chris’s artillery scored a devastating success agains the Royalist infantry moving through the edge of Ely. [Later I re-read the rules and this unit would have counted as in cover so Parliament should have roll 1d6 not 2d6.]

Turn 3
Adam advanced again.

The two forces were now close enough to open fire.

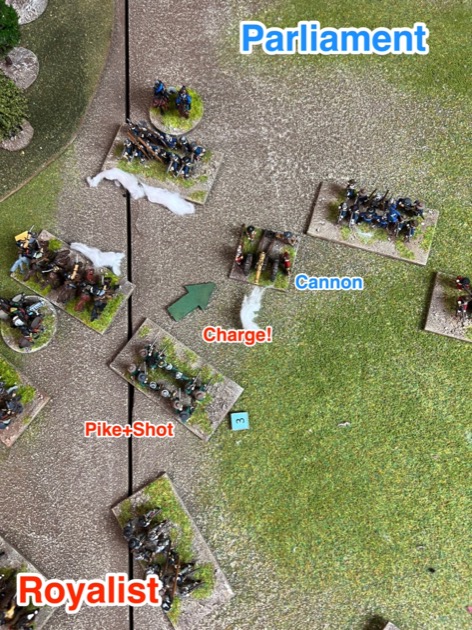
Turn 4
The firefight hotted up. This was a fight between rough terrain troops (shot and dragoons) versus open terrain troops (horse). Not surprisingly Adam was keen to keep his horse in the open and rely on pistols.

But nearby Adam saw an opportunity to eliminate the pesky Royalist artillery. It just took a charge and they were gone.
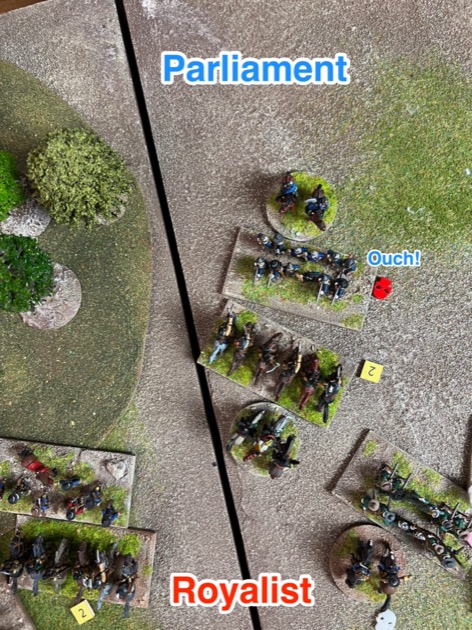
Turn 5
Back on the left the fire fight was going against Adam. The Parliamentary shot routed some dragoons.

Despite this set back, Adam kept advancing in the middle, past Ely.

Chris thought it was time to bring his flanking horse closer to the action.

When the firing started the Royalists got a mauling.

Both sides then launched charges.

Parliament scored another rout. This time from a triple 6!

Further to the right things were more balanced. Both sides got a unit reduced to one resolve and forced to rally back.

Turn 6
The Parliamentarian horse opened up with pistols and routed a pike+shot unit facing them.

Over near the wood there were a number of charge declarations. But the charging Royalist horse pre-empted and cancelled the charges of the Parliamentarian foot.

But charging wasn’t enough for one unit of Royalist horse. They attacked the Parliamentarian shot unit and routed away.

Turn 7
Turn 7 saw several Royalist charge declarations. But it also saw the Parliamentarian shot get into the rear of one Royalist horse unit.

There were five melees. Melee 1 was a deadlock despite it was two to one against the Royalists, and they were only throwing 1d6 due to having enemy in rear.

In Melee 2 the Royalist horse routed their foot opponents.
Melee 3 was a Royalist success, with the Parliamentarian foot being driven back. Unfortunately the royalist general was killed in the process.

With the Royalist general gone, another unit in this command routed. And that meant six units lost and the Royalists broke.
Observations and conclusions
Score one for the Parliamentary side. Chris took the game, despite having the smaller army, through clever deployment and a bit of luck.
This was our first table top game for a while and we were a bit slow setting up. This allowed quite a lot of time for catch up. Once we were into it, the game took only 90 minutes.
Good things about Populous, Rich and Rebellious
One game in and I’m quite pleased with the Populous, Rich and Rebellious Campaign system. The campaign card system proved its value. We got a match up of 15 units to 12, which under normal circumstanced wouldn’t be possible. And even better … it was a great game with the smaller side winning. I was very happy to see that.
The Terrain Cards continue to offer interesting and playable maps, generated simply.
Improvements to Populous, Rich and Rebellious
But not everything is rosy with Populous, Rich and Rebellious. Here are a few things for me to consider if I ever do an new version.
Oddities in the map
For a start the map was a bit odd, with Oxford being too far north (in the North Midlands) and the midlands stretching too far south. So changed the map.

To avoid confusion, I have retrospectively changed all the photos of the campaign moves to use the updated map.
Is the weather and time of day rolls worth the faff?
I rolled for weather and time of day, I’m not sure the slight level of faff this requires is worth the effort. Maybe Adam can tell me whether weather and night fall were important in any of the big English Civil War battles.
Recruitment between capitals was confusing
This game was set between the capitals, and I think the recruitment bit of the campaign cards section can be clearer around the capitals. It currently says:
You get one campaign cards for each recruitment factor that applies:
+1 if you are the strategic attacker so are assumed to have prepared for the campaign
+1 if you are the strategic defender so control the contested region
+1 for each friendly controlled region adjacent to the contested region
+1 if you control Lower Thames Valley and this is either the contested region or an adjacent region
+1 if you control Upper Thames Valley and this is either the contested region or an adjacent region
I think this would be clearer:
Each player gets one campaign card for each recruitment factor that applies:
+1 because you are fighting a battle
+2 if you control the contested region and it is a capital (Lower Thames Valley, Upper Thames Valley )
+1 if you control the contested region and it is not a capital
+2 if you control the Royalist capital (Upper Thames Valley) and it is adjacent to the contested region
+2 if you control the Parliamentary capital (Lower Thames Valley) and it is adjacent to the contested region
+1 for each other friendly controlled region adjacent to the contested region
No quick reference sheet
Lastly, I think I’ll write a quick reference sheet for Populous, Rich and Rebellious. The rules have a lot of bits but the sequence of play is quite short and I found myself having to hold the rule book all the time. Which is always a bad sign for a set of rules.
Where to get Tilly’s Very Bad Day and Populous, Rich and Rebellious
Both are available for download as PDFs:
Tilly’s Very Bad Day (PDF)
Populous, Rich and Rebellious – English Civil War Campaign (PDF)
I like those green arrows for marking charges. At first, I though that they were superimposed on the photos like the blue movement arrows and the red and blue caption text, but the light and shadow make it clear they were markers used during play. Are they made from wood / MDF and painted green or just thick card…? Did you buy them ready cut or are they home made…? Please, do tell…! 😉 I think these would be really useful movement markers for a variety of wargames.
The arrows are commercial. MDF / Wooden 20mm long and 3mm deep. I got a pack of 50 from eBay for not very much. Then I spray painted them. Mostly you see the green ones, but I also did blue, red, and black … just in case.