
Jamie was coming over and I quickly knocked up this Crossfire scenario to continue my experiments with the revised Anti-tank rules. This time I wanted tanks on both sides and we ended up with three Panzers attacking and two Shermans in defence.
The scenario is extremely loosely based on the Coldstream Guards and Scots Greys defence of the Fosse Bridge on 13 September 1943. One of the many small actions following the Salerno landings in the Italian Campaign. Emphasis on the “extremely loosely”. At the time I only knew the battalions/regiments present and the location of the bridge which gave me a modern google map of the modern site. Not much to go on historically, but it gave a good game. I’ll write up the scenario later although a real Fosse Bridge Scenario will be quite different.
Table and deployment
I didn’t have much to go on for this scenario. I knew the Fosse Bridge crossed the Tusciano River, west of Battipaglia, near San Mattia. So I found a logical bridge on google and printed out the location.

Jamie helped set up. The modern map looks quite industrial, in a farming way, and I suspect it looked quite different in WW2. I felt that gave us a bit of lee way when it came to putting it on table. We kept the outline of the river, the location of the bridge, the roads/tracks, farm, big patch of rough ground between the farm and the bridge, and patchwork of fields on the other side of the road. The hedges are conjectural but reflect what looks like vegetation along some of the tracks. We dropped in vineyards and a crest to cut up visibility.

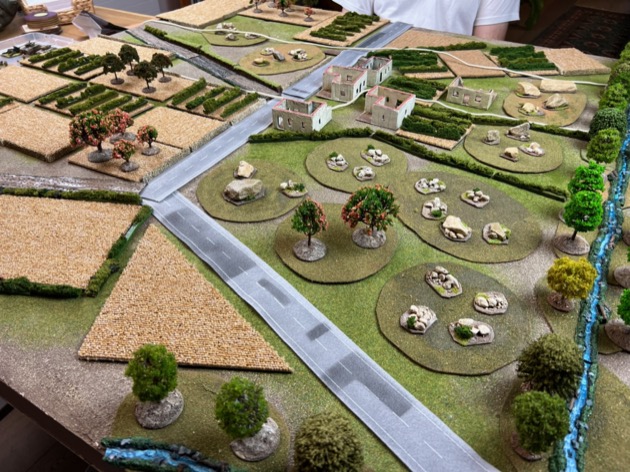
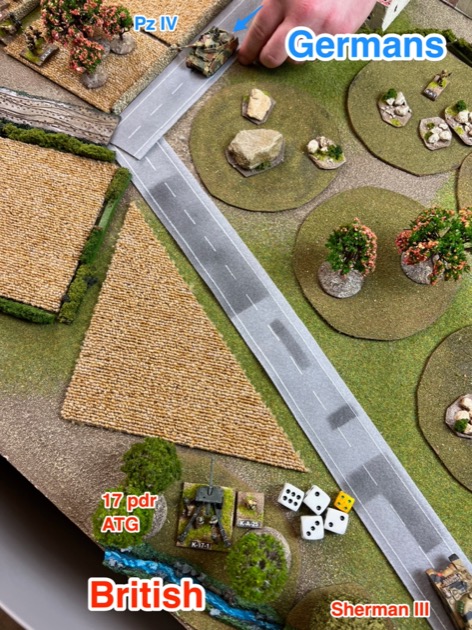
The tanks started visible. In this case a Sherman III of the Scots Greys aiming down the main road. Otherwise I deployed hidden.

Jamie deployed his Germans across the table.


2000 Hours
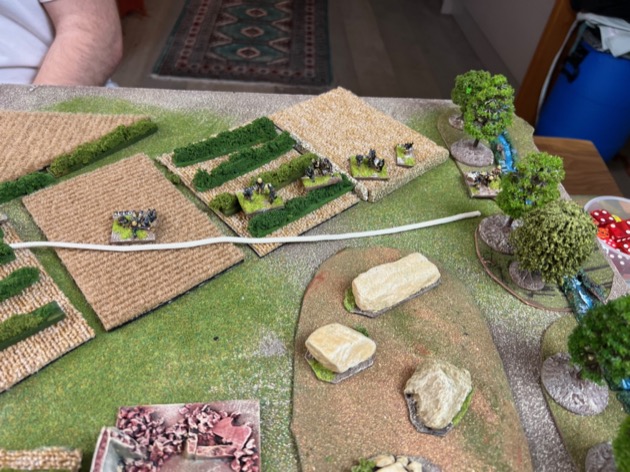
Jamie probed on my left, towards the road before the patchwork of fields.

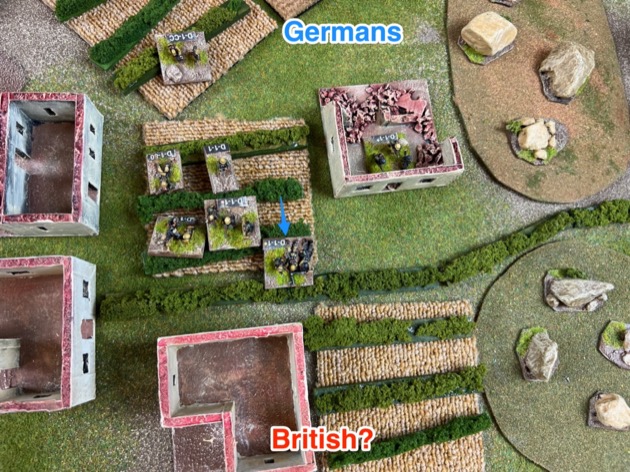
He also aggressively advanced towards the farm.

One of the cool things about Crossfire is that Jamie didn’t know where I was.
2020 Hours
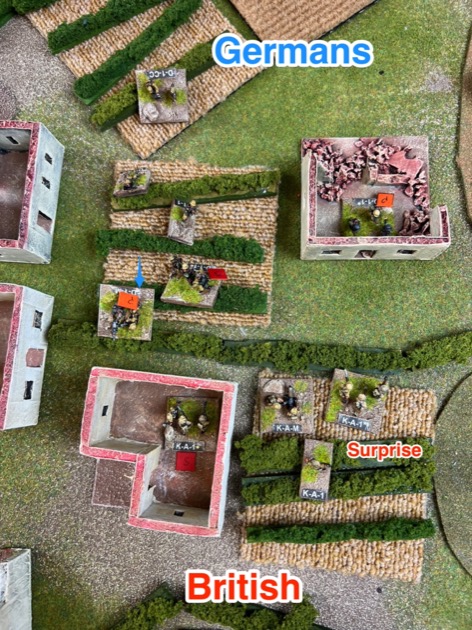
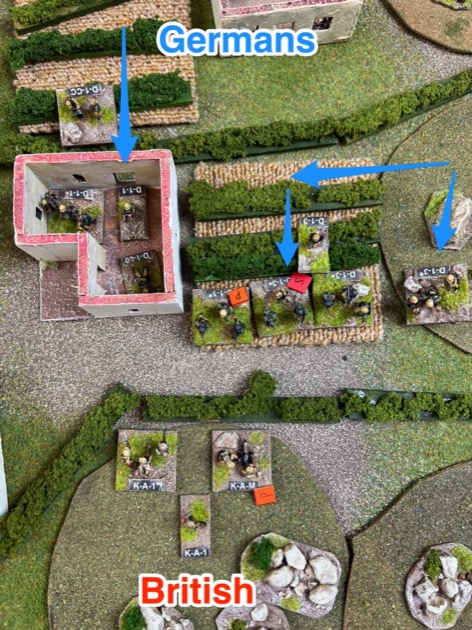
Not too surprisingly I was defending the farm. I revealed a squad in one of the farm buildings and shot at Jamie point squad after it crossed the hedge. Killed.
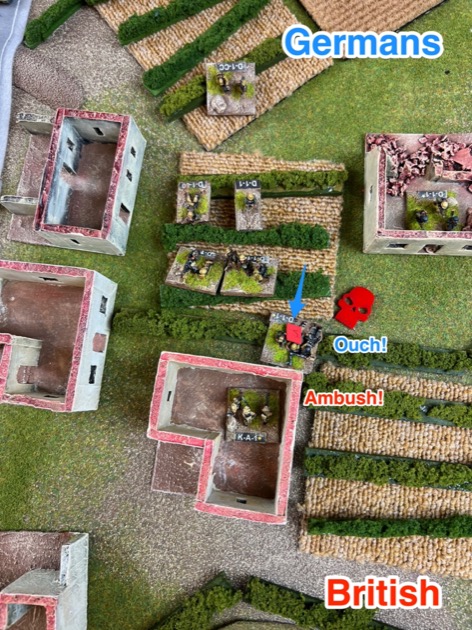
As the firefight built up I had to reveal more stands to be able to hold him back. In this case stands in the vineyard next to my defended farm building.
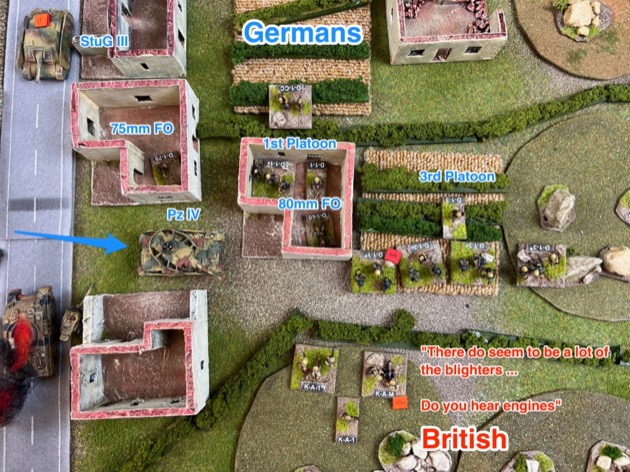
In the centre Jamie smoked off my Sherman, allowing his StuG III to crest the rise in the road safely. It looks like a big tank shoot out was likely.

2030 Hours
Using my revised Anti-tank rules, Jamie SUPPRESSED my Sherman.

I rallied the Sherman and shot back. But several attempts just had be rolling low. I didn’t bother capturing all of the attempts, but the photo is a good example. 5d6 to hit for the gun, less 1d6 for the StuG’s armour, making 4d6. No hits. Mutter. Mutter.

In reply, however, Jamie again managed to SUPPRESS my Sherman.

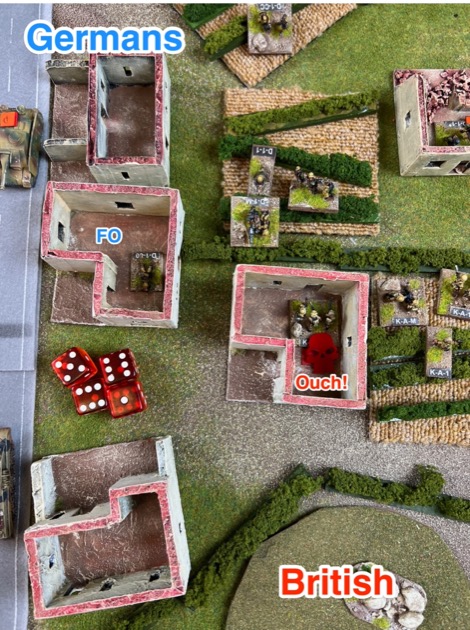
Jamie was also very aggressive with his Forward Observers (FO). He brought up the FO for his 8cm mortars and killed the defenders of the my farm building. [Hmm, now that I look at the photo he rolled 4d6 into cover, but it should have been 3d6. Never mind.]
It was getting too hot in the Farm so I pulled my platoon back into the rough ground.

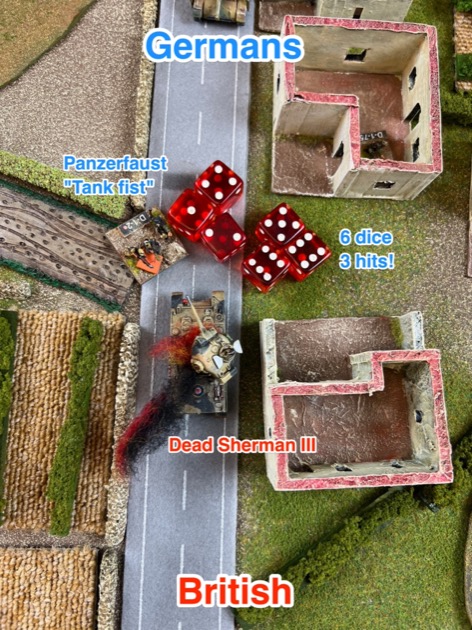
Now Jamie tried what looked like a suicidal charge on my lead Sherman. He smoked it. He charged frontally (the dodgy bit). I rolled 5d6 in reactive fire … and PINNED him. That wasn’t great as the squad was (1) within 1 base width and (2) armed with a Panzerfaust.

7d6 = Boom! Scratch one Sherman.
Then Jamie cautiously retreated away from the wreckage.

On the right, Jamie brought another platoon into play by advancing hear the river.

Jamie reinforced the farm and it gave me a Kill.
But numbers were on Jamie’s side as he brought in the platoon from the river bank.
And just to make my day, Jamie directed a Panzer IV into the farm complex.
The German force on my left also kept advancing.

2040 Hours
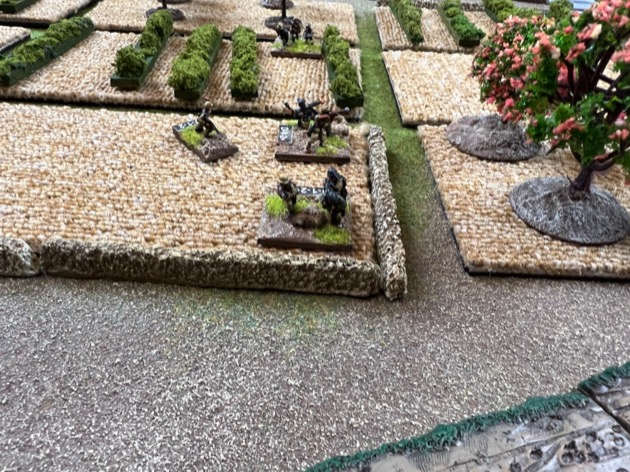
The Germans on my left fanned out into the patchwork of fields.

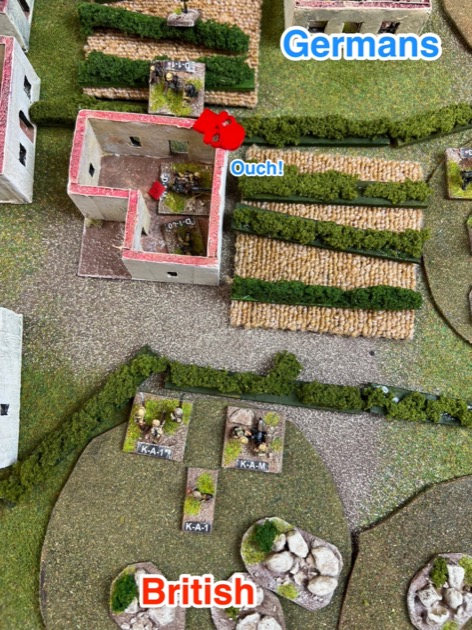
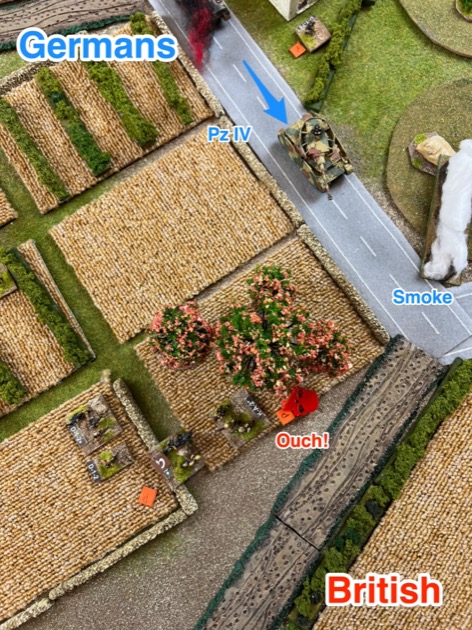
Back in the farm, the Panzer IV started pounding the hedge line and my guardsmen sheltering behind it. Ouch!

Meanwhile the German mortars were still busy and took out the remaining squad from my platoon at the farm.

With that sector seemingly clear, Jamie pulled the panzer out of the farm complex and back onto the road.

Then he attempted to push his flanking platoon over the head into the rough ground. This was the moment I chose to reveal my big surprise. My Company Commander and a rifle squad where hiding along the river bank. They SUPPRESSED the moving German squad.

And my remaining Sherman finished it off.

But that wasn’t the only surprise. This is when I revealed my remaining squad inside the farm. They happed to have a PIAT but didn’t get to use it – see the observations at the end. But rifles were enough to stop Jamie’s FO, just in front of the building.

2050 Hours
Did I mention that Jamie was aggressive with his FOs. This guy, pinned within spitting distance of my building, brought in mortar fire. The cad.

2100 Hours
It only took a couple of rounds and the FO killed off my squad.

On the left, Jamie finally ran into my only defenders in the patchwork of fields.

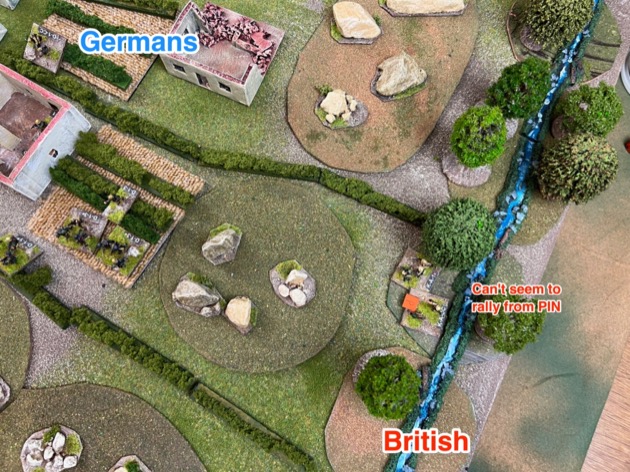
On the river, Jamie and I had a bit of a firefight going. I was trying to rally both stands so I could move them somewhere more useful, like into the rear of the Germans. But Jamie kept PINNING me. I’d rally, or more usually fail to rally, then he’d PIN me again. Mutter, mutter.
With panzers approaching on the main road, and my right looking weak, I pulled my sole remaining Sherman to the bridge. I carefully positioned it to have line of fire across the rough ground.

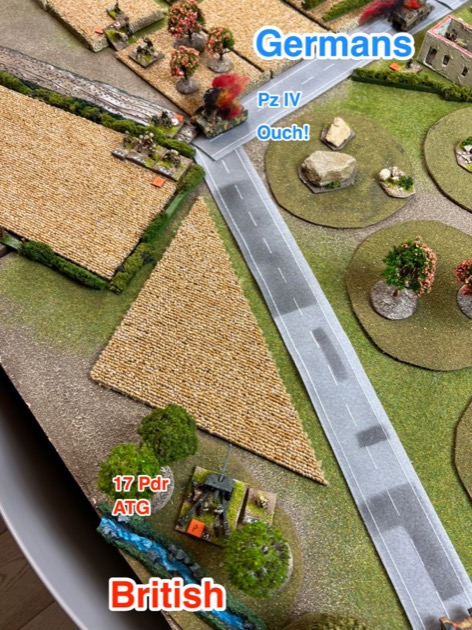
Jamie’ took the implicit invitation and drove up the main road with his Panzer IV. Surprise! I revealed my 17 pounder anti-tank gun and got to roll 5d6 (6d6 less 1d6 armour). And only PINNED him. There is no justice.
2110 Hours
But that was sufficiently scary that Jamie laid smoke to cover his panzer’s withdrawal.

2120 Hours
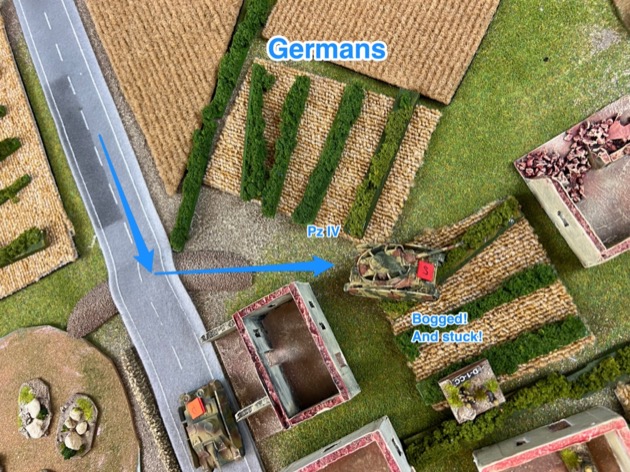
Jamie sent his other Panzer IV into a vineyard near the farm complex. And got bogged, then permanently mire, making it out of action for the rest of the game. What this showed is the terrain was more potent than my anti-tank shells.
2130 Hours
With skilful use of smoke Jamie could use his Panzer IV to clear out the patchwork of fields.
2140 Hours
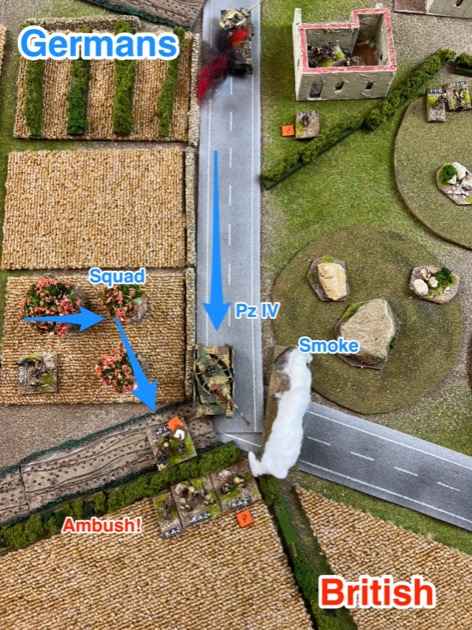
Jamie then advanced with both the Panzer and an infantry squad. The squad triggered the ambush of my remaining hidden infantry, right at the road junction.
2150 Hours
The smoke cleared and finally my 17 pounder dealt to the leading panzer.
Making the nearby Brits very happy.

Unfortunately, back on the river, Jamie close assaulted my Company Commander. Oh, dear. Lots of dead and captured guardsmen.

Then Jamie took the game by pushing a platoon right along the wooded river bank. I’d cleverly positioned my Sherman to cover the rough ground and road. But I failed to cover the river bank, leaving a open path for the panzergrenadiers.

And then to round off the game, he Panzerfausted my Sherman. I this case 7d6, no armour to rear, 3 hits, dead.

And so it ended.
Observations and Conclusions
It was a good fun game, great to get my Germans in Italy on table alongside my Kiwis (masquerading as Coldstream Guards), and another good try out of my revised Anti-tank rules. On the down side, it did highlight flaws in the (admittedly “extreme loose”) scenario. And it did make me wonder about the potency of the tanks in my revised Anti-tank rules.
The game
Well, Jamie won. As is common with Crossfire we both felt under strength relative to the challenge. It was a good game, tightly contested around the farm, the patchwork of small fields, and along the road. Jamie eventually won by sneaking some Panzergrenadiers down the river line to take the bridge. And, to add insult to injury, he fired a panzerfaust into the exhaust of my remaining Sherman. Sigh.
The Scenario
It was interesting going from a Google map to a crossfire table. Personally I think this process meant I made the table more cluttered than it had to be. Next time I’d cut back the number of features e.g. have less building sectors in the farm complex – it probably only warrants one or two building sectors although the real farm had several.
My experience researching the`Battle of Lemon Bridge (18-19 July 1943) highlighted that todays landscape is not necessarily indicate what was there during WW2. I suspect the same is true for Fosse Bridge. That gives me more scope to just make it up.
After the game I also read a bit about Fosse Bridge. It seems the British defended the river bank, so the Germans must have come from the north rather than through the farm to the north-east. That would change the game quite a bit. It would, for example, eliminate the rather glaring map flaw which allowed Jamie’s Germans to sneak along the wooded river bank on the edge of the table to capture the bridge.
The revised anti-tank rules
My revised Anti-tank rules are holding up through game play. I did have a slight niggle of doubt because Jamie was inclined to use his tanks a lot. When he had a choice he’s use tank fire rather than infantry fire. It wasn’t a massive problem, but hints that the balance might be slightly towards tanks over infantry. The counter balancing observation is I failed to hurt anything with my Shermans for the entire game and it didn’t matter how many dice I was rolling.
Jamie’s panzerfausts had two big moments. A panzerfaust crew rushed through smoke to shoot a Sherman at point blank range from the front. A risky move but the Sherman crew didn’t notice them before the tank brewed up. The second big moment was when another panzerfaust crew took the Fosse bridge then knocked out the Sherman ostensibly guarding it. As I said, insult to injury. What I like about this is these were big moment during the game. Dramatic moments. The squads had to get close before firing. That felt right. And of course Jamie was rewarded by gratifying booms.
And the 17 pounder firing from cover was also dramatic. I like drama in wargames.
I also wasn’t sure about shooting my PIAT from a building. The draft anti-tank rule gives PIAT a short range of “within 1 base width” but what does that mean when the firing squad is in a building. I decided not to make an issue of it, but after the game, and after consulting the Crossfire forum, I now think it is fair that defenders of building should measure shooting range from the walls. If we’d played that, then I probably would have got his Panzer IV as it entered the farm complex.

The game reminded me about bogging, so after the game I did some musing on how to bogging with normal infantry fire (see Bogging and Anti-tank Mines – Revising Crossfire Anti-tank Rules 7).
Great post, thanks! Very nice game and scenery! Hi Alessandro
This was a great game and a great write up, thanks Steven
Hi Steve , do you have the orbats , I’m thinking of giving this one a go
hope you are well , Bruce
I’ll post the scenario this week. Just for you.
cheers , what morale rating were the guards ? veteran ? Clynts over in July so will hopefully have a crack at this one
I’ve now posted the Almost Fosse Bridge Scenario. I rated the Guards as regular for the game. That might have done them an injustice but I was looking for quick and simple.
Hi I have sent youa battle report
Great stuff! However, a closer look at the satellite photo on Google Maps reveals an additional significant terrain feature that would have obstructed two significant moves in this wargame:
The hedge to the south of the farm complex is actually the Fosso canal, which pass under a road bridge and carries on between the fields to the north west. Trees obscure the view of how exactly the Fosso canal intersects with the Tusciano river, but a dry dock with some canal boats is visible immediately to the south east:
https://www.google.com/maps/place/Via+Fosso+Pioppo,+25,+84091+Battipaglia+SA,+Italy/@40.599019,14.9464318,1427m/data=!3m1!1e3!4m16!1m9!3m8!1s0x133be0c90903b795:0x7118e89958326ee!2sVia+Fosso+Pioppo,+25,+84091+Battipaglia+SA,+Italy!3b1!8m2!3d40.60171!4d14.94672!10e5!16s%2Fg%2F11csfnhbcy!3m5!1s0x133be0c90903b795:0x7118e89958326ee!8m2!3d40.60171!4d14.94672!16s%2Fg%2F11csfnhbcy?hl=en
Open Street Map does not make the nature of the canal-river intersection any clearer, but I am guessing that the river is culverted and actually flows underneath the canal.
https://www.openstreetmap.org/?mlat=40.616667&mlon=14.983333&zoom=12#map=17/40.59927/14.94755
Anyway, both of these moves in the above wargame would involve a canal crossing:
fosse-124 British pull out of the farm
fosse-163 Sneaky Panzer Grenadiers win game
Daniel, you’ve got better eyes than I. Thanks for putting the spot light on the canal.
Outstanding! Play though, descriptions and photos are inspiring. Thank for posting this. This and several of the other group posts have helped us understand the rules better and have inspired us to play more often. Many thanks.