Malcom Dove sent through a battle report of the Battle of Grantham, his 2nd Solo Game Tilly’s Very Bad Day, and the first game of his English Civil War Campaign. Most words are Malcolm’s.
Campaign
I decided to use the English Civil War Campaign rules (called Populous, Rich, and Rebellious) with my 30 Years War 6mm armies, to give structure to my solo games until my group can meet again. The games are small and quick and the campaign needed very little tweaking for TYW. I made the Imperialists into Royalists and the Protestants as Parliament, the only rule change was that either side had the option to field light horse in place of dragoons on a throw of 4,5,6.
The Royalists won the first action and invaded Lincolnshire.
Dice decided the battle started at 2pm in late March, thus limiting it to 8 turns.
Forces Available
The aggresive Royalists immediately detached a unit of horse to raid, the parliamentarians ignored this threat and met their foe at full strength (this was decided by campaign cards).
The Royalist army was:
Royalist Order of Battle
- Wing
- 1 x Commander
- 2 x Horse
- Centre
- 1 x Commander
- 4 x Pike+Shot
- Wing
- 1 x Commander
- 1 x Horse
- 1 x Dragoon
- 1 x Shot
- 1 x Cannon
- 13 Units; 5 break point
Having the larger army Parliament was the tactical attacker.
Parliament Order of Battle
- Wing
- 1 x Commander
- 3 x Horse
- 1 x Light Horse
- Centre
- 1 x Commander
- 3 x Pike+Shot
- Wing
- 1 x Commander
- 1 x Horse
- 1 x Pike+Shot
- 1 x Shot
- 1 x Cannon
- 14 Units; 5 break point
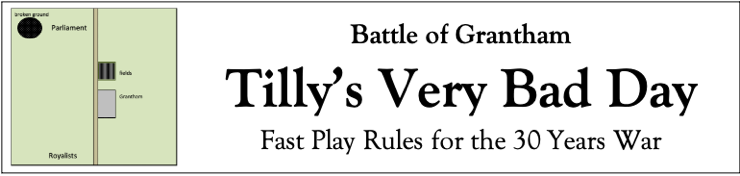
Map
The battle field was set up using the terrain cards in the TVBD rules. Note in the photos, I did not put a road on the table as it had no effect on play.

Deployement
Both armies deployed their P&S in the centre (compulsory) and their shot commands around Grantham and its fields. Parliamentarian horse was in greater numbers on their right flank therefore the Royalists on their left held their cavalry back to guard the infantry.

Action
Move 1 the roundheads advanced along the line, while the cavaliers halted apart from an advance to occupy Grantham and on the other flank to swing a P&S unit to help the outnumbered cavalry.
Move 2 saw the first clash on both flanks with roundhead P&S unit charging the opposing shot and the lead cavalry meeting, both lead by their general on the other. The P&S unit was thrown back with heavy loss (2 resolve) but on the other flank there was disaster for the king’s cause. Both generals were unhorsed, but whilst the roundhead leader groggily got to his feet, the brave cavalier lay dying nearby. This was enough for the cavalry unit to route from the field (-2 resolve from melee & -1 for loss of general).
Move 3 saw the royalists generally winning the firefight with one P&S unit taking a third loss of resolve and the general who had joined it was unhorsed. Meanwhile the light horse was now in the rear of the royalist centre and the second cavalry unit on that side was routed leaving an open flank for the roundheads to exploit.
Move 4 saw just that, the victorious roundhead horse wheeled into the flank of the P&S unit routing it and with the artillery exposed that too looked lost. Move 5 And so it proved, not only was the gun lost, the Right flank roundhead P&S charged the opposing shot and routed it (4 hits on an already weakened unit).

The Royalists fled from the field and Lincolnshire gave its support to Parliament.
Conclusions and observations
I like the terrain generation system, particularly as it partly depends on how you flip the card over. I have greatly enjoyed the games I’ve played so far especially as I now painted the reinforcements from Baccus
Lessons learned – well keeping your flanks protected is an obvious need. The loss of a general is a crippling and although if hit there is only an 11% chance of him dying, the impact I suspect outweighs the benefit of winning a melee or rallying a unit. I suspect waiting until the battle is at its crisis point is the time to get gung-ho. Although two parliament generals were hit they both passed their second saving throw. I also wonder if I should have been more aggressive with the Royalist army. Advancing the foot would have allowed an oblique to support the outnumbered cavalry more quickly.
I’m still not sure whether to sit back and shoot or get charging immediately is correct. Certainly for infantry weakening the enemy before getting stuck in is best, but for cavalry I’m not so sure. If you shoot and receive the charge at the halt, you will have an advantage if you damage the enemy, but could be routed if you don’t. The best option seems to be the second mover so you can take fire and if not hit charge home! More battles needed to make sure.
Nice report. What is TVBD?
Oops. Tiiily’s Very Bad Day. Just saw it. Thanks.