
Adam and Jamie played my big Lutzen scenario for Tilly’s Very Bad Day.
Summary: Good game. A better game than last time. Jamie (Imperialists) beat Adam (Swedes) on Game Turn 6.
Version of Tilly’s Very Bad Day
We played Tilly’s Very Bad Day (version 1.3) with the same experiments we’ve been playing recently:
- -1d6 in melee if unsupported; support meant any friendly unit to rear within 2 TUM
- Winner has to inflict 33% loses on the enemy rather than just 25% loses
- More effective Light Horse, Dragoons and Shot
- Pre-game bombardment by Cannon
- Morale erosion when a friendly unit routs
- Behind flank means BEHIND-FLANK
- 10 Game Turn time limit for the attacker
And tweaks to existing, although experimental, rules:
- Pre-game Scouting by Dragoons and Light Horse (but not Horse)
- Saving throw of 5+ on a Commander Casualty (rather than the 4+ we tried last time)
Featuring new rules:
- Infantry rally back
- Large Pike+Shot
- Sequence of play for pre-game elements
Pre-game
This section takes us through the new sequence of play for the pre-game elements.
Armies
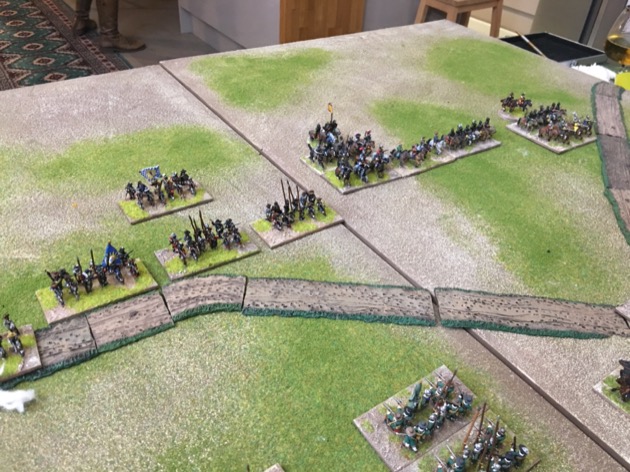
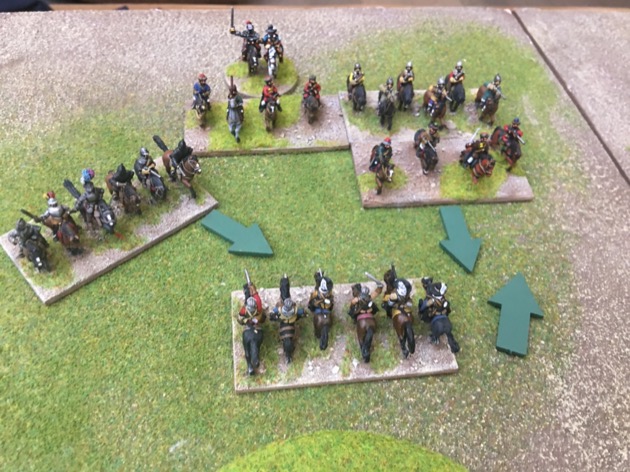
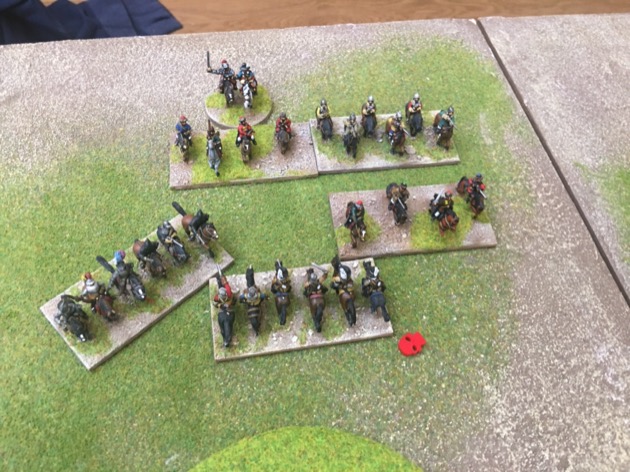
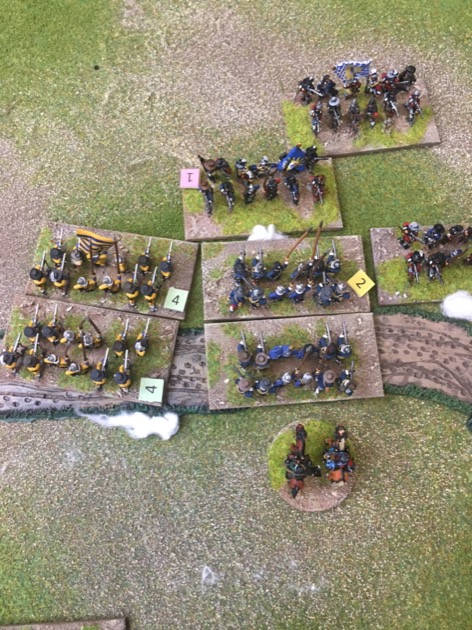
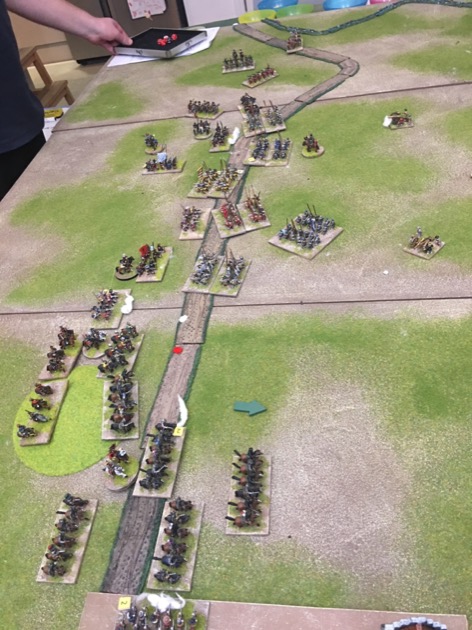
The orders of battle were bigger than in the last play test. The Swedes, for example, has six more units on table. The board was definitely more full.
Terrain
As per scenario map. There were a couple of changes to the last game:
- Windmill Hill is smaller than last time.
- And the road has a bend pointing towards the Swedes.
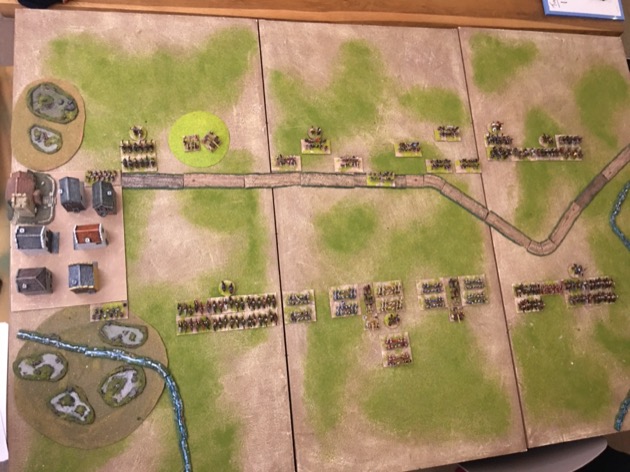
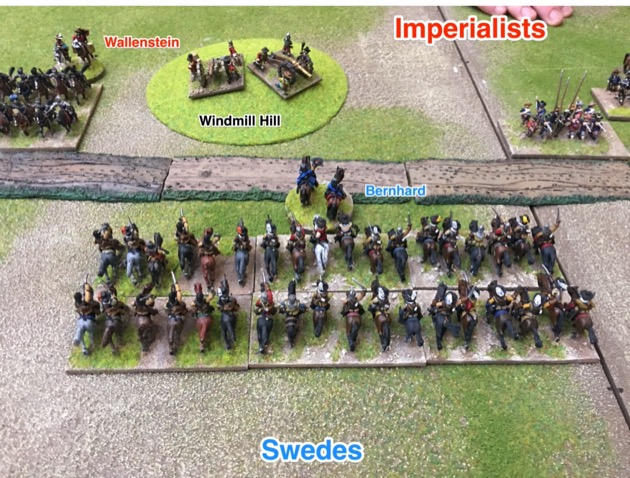
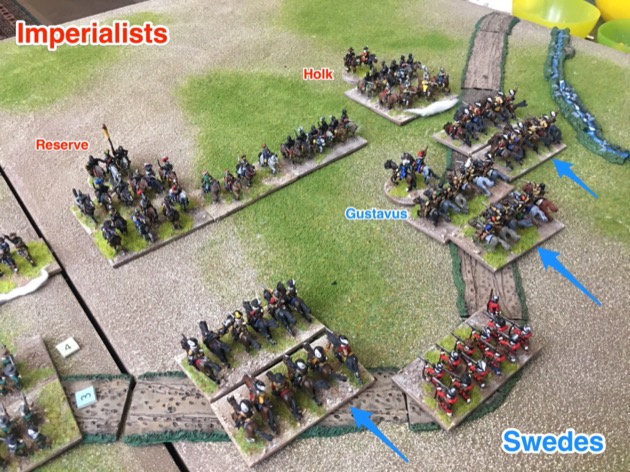
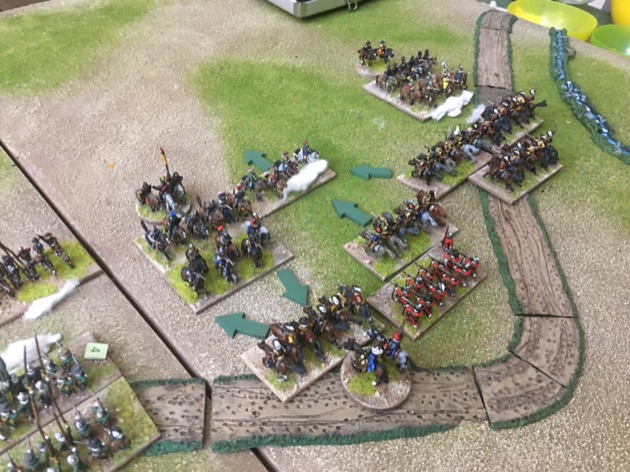
Deployment
Both armies deployed close to the neutral zone. The Imperialists so they could benefit from the protection offered by the sunken road. The Swedes to reduce the distance they have to travel.

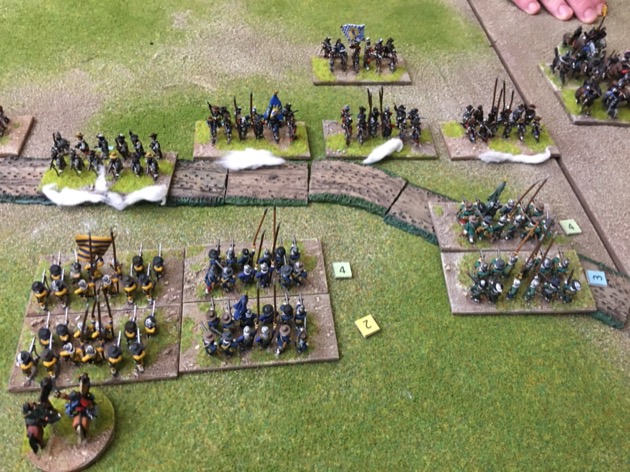
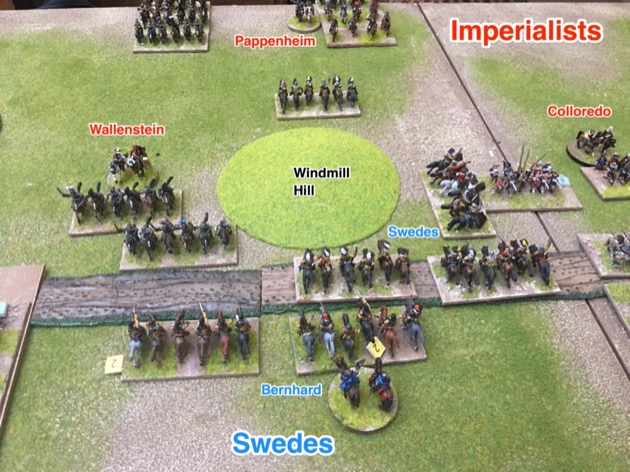
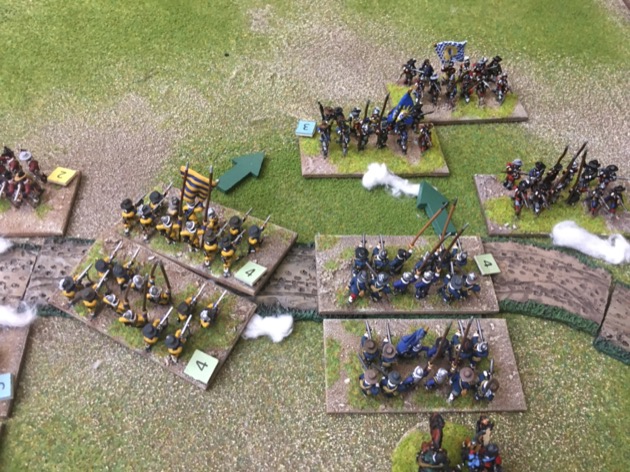
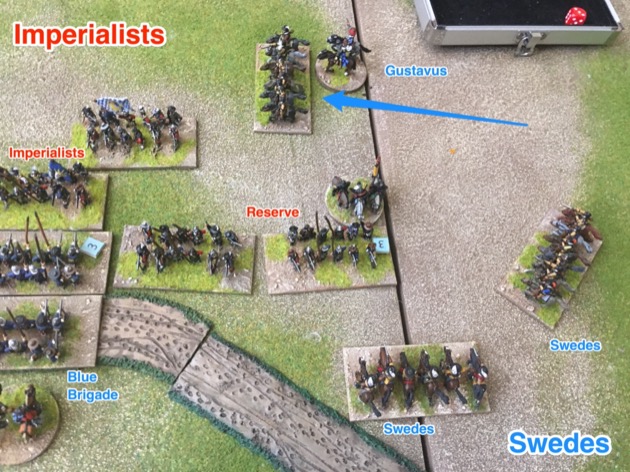
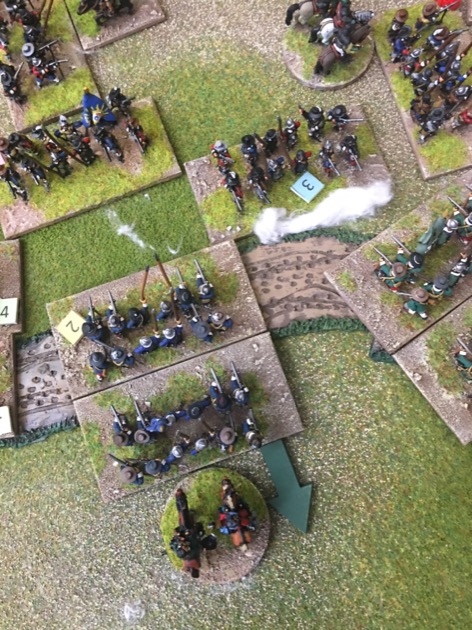
The armies were bigger and looked quite impressive. At least I think so. Here is Bernhard of Saxe Weimar with the Swedish left wing.


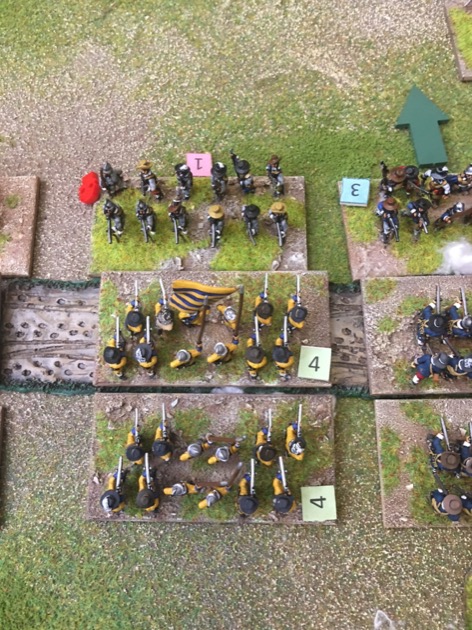
The Swedish centre had six Swedish brigades. Large Pike+Shot under the rules. Mine are colour coded.

Gustavus was on the right with more horse and commanded shot.
Wallenstein was defending Windmill hill, so facing Bernhard. Wallenstein had a tiny force compared to Saxe-Weimar. Historically he took this position because he knew there would be a tough fight over the hill.
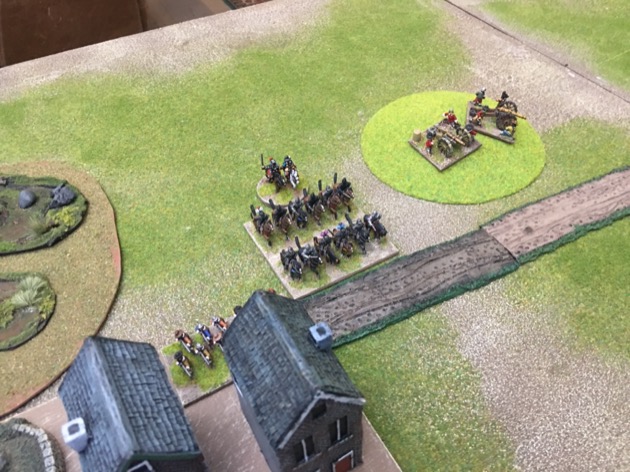
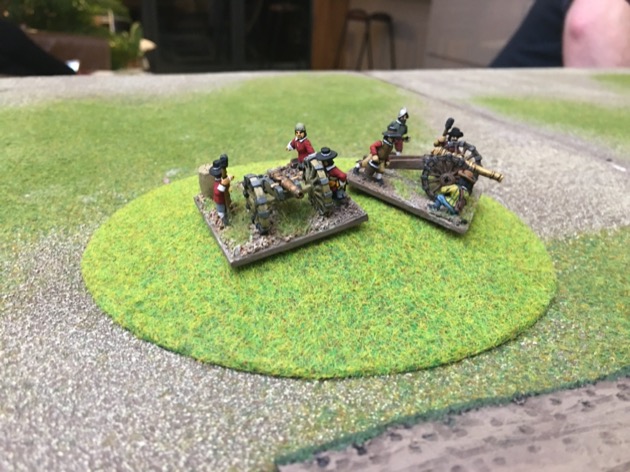
I gave the Imperialists the option to separate their two Cannon or group them on Windmill Hill. Jamie chose to group them.
The Imperialist food were in a chequerboard formation.
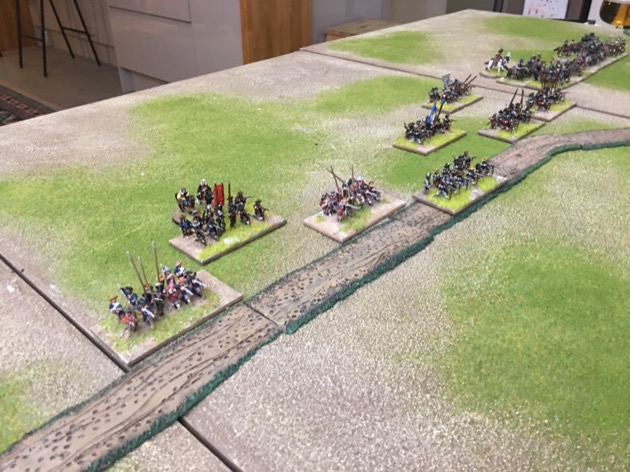

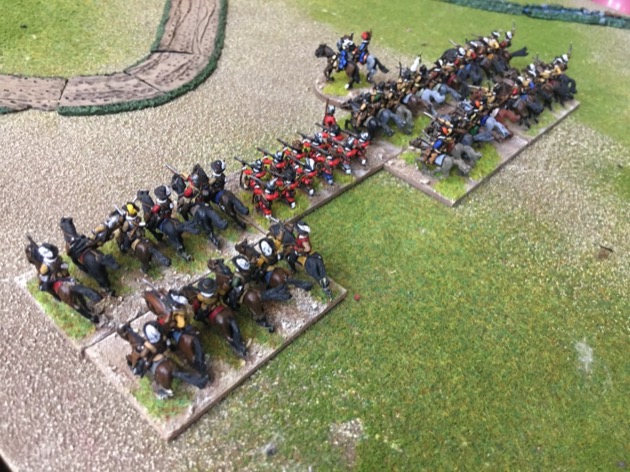
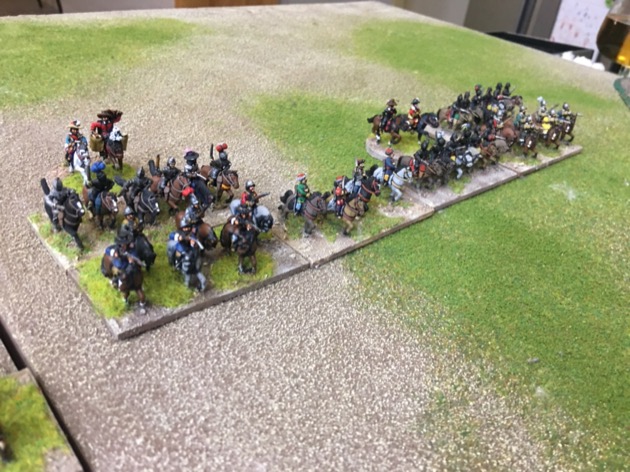
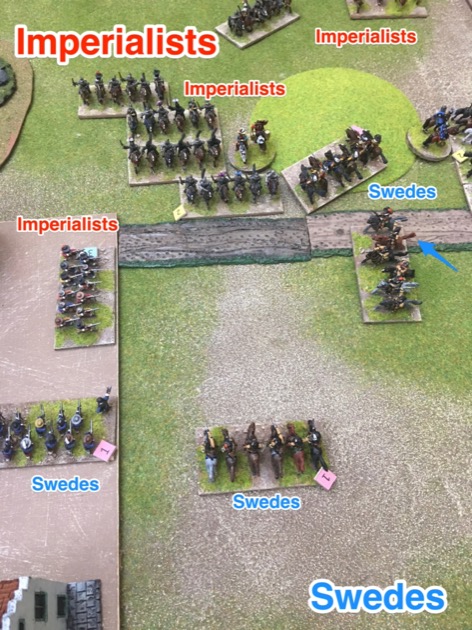
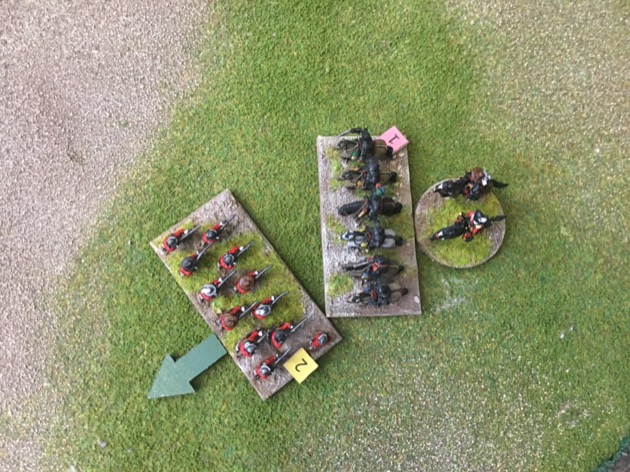
Holk was over on the Imperialist left facing Gustavus. He had the bulk of the Imperialist horse. He was supported by the reserve. Yup, Jamie had his reserve in the front line.
Scouting
The Imperialists got a scouting advantage and delayed deploying one command. So deployment started with the a Swedish command.
Bombardment
The Swedish cannon start limbered so only the Imperialists could do bombardment. To no effect.
Turn 1
Adam launched his army forward. Gustavus headed for the bend in the road.


The Swedish foot also trundled forward.

Bernhard got to the reach in one turn.
Colloredo edged towards Bernhard’s wing, along with some Imperialist food.

Jamie pushed his Imperialist foot up to the road. This sacrificed the chequerboard formation, but he still had a thin second line to provide support.

Turn 2
Swedish left (Bernhard versus Wallenstein)
In Lutzen village the opposing shot had a go at each other.

Only game turn 2 and Bernhard crossed the road under Windmill Hill.


The Imperialist battery on Windmill hill blazed away to little avail.

We had to do a little adjustment at that point because the front left Swedish horse unit was too far advanced and was within the buffer zone of the Imperialists. So we pushed it back. Then, somehow, I managed to let the Imperialist horse to their left do the same thing; it shifted sideways to block the Swedes. Ooops. Double oops.

But that dancing around near the road didn’t save the Imperialist guns. Bernhard went straight up the hill and took out one of the cannon.

On the road the Imperialist horse sent the Swedes backwards.

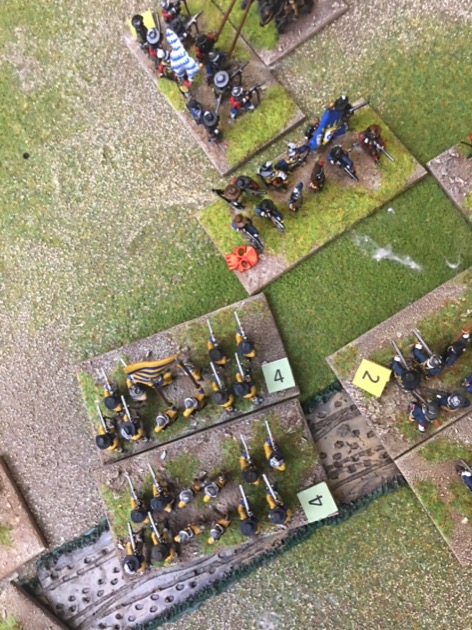
Swedish Centre (Knyphausen versus Colloredo)
By now the opposing foot were on opposites sides of the road. Big Swedish brigades were small Imperialist brigades.


The defending Imperialists opened up.
The Swedish Blue brigade suffered the most.

Then the Swedes charges. The Green brigade got driven back.
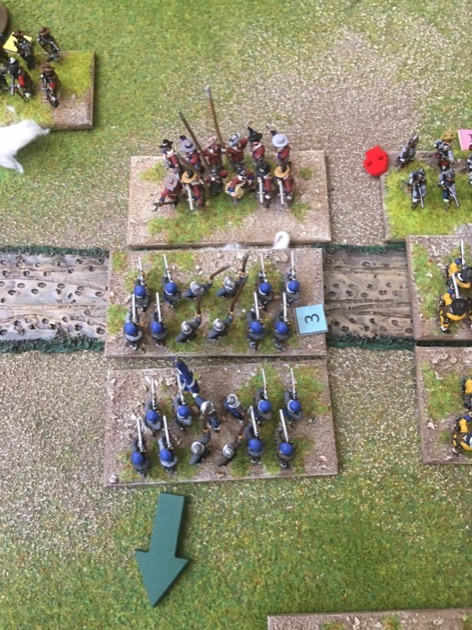
The Blue brigade also got driven back but the Yellow brigade cleared the Imperialist Shot from the road.

The Scottish brigade was also driven back.
As was the Grey brigade.

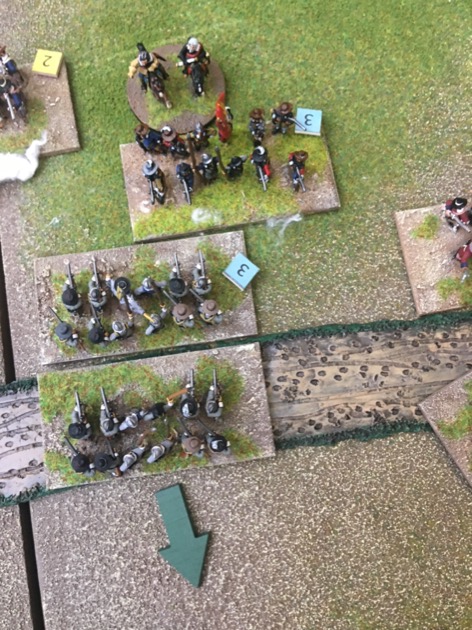
Swedish right (Gustavus versus Holk)
On the right Gustavus pushed ahead aggressively.
The Swedish King lead a charge which destroyed a unit of Imperialist horse.

But nearby the Swedish lost some horse themselves.

Personally I quite liked the spectacle of the game.

Turn 3
Swedish left (Bernhard versus Wallenstein and Pappenheim)
Adam had to pull back a shaken unit of Horse but generally advanced aggressively. He was trying to get a bridgehead across the road.

The Imperialists continued to shoot but without much impact.

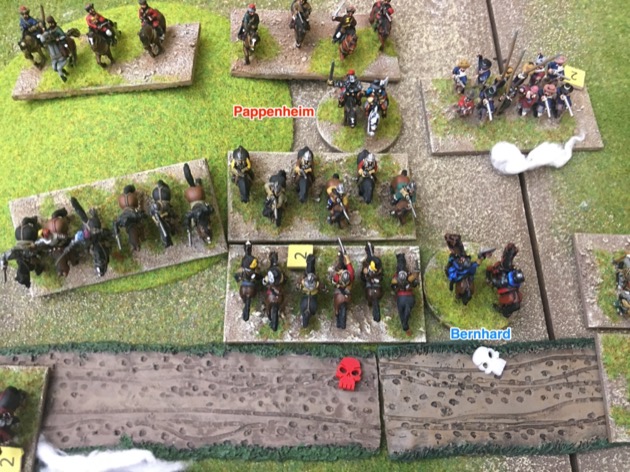
The big event was Pappenheim arriving. Jamie chose to have him arrive on the Imperialist right, behind Wallenstein, Windmill Hill and Lutzen. Not historical but sensible given where he was under pressure. Jamie was, of course, taking a risk here as this would leave Gustavus with a superior position on the other flank.

The Imperialist shot in Lutzen were more concerned with shooting at the horse than the enemy shot within the village.

So Adam decided to point out the error of their ways to the Imperialists.


Adam was desperate to get across the road and the Swedes more or less charged everywhere.

On Windmill Hill Adam wanted to get the remaining Imperialist guns. He also wanted to squash the Imperialist regiment that was the lynchpin between Wallenstein (Right) and Colloredo (Centre). So three Swedish units charged them.

Adam got the guns.
But that pesky Imperialist regiment of foot held on.

Swedish Centre (Knyphausen versus Colloredo)
This was the turn when the Swedish foot got to the road.

The Green brigade were on the corner of the bend and started to cross the road under fire from the Imperialists on the other side.

Else it was going to be charges that launched the Swedes across the road. The Blue, Yellow and Scottish brigades all went in.

The Blue brigade had some success and drove the Imperialists back.

The Yellow brigade routed their opponents outright.
The Scots were driven back.
Swedish right (Gustavus versus Holk)
Gustavus kept advancing aggressively but the bend in the road slowed him down. (The road was “Difficult Terrain” so slowed cavalry movement; and the bend meant units spent more time in the road than if they’d been crossing it perpendicularly.)

Lots of charges on the right.

The Imperialist Croats tried to evade but failed and routed.

Turn 4
Swedish left (Bernhard versus Wallenstein and Pappenheim)
Jamie pushed forward on the left

With Pappenheim on table Adam realised he had a problem. He could beat the Imperialists on Windmill Hill but not if Pappenheim intervened. So he sent a unit of horse out to slow Pappenheim down.

Of course Jamie sent his boys in.
Unfortunately for Adam, his Swedes routed.
Another charge near Windmill hill: a unit of Swedes charge across the road to hit some Imperialists.

Neither side prevailed.
Swedish Centre (Knyphausen versus Colloredo)
As per last turn, the Imperialists preferred to shoot rather than charge.

The Swedes preferred to charge. The Yellow brigade wheeled to line up.

The Yellow and Blue brigades then went in.
Surprisingly the Imperialist regiment stood the Swedes off.
Swedish right (Gustavus versus Holk)
Gustavus lead another charge on the right. Three Swedish units hit one unit of Imperialist horse.

Not surprisingly the Imperialists routed.

The Imperialists won another melee on the far right.

Turn 5
Swedish left (Bernhard versus Wallenstein and Pappenheim)
Bernhard was starting to look weak between Windmill Hill and Lutzen. So he wheeled a unit of horse to face the threat.
Pappenheim roared in, from the far side of Windmill hill.

Pappenheim’s horse charged at Bernhard. Nearby the Swedish Grey brigade also charged.

Bernhard’s escort routed but the man survived.

On Windmill hill events were going against the Swedes. The Imperialist routed some Swedish horse.

Swedish Centre (Knyphausen versus Colloredo)
The infantry fight in the centre raged on.

The Swedes continued their aggressive attempt to cross the road, so more Swedish charges.
Swedish right (Gustavus versus Holk)
Gustavus was starting to encroach on the Imperialist foot in the right centre. And worse he was threatening to go around their flank.
So a couple of Imperialist regiments had to turn to face, just before the Swedish horse charged. Adam was hoping for charges behind flank, but ended up going straight in.

Gustavus sent his opponent backwards.

And the nearby Imperialist infantry came of badly against the Swedish horse.
But further out the Swedish began to withdraw.

Turn 6
Swedish left (Bernhard versus Wallenstein and Pappenheim)
Adam started turn six by pulling one of his shaken Swedish units far back from the fighting near Windmill hill.
The hill itself, and nearby, was swarming with Imperialists. Bernhard only had two Swedish units in action.

Jamie pushed his horse across the road.

Then the charges caem.

Bernhard became a casualty.
Across the road the Swedish rallied back.

Swedish Centre (Knyphausen versus Colloredo)
Two of the Swedish brigades were already locked in melee so not much movement happened.

The Green brigade charged, as did Gustavus and another horse unit.

The Green brigade and their mounted colleagues took out the Imperialist foot facing them.

The Blue brigade was driven back.
The Yellow brigade continued its run of success.
And the Greys were driven back.
Swedish right (Gustavus versus Holk)
Gustavus was facing the same foot unit as last time.

The King charged and his escort routed.

On the far flank the Swedish shot advanced, unaccompanied, towards the Imperialist horse.

The Imperialists charged.

Surprisingly the Swedish shot survived and rallied back.
The Swedish horse on the extreme right didn’t do so well and routed.

End Game
That was the end of the game. Jamie’s Imperialists won.
The Imperialists had won on both flanks. The Swedish centre was still holding but they’d have a hard time extricating themselves.
The Swedes lost five units in turn six and lost the game. 12 units lost.

It was an Imperialist victory but they had suffered quite a bit. Eight formed units and two cannon lost.

Observations and conclusions
We liked the updated Lutzen scenario. It played out quite differently to the early play test. It was a great game and could have swung either way.
The critical moment was when Bernard of Saxe-Weimar, the left wing Swedish commander, died. Historically Gustavus was the casualty and Bernhard won the battle. This time Gustavus survived and Bernhard fell. At the same time three of his units evaporated because they were already on 1 Resolve. We’ve never seen an entire command simultaneously dissolve. Impressive.
And for those Gustavus fans in the audience … Bernhard was, of course, German. As were 80% of the “Swedish” army. Thus dispelling another Gustavus myth that the Swedish army only contained native Swedes (or Finns).
Now a few observations on rules …
Large Pike+Shot
We liked the big brigades rule. Massively resilient without being overpowering. Admittedly they spent the entire game struggling to cross the road. In the open they would be more awesome.
I do wonder if they need support. Historically Gustavus deployed them in chequerboard and at the moment there is little reason to do that.
Road
I mostly liked the road = difficult terrain rule. But Adam has convinced me that “a unit is in difficult terrain if any part of a unit is in difficult, for movement, shooting and melee.” It would have meant we didn’t keep say “Is that unit ‘in the road’?” when it clearly was.
Infantry rally back
We let infantry rally back 1 TUM. It felt right. Meant the Swedes where thrown back from the road a few times and either had to shoot or charge again.
Game Turn 6
Every game we have played since I started counting has finished on game turn six. I don’t know if this is a weird coincidence or something inherent to the rules.
Small games take 2 hours of play to get to game turn six. Big game take three hours to get to the same play. This is a reflection of the larger number of units.
What an excellent game, both in appearance and in the way it played out. It seemed as if it could have gone either way, which suggests the scenario is well balanced. I’m not sure I’ll be able to stage such a big game, but maybe one day. I’m glad you didn’t over-emphasise ‘Windmill’ hill, as happens in some Lutzen games. Having been to Lutzen, I’ve seen that it is one of the flattest battlefields there is (which is useful for wargamers trying to reproduce it!).
I also hope the ‘experimental’ rules will be finalised soon. I think I can see what most of them will do, but it would be good to have any doubt resolved.
RogerC
It was a good game. I’m pleased with both the scenario and the rules (with emerging tweaks). I like the idea of getting entire battles onto a single table rather than having to fight bits of them because of the constraints of the rules. I’ve managed to do that with Lutzen.
Agreed on Windmill hill. It was, apparently only 1-2 metres tall and has since disappeared.
I’m thinking of doing a “Small Lutzen” with half the numbers of units on a small table. Let me know if that sounds interesting.
The experimental rules are “close”. I’m grappling with a couple of things (field fortifications; cavalry pursuit). If my internal debates continue I’ll publish the rules anyway and waits for inspiration on the contentious stuff. I have a draft ready to send to the proof readers already. Let me know if you have a preferences for:
(1) publish version 2 of the rules, as is, before Xmas or
(2) wait for additional rules post Xmas.
Steven
It’s good to see progress but Christmas is now very close and I think the new year is a more propitious time for publication of any new version, whether that’s as is or with additional rules.
Richard
Message received. Over and out. 🙂
Some previous reports noted that troops deployed too far back didn’t get into the fight, or very, very late. I was thinking perhaps allow fresh units that keep a certain distance from the enemy to move at double speed. Poorly deployed units would still arrive behind schedule, but reserves would have more flexibility. This might mean recalculating when Pappenheim’s lads arrive,
Maybe even officially designate units as reserves. Beaten up units that fall back to regroup should not qualify for faster movement.
That said, this report looks great.
Vincent
The deployment rules in Tilly’s Very Bad Day are designed to get the action started immediately. We have proved that melee is possible in game turn 1.
The deployment issues mentioned in the previous game were due to player choice. The player chose to deploy in a march column, far from the enemy, and it took time to shake out of that. We’re not talking “reserve” here, this was both the left and right cavalry wings of the attacking army. Given the scenario context this deployment was less than optimal. He only had 3-4 turns of superior numbers and his deployment meant he couldn’t exploit that.
I think this game demonstrated how a reserve can be pivotal. Pappenheim won this game despite arriving on turn 3. On game turn six he broke Bernhard’s wing and that is what broke the Swedes.
Admittedly it would be harder for an on-table reserve to be quite as decisive. Pappenheim got to chose his entry point in this game whereas an on-table reserve is where it is and has to move from that point.
In this game the Imperialists had an on-table reserve, in addition to Pappeneheim, but chose to deploy that command in the front line from the beginning of the battle. Historically these units were held back in the centre and if they player had chose to do that they could have intervened at any point all across the centre zone. Again player choice. This decision, at the outset, is probably what won him battle against Gustavus’s wing.
I’m okay with all of that. Player choices lead to implications, either good or bad.
However, some sort of “Reserve” special rule or DBx style “March Move” might be warranted. I was thinking that the normal movement rates are already quite generous. However, 6 TUM for horse means it would take them 5 turns to get from base edge to base edge. Given all our games have been taking six turns that might be too slow. So I’ll watch for out for a need to speed up the reserve. Thanks for the suggestion.
I agree that movement in TVBD is generous, and a well-positioned reserve can intervene successfully. I would be wary of making it too easy to move reserves about, as it allows a player quickly to correct a poor deployment. How often did troops move from one side of a battle to another?
The question of pursuit is a difficult one. Pursuits (other than those at the end of a battle) don’t seem as common in the 30YW as they were in the ECW, but maybe we don’t hear as much about them due to the briefness of the details that are available. At least some of the Imperial cavalry at Brietenfeld must have pursued the Saxons, as they don’t appear to be around later. On balance, I think some sort of pursuit rule is desirable, to reduce the probability of victorious cavalry routinely turning in on the enemy centre to win the game. It seems to me that, in this era, victorious cavalry was often spent, by the time it had achieved success.
I’ll look forward to the New Year rules revision!
‘Small Lutzen’ also sounds interesting. Maybe a 2/3 version with large Swedish units representing about 3000 men (so combining the first and second lines), and other forces adjusted accordingly. Also, if you assume Lutzen is set on fire and is impassible, maybe the town and the marshes on either side of it could be mostly off-table.
RogerC