I use the Crossfire special rules from Hit the Dirt (HTD) a lot, but I’m conscious I haven’t played many of the scenarios. Recently I decided to rectify that, so when Chris and Adam came over last week I suggested they play Breakout at the Hinge, one of the HTD scenarios. This scenario is very unusual because it features a German breakout in 1941, at the height of Operational Barbarossa, when the perception is that it was the Soviets who were always the ones encircled.
Summary: Good game. Lots of terrain. Very asymmetric making it a serious challenge for both sides. Sparked lots of Observations.
Updated map
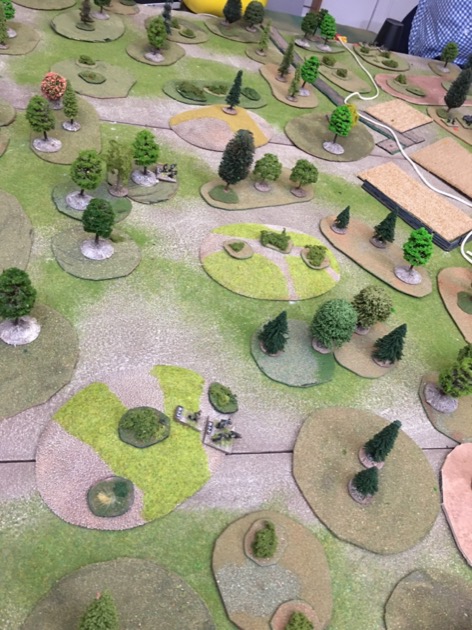
One of the things I have discovered about Hit the Dirt, is that some of the maps have lots of tiny wee area terrain features, woods and such like. Even when they are not tiny the features are often very odd shapes. To accommodate my standard sizes for the Terrain Templates for Crossfire I thought I’d re-draw the the map.

I discovered for this battle that I didn’t have enough 4″ x 8″ (10cm x 20cm) templates (for woods and rough ground). I needed a lot (19 of them). I was five short and used a pair of 4″ diameter templated butted together to replace each of these missing features.

Two of the features are depressions, both 14″ x 6″ (35 cm by 15cm). I didn’t have these depressions so I started work on some before the game. The trouble is I’d only got as far as cutting out some hardboard to the right shape before the guys turned up. So, for the purposes of this game, the two oval lumps of hardboard that looks like of like flat hills are in fact depressions.

I also didn’t have the right sized hills for the game. Or, more specifically, I probably had them but I left them in a box upstairs and used slightly smaller ones. The smaller hills had the enormous advantage that they were right next to the table when I set up.
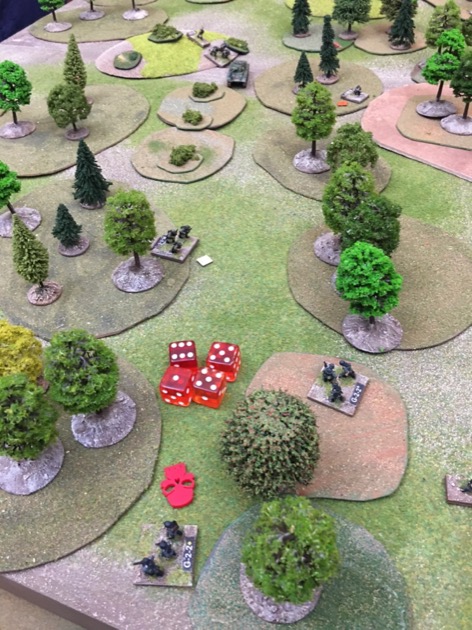
Deployment
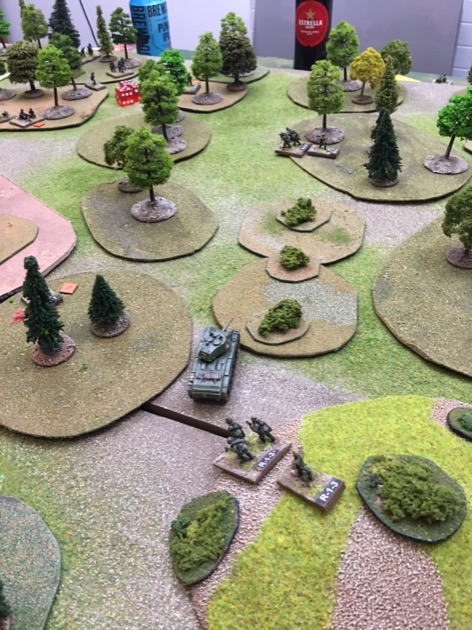
I think the table looked quite good. We probably could have added some more trees to make it look better, but we’ve found that slows the game as we have to move the trees about more.


Adam deployed forward, as close to the boundary line as possible (line S-S on my map). He figured this would give him more depth to fight in. Probably a reasonable approach.
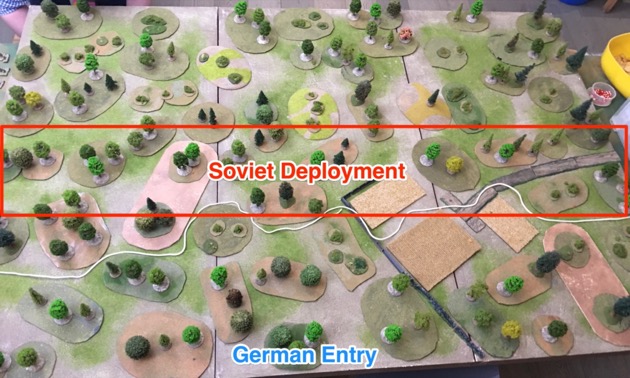
The Germans don’t deploy on table. They arrive on table on the northern table edge. Because 25% of the table is free of Soviets what this means is they get to deploy dynamically. Chris decided to come on table in “waves”. Unusually this mean his first company was spread across the entire table. Then he did the same with the second and third companies. This is unusual in Crossfire because the platoons quickly got mixed up and he found he didn’t have the right stands in the right place for group fires and rallying. But that came later.

Battle
Any breakthrough scenario has the attacker probing for weakness, and that is exactly what happened here. Of course, most of the time the probe discovers strength not weakness. In this case a Soviet platoon did a reactive on an advancing German squad and blitzed it.

This was on the German right flank, in the area with the road. Chris had a couple of platoons here and the battalion commander.

Chris also pushed forward on the left and got suppressed in the open.

A Soviet 50mm mortar opened up. Adam took advantage of the fact that indirect fire weapons can shoot and the FO or on-table mortar stays invisible.

Breakout at the Hinge has random reinforcements. 12 random options with options 1-6 resulting in reinforcements. We were rolling dice. I didn’t notice for quite some time that I’d given the guys 1d10 rather than 1d12. So more chance of reinforcements and no chance of rolling a “12” which stops all subsequent reinforcements. Oops.
Anyway, Adam rolled a “1” and got a platoon. He also rolled for the side of entry, and rolled to come on the German right flank.

Adam brought the reinforcements onto the table in and advanced position behind the German right flank. This position was exposed and a couple of stands got PINNED immediately.

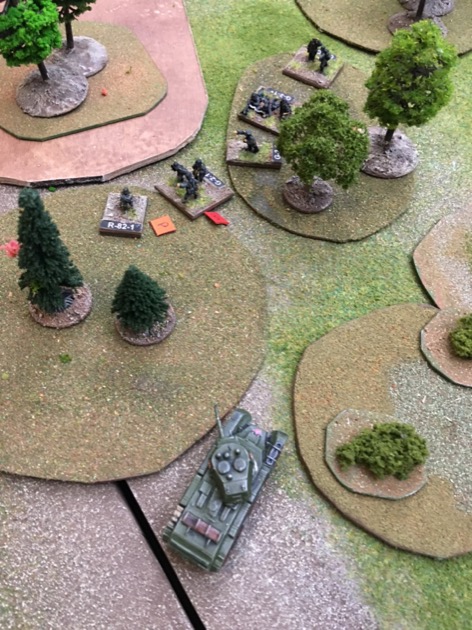
Then the Soviets opened up and suppressed a HMG on the far side of the depression. Depressions add an interesting dynamic. You can hide in them but anybody can shoot across them.

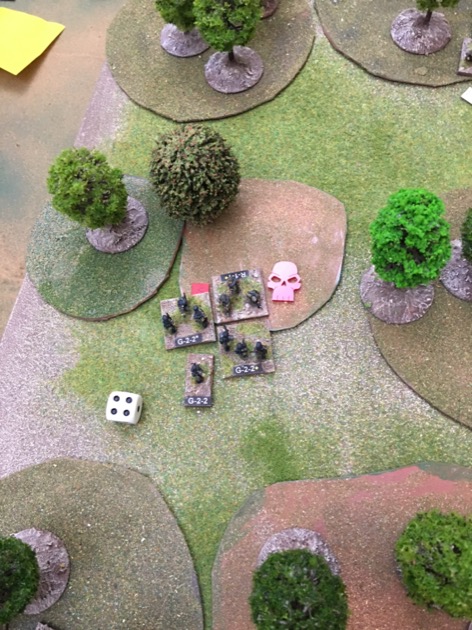
As usual, the attacker probes ahead, the defender reveals stands to do reactive fire, and on a NO FIRE the attacker charges. In this case a German platoon takes out a Russian squad.

But it is a game that can backfire. So next up a Soviet squad kills German chargers.

The exposed Soviets on the right flank took some casualties.

German HMG inflicted some more Soviet casualties.

And then the Soviet tanks started arriving. Two T-26s to start with.

Like most of the Soviet reinforcements they arrived on the German right flank. Adam again brought them onto the table to the flank of the Germans. Good fields of fire. And there are two of them so they can provide mutual cover.

Ding dong, more Soviet armour arrives. The BT-7.

Again it arrived on the German right flank, but Adam needed it on the left, so he raced it across the table. My house rules allow a fast tank, like the BT-7, to make three movement actions in an initiative.

With the T-26s in front of them, Chris reorganised his right flank and brought quite a few of the units back behind the wall.

At some point, and I can no longer recall when, Adam got, as a reinforcement, a forward observer (FO) for an off table 82mm mortar battery. This this kicked of his intervention in the battle by stonking a German HMG.

Then a squad.

The BT-7 moved forward again. It took up position covering much of the German left flank. The position of the BT-7 and the 82mm mortar guy nearby, were critical in how the rest of the game played out.
Nearby the Germans suppressed then charged a squad.
Chris sought to take advantage of that but his troops got caught by the BT-7.
Chris wanted some cover for his advance so he called in smoke. A lot of smoke. His off table heavy artillery was the only smoke available and heavy artillery means six smoke.

His troops got to the end of the smoke and then got stopped. It was a weak Russian platoon behind that stopped the German charge.

The Russian reserve platoon then charged and wiped out the attacking Germans.

They then charged again and destroyed a German squad and nearby platoon commander. The other squad and FO looked on but could not intervene.

They pushed on but their luck ran out with that last German squad.

Back on the other flank Chris was still reorganising. His battalion commander got suppressed trying to move the left flank.

On the left Chris tried to reach the 82mm FO. But the BT-7 was on overwatch and pinned the advancing squad.

The mortar man brought in fire – “Fire on my position” – and destroyed the attacking Germans.

The Germans also had mortars and used them to effect.

And then German long distance fire picked off another stand.

The BT-7 stopped another German squad having a go at the 82mm mortar guy.
By this tine Chris had a long line of stragglers piling up behind the front stand. Hoping for a way out. But all they found were mortar bombs and automatic fire from the BT-7.

And then Adam got his last reinforcement.

As the evening was late Chris conceded. He had lost 11 fighting stands. The tipping point was 13 stands, i.e. at 13 stands lost, Chris could not have won the game no matter how many stands he got off table. By this stage it seemed likely he would reach 13 stands lost before he got any off table. Not guaranteed, but likely.
Observations and Conclusions
Pretty good game really. Very tense to the end. Chris tried again and again to get through but got knocked back each time. The Soviet 82mm mortar guy did wonders. Another Soviet (usually the BT-7) would stop a German from close assaulting him. Then he’d bring in the mortars and blitz the threatening Fritz (“Fire on my position”). This FO was one of the reinforcements and generally the reinforcements tipped the balance. The BT-7 teamed up with the FO and between them held 1/3 of the frontage. I have to admit that, at any point, Adam could have thrown badly and that particular arrangement would have collapsed in a hail of grenades. But his luck held to the end.
Chris was a bit rusty after six months of lock down and made a couple of tactical mistakes. Firstly, he didn’t attach his HMG to platoons. The platoons were small and need that extra fire power. Secondly he brought his companies in waves spread across the table. This meant his force was disorganised and he found himself with squads mixed up with squads from other companies, and with company commanders distant from their men. It took a few initiatives for Chris to realise his mistake and correct it.
A few other points are worth going into detail on.
I got some stuff wrong
I got a couple of things wrong. For starters I gave the Germans two 50mm mortars not one. Oh well.
Then I really mucked about with the Soviet reinforcements. The scenario awards Soviet reinforcements by drawing a chit labelled 1-12 from a cup. As time goes on the number of chits decreases and the chance of drawing any remaining reinforcements increases. So the Soviets are guaranteed to have all their reinforcements by initiative 13 (1+12), or until stopped by drawing the “12” chit. I did this differently in two ways. Firstly, I used a dice. The effect of using a dice is that the chance of getting a particular result is always a the same. The chance of a “1” with 1d12 is always 1/12th. Whereas with chit the chance of getting a “1” is 1/12th the first time, 1/11th the second time (assuming you didn’t draw it already), 1/10th etc. So rolling a die meant the Soviet reinforcements came on slower. But the chance of the dreaded “12” was also reduced, so it takes longer to get the abrupt halt as well. Second, I got confused and gave Adam a 1d10 not a 1d12. Ooops. That increases the chance of reinforcements with no chance of a stop on “12”. I spotted this part way through and replaced the offending 1d10 with a 1d12.
On balance it probably worked out okay.
Breakthrough scenario
My experience of playing the HTD scenario “The Island” showed that it is quite hard to get the balance right in a breakthrough scenario. After a bit of Musing on Breakthrough Objectives for Crossfire Scenarios I got a scenario that I thought worked quite well in SU-76i in 1902nd SAP – A Crossfire Scenario.
Given the challenges a breakthrough scenario I was keen to see what another HTD scenario offered. It turns out that “Breakout at the Hinge” is pretty good. The attackers are much stronger but no platoon is strong, as they have only one three squad platoon with most of the rest being two squad platoons. The defenders are painfully thin on the ground to start with. Personally I think Crossfire is at its best when a few defenders hold of lots of attackers, and that is exactly what this scenario did.
What is cute about this scenario is that the defenders get reinforcements to compensate for their weak start. And some of those reinforcements are tanks, which the Germans don’t have a good answer to. It worked out very nicely as a scenario.
More Terrain
Another scenario with a lot of terrain. I had to use tons of area Terrain Templates. It turned out I didn’t have enough 4″ x 8″ templates. I needed more as we are likely to play this scenario again and I’m also expecting to do more games with lots of trees e.g. Vietnam, Burma, and more Portuguese Colonial War. I was five short for the game so I’ll round up and made 10 more. I’ve learnt you can never have too much terrain.

I also needed to finish the depressions. Given the Italian Campaign is high on the list, perhaps higher priority than the projects mentioned above, I’m going to need more contours and depressions are a way to do that. In fact glancing at the other Hit the Dirt Scenarios set in Italy, I’m going to need quite a lot of depressions.
I’ve built some depressions twice before (version 1, version 2). Both of these had solid bottoms. This time, for version 3, I decided to do something different. I just modelled the lip of the depression.

Depressions and hull down
Adam asked if his tanks could go hull down inside but on the lip of the depression. I said yes, on the grounds that the lip of a depression is pretty similar to a crest.
1,000 foot general
Adam used Crossfire’s unlimited movement a couple of times to move platoons across the table. To be honest the scenario doesn’t work unless the defender can regroup and patch holes.
Both Adam and Chris commented on this. “This is one of the weird aspects of Crossfire”. Personally I’m okay with this. You can view it as a flaw, like many, or a feature. The way I see it, this represents a longer term game/redeployment. I do concede it is too easy. Kind of like teleportation.
I have suggested some ideas for Fighting the 1000 Foot General in Crossfire. I just found these didn’t add much to the games.
Defending the flanks
Adam commented that it is easy to attack up the flanks because the defender cannot defend to both the left and right of the attackers. It is true but I’ve never been to fussed about this either. I have read many accounts of attackers targeting the gap between formations. Whether the gap between armies, or divisions, brigades, battalions, companies, platoons or even squads. So to my thinking the weak area on each flank represents that weak gap between formations. The defender has a company (or whatever) on table and there are also companies on adjacent (virtual) tables. But these other companies are distracted by their own worries and don’t intervene on table.
Adam suggested a rule that could also help with Fighting the 1000 Foot General in Crossfire, each side gets a certain number of reactive fires from off table that they can use against stands that are visible from the table edge.
References
Rutherford, B, & Lewis, J. (n.d.) Hit the Dirt: WWII Scenarios for Crossfire.
Urrah! Another Crossfire battle report. I appreciate your endeavors with other settings and rulesets, Steven, but I really come here for your Crossfire articles — and if they are set in the Eastern Front, even better!
I don’t mind unlimited movement being used to reshuffle reinforcements and plugging gaps in the defenses. I think it reflects the fog of war that the attacker must have felt. In fact, didn’t this often happen to the Germans, who frequently misjudged the size and location of Soviet reinforcements, leading to their belief there were “hordes” of them? (though I think this was at the operational rather than tactical level).
Yeah, I figured I needed a dose of Crossfire. Been too long.
I agree, the 1000 foot general can be seen as a feature, not a flaw.