
Crossfire needs some markers to show status, hidden deployment and objectives. This page shows what I use although there are lots of alternatives.

Terrain Objective Markers
In Crossfire Terrain objectives are the most common method of determining victory. It might be capture the hill, or capture the town hall, or the wood, or the road junction, or it might be capture them all.
Models as Terrain Objectives
Flames of War from Battle Front use fancy markers such as Artillery posts, knocked out tanks etc. Despite its aesthetic appeal I have too many armies and need too many objective markers for each to make this a feasible approach.
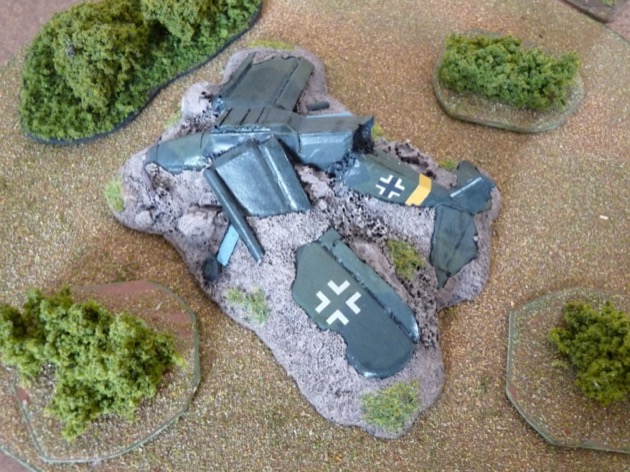
Having said that I did pick up a crashed Storch model as a gift when I purchased some other terrain. Roland painted it up as a terrain objective.
Flag Terrain Objectives
Generally I use a Flag to mark each objective. Russian flags for Russian held objectives; German for German, etc. In fact I also have Republican and Nationalist for the Spanish Civil War and Israeli. I have the masters for the Israeli opponents in 1948 but haven’t made up the flags yet. I also have generic Blue and Red flags for those armies I’ve no Objectives prepared.

My flags are glued to 2″ flat head nails, which are themselves glued to 2p coins. All of which are painted and flocked.

Download Generic Objective Flags (pdf)
Hidden Deployment Markers
I use Flocked Numbered Terrain Markers as Hidden Deployment Markers. I took my basic Numbered Terrain Markers and applied some scenic effects – plaster, paint and dots of flock (see Flocking for details). This greatly improved the aesthetics and made them less conspicuous on the table. But it did take some time.


The thing about any marker is that, ideally, they are unobtrusive yet obvious. In the case of hidden deployment markers you shouldn’t notice them unless you want to know the number of the terrain feature, when it should be easy to read the number. That is why I’ve used flocked markers with bright white numbers.

Every feature will need a marker. So, for example, a building with two building sectors – like that in the photo – will need two markers. I normally don’t play multi-story buildings but if I did then I’d probably just use one marker building sector and note the level they figures are on (0, 1, 2, etc).

Linear features pose a certain challenge. If it is short, say less than 8″ then I’d just use one marker. But for longer features, like the crest in the photo, I use one marker per segment.

Fields would just have one marker, but if the field has hedge around it then these are treated as separate features. So the field in the photo has five markers, one for the field itself and one for the hedge on each side.

Status markers
Crossfire recommends using figures (casualties, prone) for status markers. Obviously this has strong visual appeal, but it has two obstacles for me:
- The extra figures need painting.
- A particular figure only has one meaning, which means when the status changes you have to find another marker.
I use cardboard markers (1 cm x 1 cm) – not as pretty, but very convenient. Specifically I have two types of counter for Crossfire. Each face of each counter has a different significance. For example, if a stand goes from Pinned to Suppressed I just flip the counter and don’t have to go looking for another type of counter.
| Counter | Obverse | Label | Colour | Reverse | Label | Colour |
|---|---|---|---|---|---|---|
| P/S | Pinned | P | Orange | Suppressed | S | Red |
| G/NF | Ground Hugging | G | Brown | No Fire | NF | Cream |
PIN
So if a Russian platoon pins a moving German stand I just reach into my box of markers and pull out a P for PIN.

SUPPRESS
I used orange for PIN. I guess that is because orange is kind of a not quite red.

I used red for SUPPRESS.

The great thing about my markers is that if the pinned stand is the suppressed you just flip the counter over.

Ground Hugging
I went for brown for ground hugging; brown = earth.

NO FIRE
The No Fire markers are on the back of the ground hugging markers. No reason for that except it reduces the total number of markers I need to have in my marker box.

Good information. Great photos. I found the article useful.
Love the photos. Started CF in the last 2 years. 8mm or 10mm colored cubes work well for different status markers too. And they don’t get blown around, rolled around easy either.
Having just started experimenting with blocks I now, rather late, realise this is a great idea. Thanks Jason.