The Spanish surprised their French and Swiss opponents in the Italian Wars by putting arquebusiers behind a ditch and bank. So I thought I should make one. Or, more accurately, make some modular sections of ditch and bank so I can make any shape of fortifications. The modular features are using my Big Bases for use with Big Base DBA and DBA-RRR.
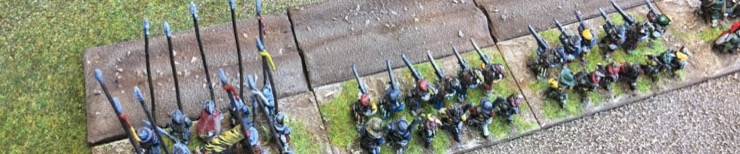
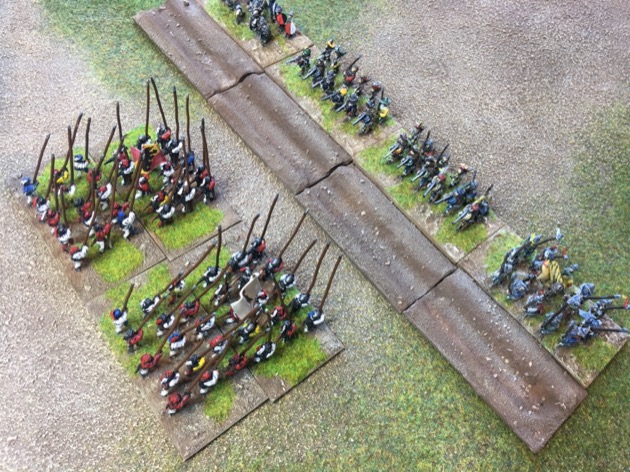
The end result
Firstly, some shots of the end result. Swiss pike blocks attacking a ditch and bank defended by the Spanish.


Instructions
I thought I’d cheat for the bank and use half round moulding from a DIY shop. I think the specific item was “Richard Burbidge Half Round Moulding – Pine – 2400 x 5 x 18mm” from HomeBase. I had some lying around from my failed experiment for Crossfire crests. You can tell because the photo shows I’ve rounded off the ends ready to become crests – I just never finished these ones.

I used my normal Big Bases i.e. 80mm x 40mm. So I cut the moulding to 80mm to fit.

I glued the moulding to the bases but was careful to leave a gap between the moulding and the edge of the base. I used my modelling probe to measure this distance.

I used milliput (air drying putty) to build up the other side of the ditch.

I was just trying for the visual illusion of a ditch so I just needed a low lip and milliput is strong enough for that. I shaped the milliput into a long but tiny ridge. Again this milliput ridge was in from the edge and again I used my modelling probe to measure the distance.

You’ll notice that aside from the 80mm x 40mm straight sectors I did some extra bits. I put the corners on 40mm x 40mm sectors.

And because sometimes the fortifications were in a line I did a couple of ends.
Now I used lots of wood filler to provide more gentle slopes: (1) both sides of the bank and (2) beyond the milliput ridge. I put filler in the ditch but it was a super thin layer and was mostly just so that there were no obvious lines.

Of course there was a lot of waiting. Waiting for the glue to dry. For the Milliput to dry. Wood filler to dry.

Then Flocking with Sand, Flat Earth and Dry Brushing. The only trick was I left both sides of the ditch a darker shade (with little dry brushing) to suggest shadows.


What next
I’m quite pleased with the result but this isn’t the end of the story.
DBA-RRR doesn’t have rules for field fortifications. I’ll have to write some. Both in game effect and also how these affect the army lists.
And, I have to be honest, 80mm long sectors are a bit annoying. They’ll get bumped around on table. So I’m tempted to do longer sectors. Maybe two lots of 640mm x 40mm i.e. the size of 8 modular sectors. Easier to set up and less bumpable.