I ran out of cardboard terrain templates in my recent game of Crossfire so I made some more and took the opportunity to take some photos. It is a pretty simple process.
Step 1: Collect Materials
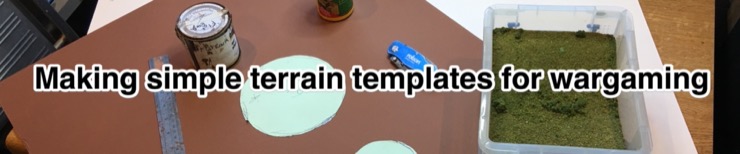
You need some white wood glue (PVA), cardboard, brown paint, and flock. Plus some tools: a big brush, a pen, craft knife, a cutting board, and cutting templates of the correct size.

The terrain features on my Crossfire maps are standard sizes. I have already prepared cutting templates for all of these. You can see three of the cutting templates in the materials photo. The sizes I ran out of in the recent game were 6″ diameter and 6″x4″ oval, but I thought I’d take the opportunity to get a couple more 4″ diameter templates as well. I also have 4″x8″, 6″x8″, 4″x8″, 8″ diameter, and others. If you don’t have cutting templates, then make some, or draw the shapes free hand.
I have tried different types material for terrain templates, but cardboard seems to be the best. For my cardboard I use artist’s mountboard. To be specific: “Daler – Rowney Studland A1 Mount Board – Coffee”. I always get a brown colour – in this case “coffee” – because it means the cardboard is less likely to show through once flocked. I get them in packs of 10 Sheets to save a few pounds – I make a lot of terrain okay – but for this project I just used one sheet.
Step 2: Cut out and label
Using my cutting templates I drew the shapes I wanted on the white side of the cardboard. I also labelled them with the size e.g. 6″ for the 6″ diameter pieces. Then I cut them out with the craft knife, using a cutting board to protect your table top.
Make sure your craft knife has a sharp blade. I replaced my blade for this mini-project and one blade was enough to cut the entire sheet.
Step 3: Paint edges
The white centre of the cardboard will show through. So I paint around the edges with brown paint. In my case I use Dulux house paint, and specifically a custom colour that I call “Flat Earth” (Dulux code 80YR14140 Extra Deep W45). I use this for all my flocking.

Step 4: Flock
Now paint wood glue onto the brown side of a single terrain template. I do this by pouring some wood glue onto the template, then brushing it over the entire surface with a big wet paint brush. Being slightly dilute makes the glue spread easier.

Then I dump green flock onto the template – make sure all the glue is covered. After that pick the template up by the edges, pour the excess flock back into the tub. The bits with more glue will show up while wet and dry darker.
In the early days I lovingly selected flocks to use and went for a two tone effect with a green/brown next to ta dark green. I don’t bother now. Because I moved to static grass for flocking figures, I was left with a lot of normal flock in storage. Different brands. Different colours (light green, dark green, brown). I just dumped it all into a single tub and mixed it around to create a kind of olive drab flock. This mixed flock is what I use on my terrain features. I use this for a two of reasons: (1) I have it so it is free, and (2) I want my terrain templates to look different to my normal flocking so they stand out on the table.
Repeat this step until you’ve done all of the templates.
Step 5: Dry
Now leave them to dry overnight. As I said, the bits that had more glue will dry darker than the rest. I think this mixed look is fine.

Step 6: Store
My new templates joined their brethren in a one of my hundreds of Really Useful Boxes – the one I reserve just for terrain templates.

To make it easier when setting up games I now keep them organised by size. Okay, a little compulsive I know, but it was Chris’s idea so blame him. 😉