These are generic instructions for making two sizes of Wooden Buildings. The painting style is described in Painting Wooden Buildings. For more examples see Homemade Wooden Buildings
Introduction
The buildings are 15mm (1/100th) scale and optimised for use with Crossfire. The roofs are removable so you can put figures inside. All my large (2 squad) wooden buildings are on a 85mm x 65mm base. This gives roughly the same floor area as my 3″x3″ generic building sectors, but allows for slightly more realistic (i.e. rectangular) shapes. My smaller buildings are 50mm x 45mm so are just big enough for a single squad.

The walls, doors, windows didn’t seem a problem as I figured balsa wood, cardboard and PVA glue would do the trick (which it did).
The thatch roofs stumped me me until John Mclennen mentioned watching Mark Strachan making them from milliput armed only with a toothpick. That inspired me and I was off.
Materials
Collect the materials.
- 5 mm thick balsa wood.
- 2 mm thick balsa wood.
- 3 mm foam board.
- 5 mm foam board
- Stiff cardboard which is about 2 mm thick. I used mounting board from an arts supply store.
- Thin cardboard like you get on a cereal packet.
- Wood glue.
- pins. I use the ones with big plastic balls on the ends.
- fine Milliput. An air drying clay popular with modellers; other brands are also okay. Comes in different degrees of coarseness and I prefer “fine”; standard will do, but produces a slightly grainier effect.
- a tooth pick or two.
- craft knife.
- pen.
- Metal ruler
Make the building frame
Steps to make the building frame:
- Cut out the base of the building from cardboard. This should be the entire outside dimension of the building, and the edge will become the lowest log of the wall. My 2 squad houses are 85 mm by 65 mm. My 1 squad houses are 50 mm x 45 mm.
- Cut out the interior floor from 2 mm balsa wood. This will nestle between the exterior walls, so is much smaller than the base. 75 mm x 55 mm for a big house, and 40 mm x 35 mm for a small.
- Score one surface of the interior floor to create a plank effect. I make my planks about 2 mm apart; this is out of scale but looks right. The planks have to be along the grain of the balsa (never against). I use the blunt back edge of a craft knife for this, and run it along a straight edge of the metal ruler. Don’t press hard at all; just has to be gentle.
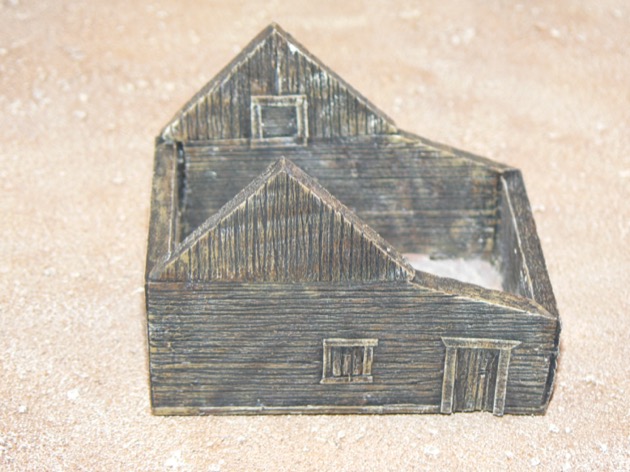
- Draw out the exterior walls on the 5 mm balsa, but don’t cut them just yet. Remember that you’re going to score the balsa like you did with the floor, so the grain of the balsa must be the horizontal dimension of the walls. Also bear in mind that we’re going to bevel the walls so they fit together; that means you must make each wall extend the entire length of the base. You will need triangular end pieces to go on top of the short walls; these will have vertical planks, so ensure you draw them out the grain is towards the peak of the triangle. You should also draw in the windows and doors.
- All my windows are based on a 8 mm x 8 mm hole (although I put framework around it latter).
- All my doors are based on a 20 mm high x 8 mm wide hole (although it ends up bigger for reasons
that will become apparent latter, plus has framework around). - For a small house (50 x 45 mm) the long walls are 50 mm long x 25 mm high and the short walls are 45 mm long x 25 mm high. The triangular end pieces are 45 mm wide and 15 mm high.
- For a large house (85 x 65 mm) the long walls are 85 mm long x 30 mm high and the short walls are 65 mm long x 30 mm high. The triangular end pieces are 65 mm wide and 25 mm high.
- Before you cut anything, score the balsa with the building pieces like you did with the interior floor. Score both sides. Once again I make my planks 2 mm wide.
- Cut out the exterior walls from the 5 mm balsa wood.
- Cut out the windows.
- Use wood glue to glue the windows back into their holes, but rotate each one 90 degrees, so the planks on the windows are vertical and the planks on the walls are horizontal.
- Cut out the doors – I retain these although you can’t actually use them as the doors because the planks are the wrong direction, and because they’re too small. For the moment just leave the doors as holes.
- Cut out new doors. 22 mm high and 8 mm wide, i.e. taller than the original hole, which is why you will have to cut through the base to make room (see below).
- Score the doors to make planks.
- Cut out small slivers of thin card to use as bars on the back of the windows and doors. Two per window and door
- Use wood glue to glue the bars to the back of the windows and doors. Glue them horizontal, i.e. at 90 degrees to the direction of the planks on the windows.
- Bevel the corners of the walls, i.e. cut the ends of each wall to 45 degrees, so the four walls butt together. Try them out on the base without gluing, to see if they fit. Trim them until they fit.
- Use wood glue to glue the the interior floor to the base – don’t wait for it to dry, but immediately go to the next step
- Use wood glue to glue the walls together and to the base. Use pins to pin the walls until the glue sticks. Pin the corners so the walls are held together and pin the base to the walls.
- Wait to dry (I get impatient and put the model on a radiator so the heat cures the glue faster). Then remove the pins.
- Fill any gaps in the corners with wood glue and/or wood putty.
- Cut out the base in each door frame. This is so I can insert a door which goes right to the table top, rather than ending at the base.
- Use wood glue to glue the new doors into the door frames. Wait to dry.
- Cut out 2 mm wide strips of thin card to use as window and door frames. You’ll need top and two sides for all, but only the windows will need a bottom.
- Score the middle of the strips of thin card to represent planks.
- Use wood glue to glue the window and door frames to the walls. Wait to dry.
- Use wood glue to glue the triangular end pieces on top of the short walls. Pin in place. Wait to dry. Remove the pins.
- Score all the planks again now that the thing is solid. This will make them stand out more when you paint the building. I also put small score marks on the planks themselves to accentuate a grained look.
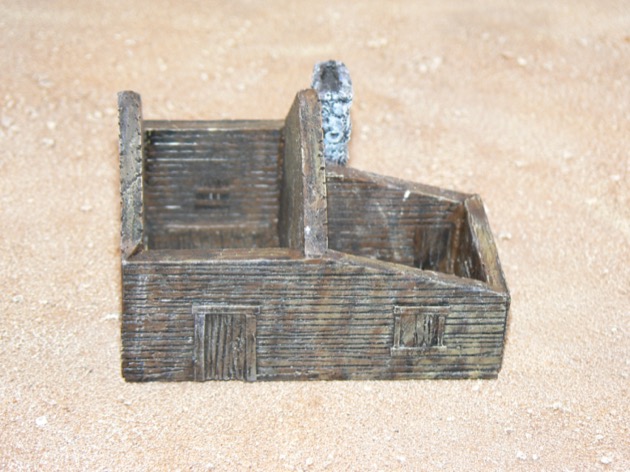
House without roof shows bevels on corners:


The roof
Steps to make the roof:
- For a small house draw a 52 mm x 52 mm square on 3 mm foam board. Bisect this with another line so you’ve got two equal sized rectangles. (You’ll have to figure out how big the roof will be for large house yourself as I don’t have one handy.)
- Cut out the square from the foam board.
- Run your knife down the centre line, but without cutting all the way through. You want to use this centre line as a hinge.
- Fold the square along the centre line.
- Try the square, i.e. roof, on the building. Trim, adjust as needed. Doesn’t have to be perfect, as you’re going to cover this later.
- Cut a small triangle from 5 mm foam board. This is the support for the roof, so it needed to be the same angle as the small end pieces you’ve glued to the short walls.
- Use wood glue to glue in the support triangle so the roof is a roof shape. Pin while it dries. Try it on the house just to check – adjust as needed.
- The roof will have a groove on the top where the hinge is. Fill this with another piece of 3 mm foam board cut to shape and glued in. Wait to dry.
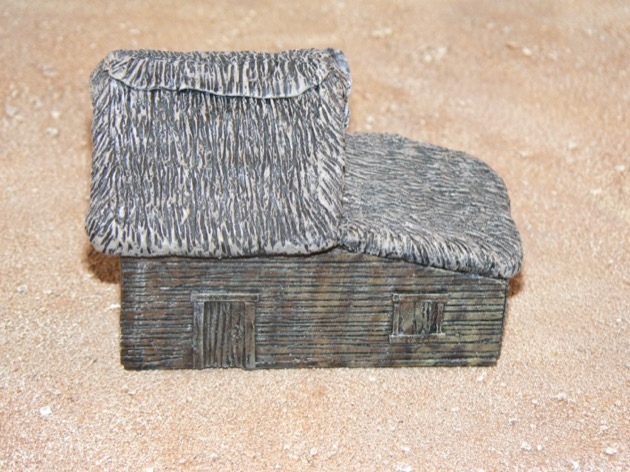
- Prepare a small amount of Milliput. Spread in a small layer on the top of the roof. Repeat until entire top of roof, and edges of roof are covered.
- Shaped some more Milliput into a long thin sausage, then slightly flatten it and lay this along the crest of the roof.
- Now, before the Milliput dries, use the toothpick to texture the Milliput. In general make short dashes downhill. On the side edges I use 45 degree dashes. The crest also need to be textured – this will flatten it out further.
- Still before the Milliput dries, try it on the house and adjust so the roof still fits.
- Wait to dry.


Chimney (if any)
If you need a chimney, then build the core from foam board or something else that is stiff. Use blobs of Milliput to make the stones. Leave to dry then glue onto the building.