
Brett Simpson sent through a report for his recent Crossfire mini-campaign set in the Pacific. The campaign is a series of three games, each using Mac’s Missions. The report features his 20mm Australian Imperial Force (AIF), Imperial Japanese Army (IJA) and Special Naval Landing Forces (SNLF) (i.e. Naval Marines). All words and photos are Brett’s.
Introduction
What follows is a brief battle report using Mac’s Missions in the Pacific: a three part mini-campaign held in memory of the late Paul Beccas. Sadly, Paul passed away a few weeks ago. He was well-respected in the war gaming community and always willing to share his knowledge and offer expert advice. Paul loved Crossfire, and my Australian infantry and tanks were painted using the colour schemes shared by Paul, so it is only fitting that a campaign held by me in his memory featured my Australians in the Pacific, doing battle with the Japanese using the Crossfire Rules.
The campaign was at single company level with support. We ruled that AFVs could perform a single action any time during their initiative, and then another single action for every three infantry or fire support actions performed. My thoughts and reflections follow the battle report.

Day One – AIF attack St. Paavo
The first offensive involved the AIF (Australian Imperial Force) A-Company advancing on the village of St. Paavo. As they entered the outskirts, their Matilda Tank was ambushed by a Japanese 10cm Howitzer hidden in the jungle.


Things didn’t go well for the Australians after that either, as they suffered heavy casualties, and lost both a Vickers Machine-gun and their company commander in the same firefight (Major Jack “Four-beers” Forsyth). Vicious hand-to-hand fighting in the St. Paavo Banana Plantation broke out between the AIF 2nd-Platoon and a Japanese platoon, and the Diggers came off second best.
Having faced heavy losses, and with rumours of a Chi-ha Tank patrolling the road, the Australians withdraw.
Day Two: AIF attack St. Paavo, again
The following day, a renewed offensive began, with the AIF attempting once more to capture St. Paavo. This time, B-Company was sent in. They were ordered to find and destroy the 10cm Howitzer; this was achieved using heavy mortar fire and cleared the way for a troop of Matildas to enter the village.

The Australian infantry gave support, and the Japanese did their best to slow the Australian advance before withdrawing into the jungle.

Day Three: AIF attack Gerbang Timur
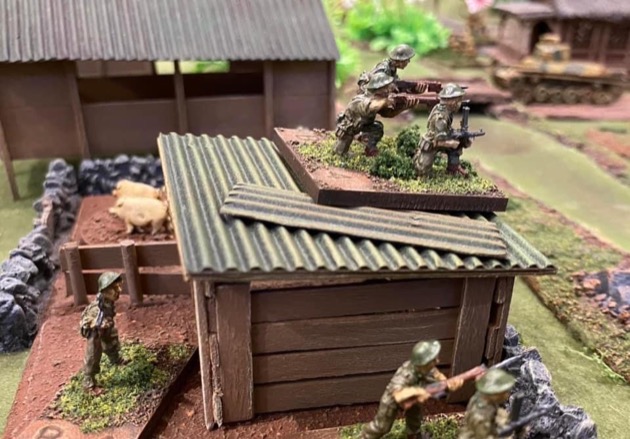
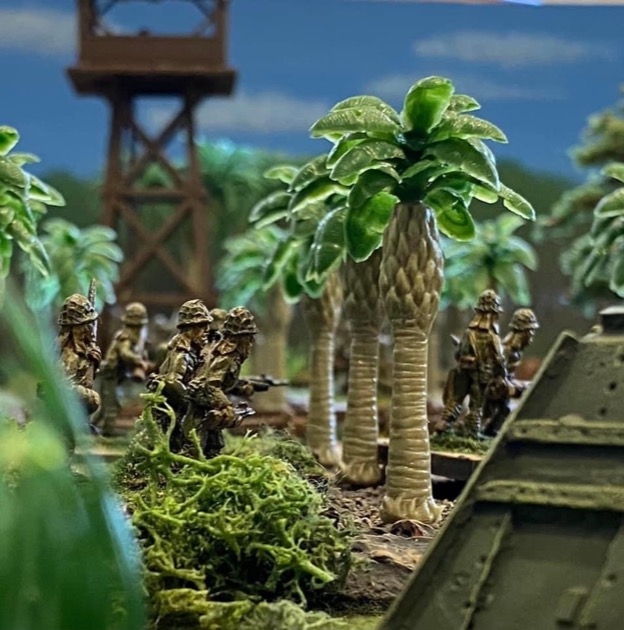
Pursuing their quarry through the jungle and over terrain heavy with hills and kunai grass, the AIF B-Company arrived at the village of Gerbang Timur. The place was seemingly deserted, with a road running from south to north, and a junction at the centre leading eastward to a makeshift airfield.

The Australians quickly took up position in buildings to the south and the west of the road while their Matilda Tanks stood guard at the junction.

Unbeknownst to the AIF, the Japanese Army had been relieved by a company of Naval Marines (SNLF) who were lying in wait in the jungle, having received orders to outflank the Australians and cut them off from the remainder of their battalion until Japanese reinforcements arrived — after which B-Company could be assaulted from two fronts.
Two Japanese platoons moved around through a plantation on the Australian left flank, but these were spotted by 4th Platoon who laid down suppressive fire.
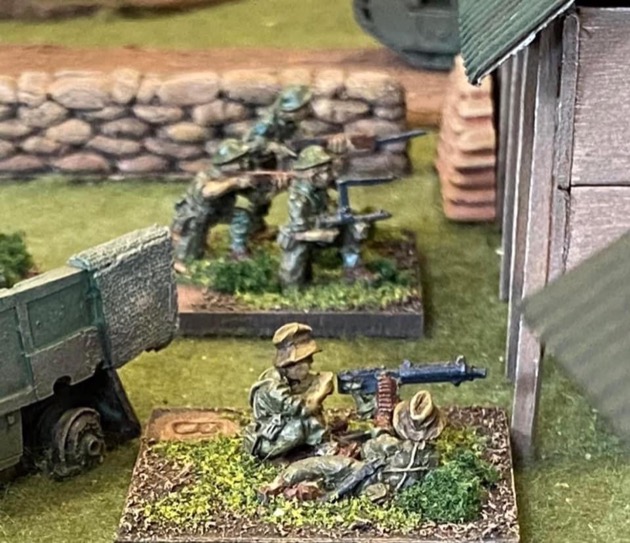
At the first signs of fighting, a third Japanese platoon supported by Woodpecker Machine-guns opened up from the northern side of the road, which led to a prolonged exchange of gunfire between the SNLF and the Australian 5th and 6th platoons and a lot of swearing.

With their forces divided and suffering heavy casualties, the Japanese retreated into the jungle, leaving the Australians largely unscathed and fully in control of Gerbang Timur.
Reflections
Allowing AFVs one action for every three infantry or fire support actions worked well. I think that’s because at least seventy-five percent of the focus was still on infantry, but it enabled the player holding the initiative to do more with their AFVs if they wanted. They were intimidating, but didn’t seem overpowered or dominate the game. More often than not they acted as a deterrent, with infantry avoiding the road (we ruled that AFVs had to start play on the road, and rarely did they move off it).
I’ve tried a number of ways of running Japanese knee mortars over the years, more often than not treating them as standard light mortars. This weekend, we played them almost by the book. One exception was that we gave them 2 1/2 dice against units not in cover (with 1 1/2 dice against units in cover). This meant rolling three dice, but with one a different colour to the others, and the odd die hitting only on a 6. This gave knee mortars the extra punch they needed, and they were put to good use. We ruled that they had a +/- 45° arc of fire, and that their PC was incapable of directing their fire (unlike the rules as written).
The Mac’s Missions were great, and certainly added an unexpected twist to one or two of our games.

For our three-part campaign, we ruled that the outcome would be determined by whoever won the third and final battle. If that was the only battle they won, the campaign was considered a draw. If they had won the final battle and one other, it was considered a minor victory. If they won all three battles, it was considered a major victory. The Australians won the second and the final battle, resulting in a minor victory for them.
Happy gaming!
Brett.
| Game 1 Result | Game 2 Result | Game 3 Result | Campaign Result |
|---|---|---|---|
| Loss | Loss | Win | Draw |
| Loss | Win | Win | Minor Victory |
| Win | Loss | Win | Minor Victory |
| Win | Win | Win | Major Victory |
Thank you, Steven.
I find Brett’s photos very inspiring. They have a cinematic quality to them.
I totally agree Andres. Every time Brett share’s something I get blown away. My tables are perfectly functional. His are beautiful.