For Boina I based my armies pretty much as standard Shako but with some minor tweaks. There is little that is specific to the First Carlist War.
Infantry Battalions
I went for the minimum number of figures to represent a battalion. An infantry battalion (representing 600-850 men) has 3 elements of 3 figures each, plus some extra figures for markers.
The figures on the elements of the battalion are organised as follows:

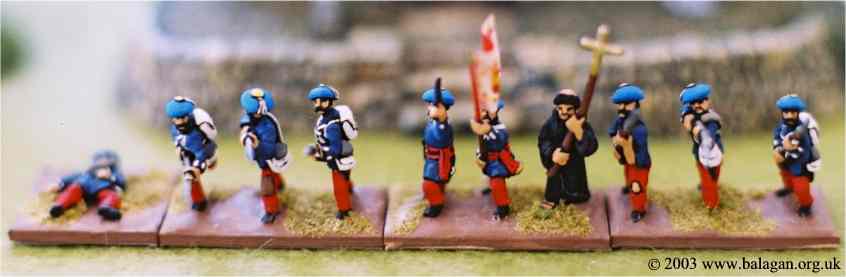
Carlist 1st Regiment of Navarra
Arrangement of Figures

Carlist 1st Regiment of Navarra
Where …
| |
Officer. Painted as Centre company |
| |
Standard Bearer. Painted as Centre company. Remember, these are Officers too. |
| |
Musician (usually Drummers, but could be Buglers or Pipers depending on the unit). Painted as Centre company. |
| |
Centre Company figure |
| |
Right flank figure (Grenadier, Granaderos or Carabineros) |
| |
Left flank figure (Light, Cazadores or Tiradores) |
Elite Carlist
To make Elite Carlist units stand out, I replaced the musician with a priest.

Carlist Guias de Navarra
Arrangement of Figures

Carlist Guias de Navarra
Battalions with No Flank Companies
If a particular battalion didn’t have flank companies (eg Cristino Guards, Cristino Marines, British Marines, British Rifles, Carlist Granaderos del Ejército), then all of the men will be centre company figures.

Carlist Granaderos del Ejercito
Arrangement of Figures
Carlist Granaderos del Ejercito
Skirmisher Stands
Skirmishers are standard Shako, i.e. 3 figures on a large base. Typically these represent an amalgamation of flank companies from several battalions, so the figures should only be Flank Company figures.

Carlist Guipuzcoan Skirmishers
Arrangement of Figures
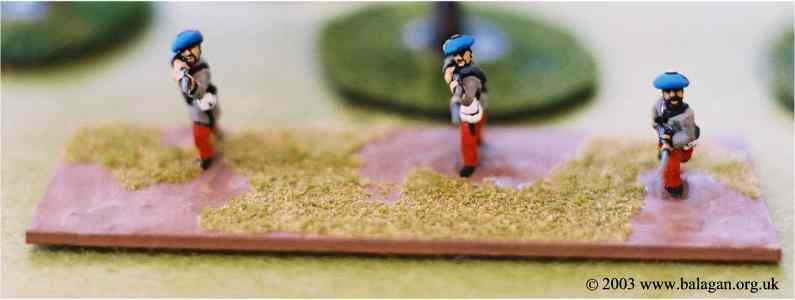
Carlist Guipuzcoan Skirmishers
However there were some specialist Light Infantry battalions what should also have centre company figures on the skirmisher stand (and the British Rifles at least would have had only Centre company figures).

Skirmisher with Centre and Flank company figures
Cavalry
Like the artillery I’ve also based my Cavalry on a narrower frontage than Shako suggests, and for the same sort of reasons:
- To make it consistent with the infantry frontage.
- To make it consistent with other rule sets.
- To make a cavalry column look like a column.
- Because during the First Carlist War Cavalry typically operated in Squadrons not Regiments, so I wanted more stands to give me the option of using them separately.
Regiments (representing 400-450 men) have 3 elements of 2 figures each. I use a mix of command figures and troopers (T).

Carlist Navarrese Cavalry
Arrangement of Figures
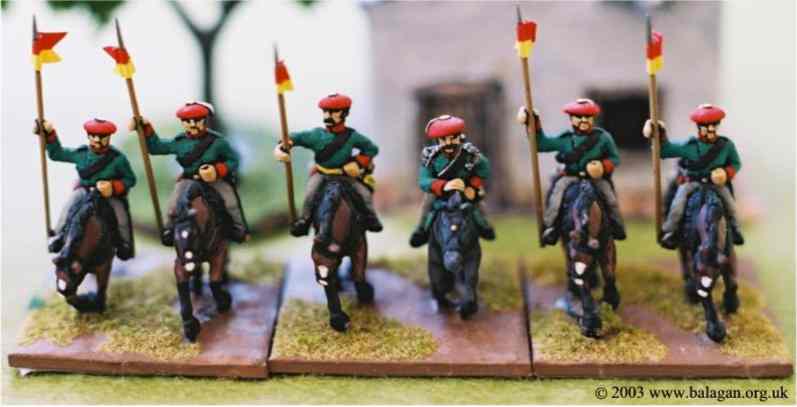
Carlist Navarrese Cavalry
Each regiment has a casualty marker and a blown marker.
Note: Although the Tirador company of each Cristino regiment was equipped different (carbine instead of lance), I didn’t get figures to represent them. All Carlist troopers were meant to equipped with a Carbine in addition to a Lance, but few actually were. I included a sprinkling of double armed guys. Carlist officers were armed with lance like the troopers.
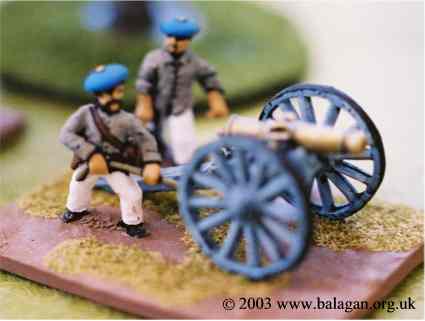
Artillery
I’ve based my Artillery on a narrower frontage than Shako suggests. I had several motivations for this:
- To make it consistent with the infantry frontage (too much DBM I suppose).
- To make it consistent with other rule sets (don’t ask me why).
- There was far less artillery in the First Carlist War than in the Napolenic Wars, so it would be hard to find the 6-8 guns necessary for a normal Shako battery, so my batteries represent 3-4 guns, thus giving me more batteries to field.
I used the number of crew (A) to indicate the size of weapon.

Heavy Gun Battery
12lb or bigger. 4 crew
e.g. Heavy foot battery

Medium Gun battery
6 – 9lb. 3 crew
e.g. Foot battery

Light Gun battery
2 – 4lb. 2 crew
e.g. mountain battery
I include all horse artillery including 6lb guns.

Rocket Troop
Congreve rockets. 1 crew
Carlist Artillery (Mountain battery and Foot Battery)
Mountain Gun
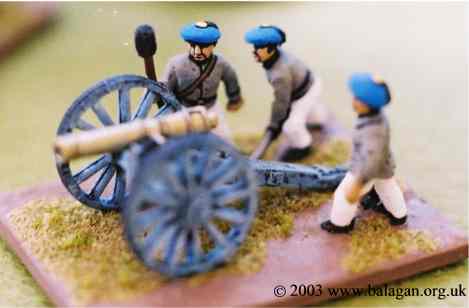
Foot Gun
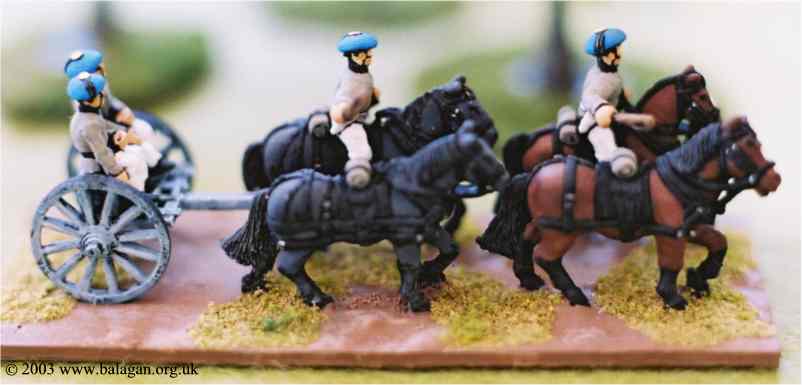
Although not necessary for Shako, I gave some batteries a separate transport element (limber or mule team). At least this gives me the option to use other rules if I choose.

Limber
For Horse, Foot, Heavy Foot Batteries.

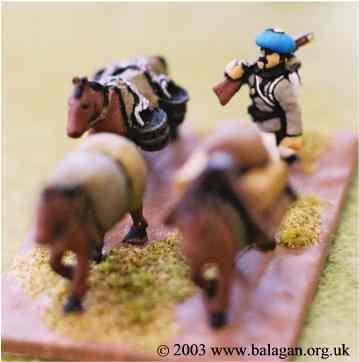
Mules
For Rocket Troops and Mountain Batteries.
I also ensured all batteries have a casualty figure of some kind – destroyed gun – to be used as a status marker.
General staff
Similar to the suggestion made in Shako but when I made the decision to use Shako my copy of the rules was in a box on a ship heading to the UK so I wasn’t sure of the specific base sizes and mine have ended up slightly bigger. Currently they are square or rectangular but John McClennan has inspired me and I’m inclined to rebase to round.
C-in-C
Brigade / Divisional commander
Aide


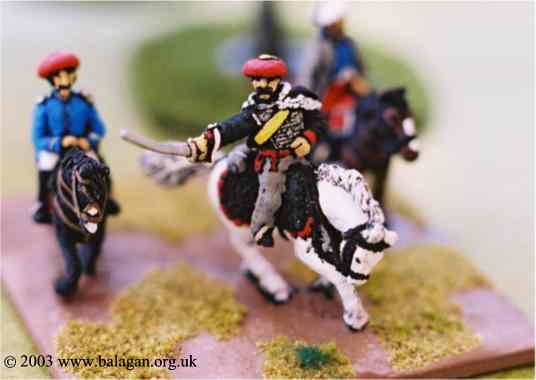
Carlist C-in-C
Status Markers
Rallying Marker
Once “Staggered” in Shako a unit must rally. For the Carlists I use a reloading figure (RL); for other troops I use an officer or musician figure. All on a 15mm by 15 mm base. You’ll need roughly one such marker for every two units in your army.

Rallying Markers
Casualty Markers
Each unit, whether infantry, cavalry or artillery, should have a casualty marker.

Casualty
You only need one casualty marker per unit as you can use the placement of the marker to indicate how many casualties have been taken. I place the marker with a flat side touching the associated unit – the touching side indicates the number of casualties. Basically the feet is side 1, and then it goes clockwise.

Casualty counting
So, for example, the battalion in the diagram following has suffered two casualties:

Example of casualties
Blown Markers
Cavalry can become “blown” in Shako, so each regiment needs a marker to represent this. I use a dead horse.