
Chris Harrod and I played my Push to the City – A Crossfire Scenario in Tarnopol. Although we played it as a stand alone game it is also part of my from my Tarnopol 3 Round Campaign.
Summary: Good game. I won as the Russian attacker.
Plans
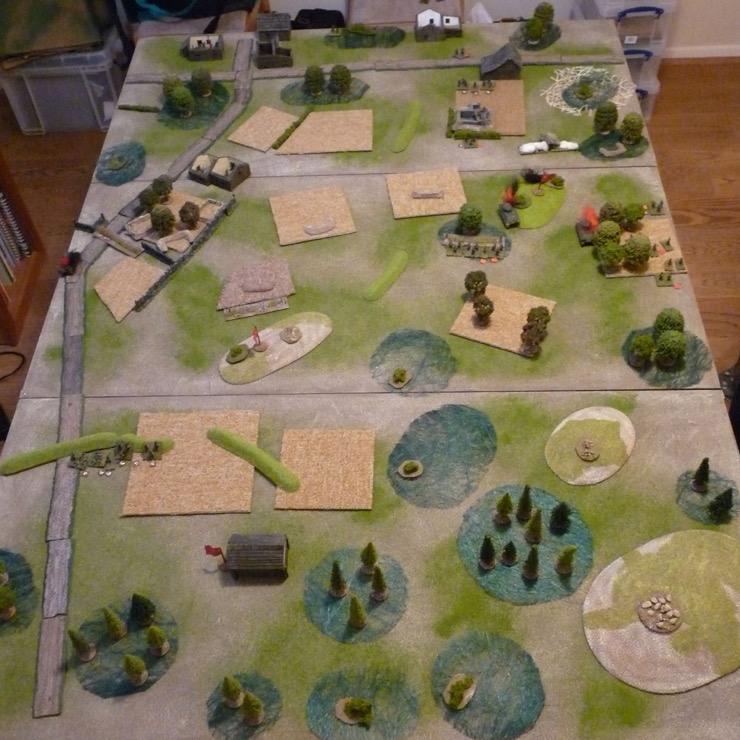
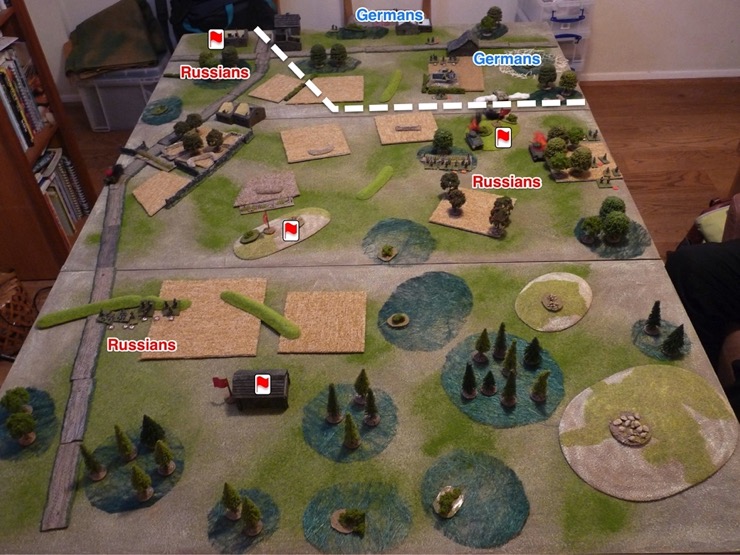
The table has four objectives, highlighted by little flags. Two of the objectives are right at the edge of the German deployment zone and on hills. Being hills a considerable amount of the table had visibility of these features so any troops on them would be subject to fire from all sides. Both of us were trying to figure out how to defend these. Put troops on them? Bunker? Wire? Mines? A combination? Or nothing? That decision has a big bearing on how the game plays out.
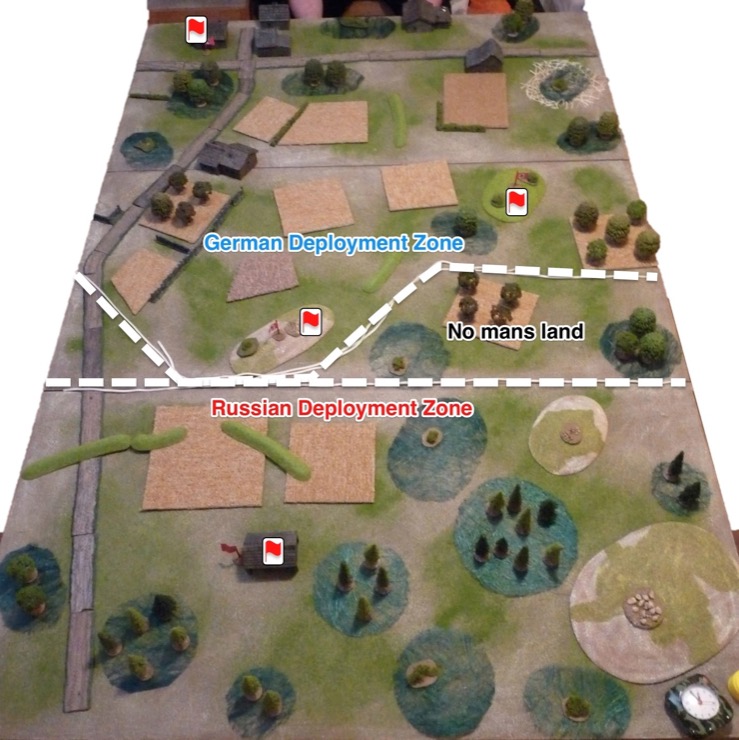
Chris, as the defending German, decided to mine the two forward objectives and cover them with fire from troops entrenched behind. A good plan but would it work?
I dropped my Pre-Planned Bombardment on and around the northern hill-objective. Being hopeful I scattered the fire missions, one per feature. After the game Chris mentioned that every feature I hit contained troops but, unfortunately, my dice rolling meant the only effect was to PIN a stand in a feature that only contained a sniper. So much for the Russian God of War.
Next I deployed my troops. With moving clock in play, and significant German reinforcements arriving half way through the time allocated, I didn’t feel I had time to muck around. So I deployed my troops forward. I’d take the two forward objectives and then see what happened.

Part of rationale for my aggressive stance is I knew I outnumbered him 2-1 and I had the advantage of combined arms – tanks and armour.
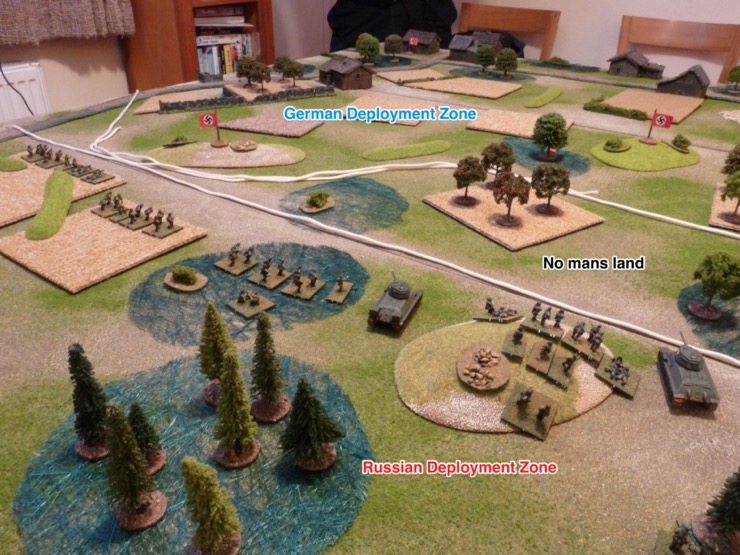
0800 hours
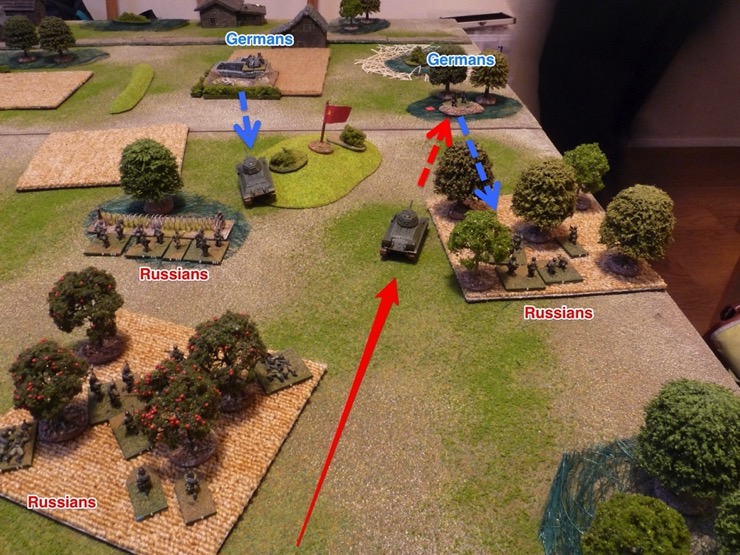
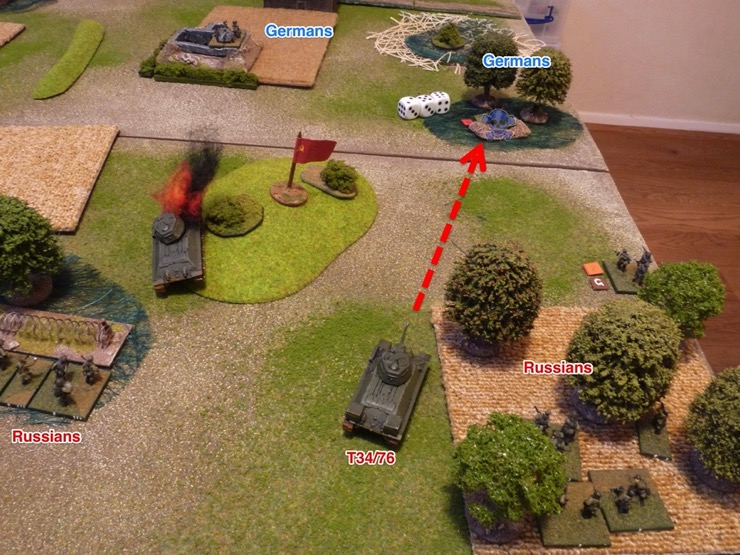
Then the game started. I pushed forward tanks and armour in the north. An infantry unit hit barbed wire in the wood near the northern objective hill. And my T34/76 rolled onto the hill itself to discover it was mined. Luckily the tank survived the mines but it wasn’t going to be moving for the rest of the game. But at least the objective was mine.

The mines weren’t the only thing to worry my T34/76. There was also a bunker in the field to the west with a Pak 38 and some infantry. How long would my tank survive?

Not surprisingly the Pak began firing. Initially unsuccessfully.

This part of the table was dominated by orchards. A steady stream of Soviets advanced through the trees. Meanwhile my tanks were shooting at Chris’s entrenched infantry and Chris’s Pak was shooting at my tanks.
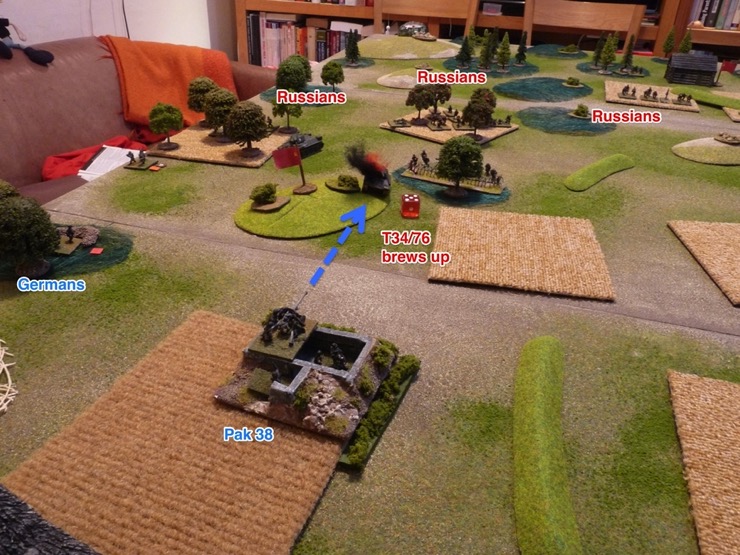
It didn’t take long for Chris to score a hit with his Pak 38 and the tank on the objective hill got knocked out. But the objective was still mine unless Chris could get a stand onto it again … and he’d mined it.
I pushed a squad onto the southern objective hill. Another minefield. The squad went to ground and would remain there grimly.

Generally I advanced without RBF. I wanted to find the Germans, kill them, and fast. That meant I had to accept getting shot at.
My tanks were the big killers. The T34/76 in the south didn’t even have to move to get a shot at the entrenched Germans.
0900 hours
My rifle squad on the southern objective hill had a long LOS. All the way to the base line. Chris only realised this when I shot at a squad rushing across open ground.

My next kill was in the north and, again, by tank fire.
Having eliminated one German nest, the T34/76 redeployed to have a go at another in the centre of the table.
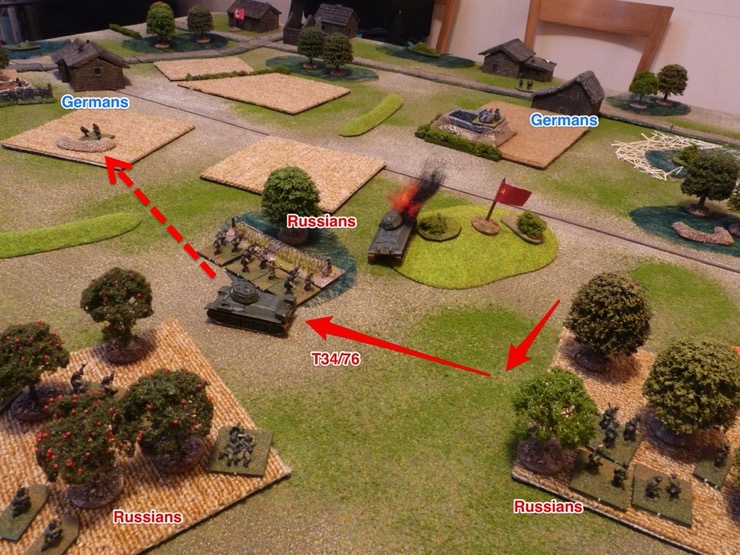
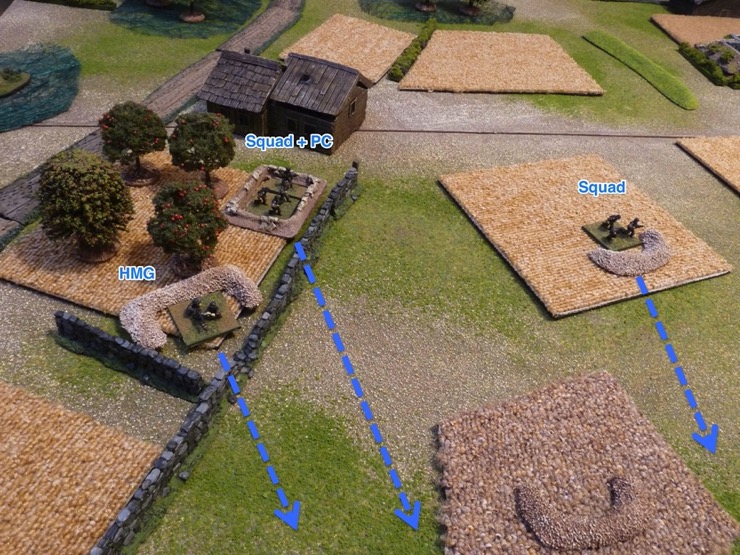
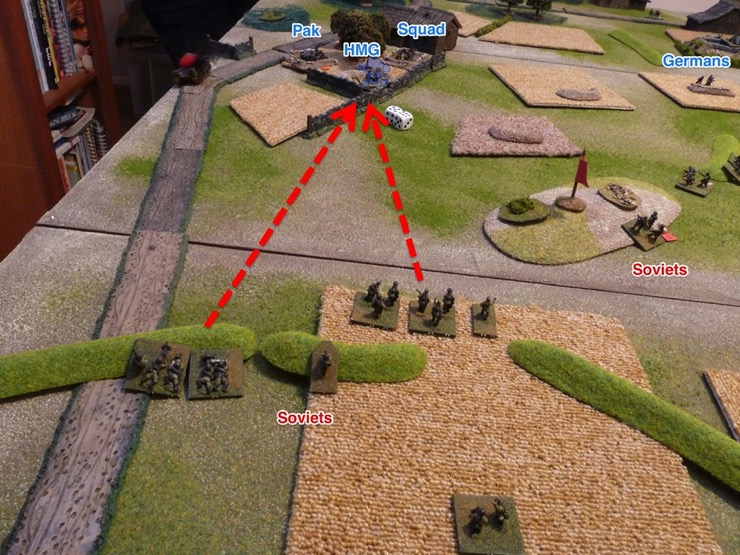
About now I realise Chris had formed a strong point in an orchard near the southern table edge. I’d spotted a PC, rifle squad and HMG. The other two rifle squads were in the fields in front of the orchard.
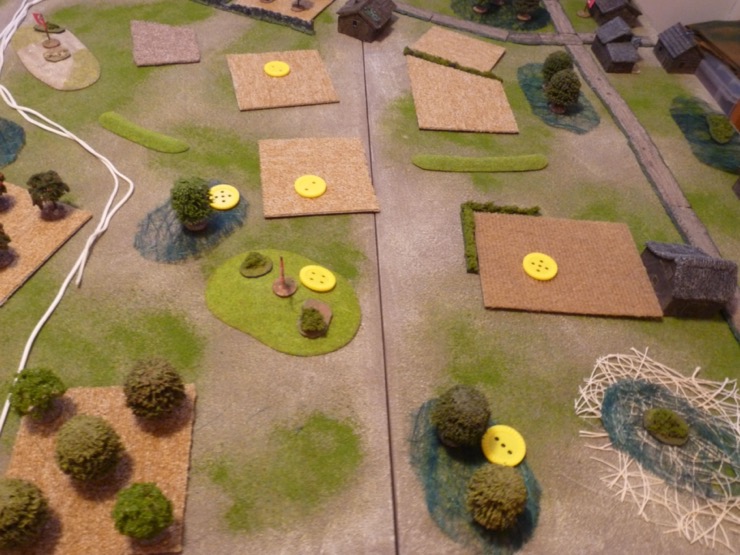
showing Lines of Fire
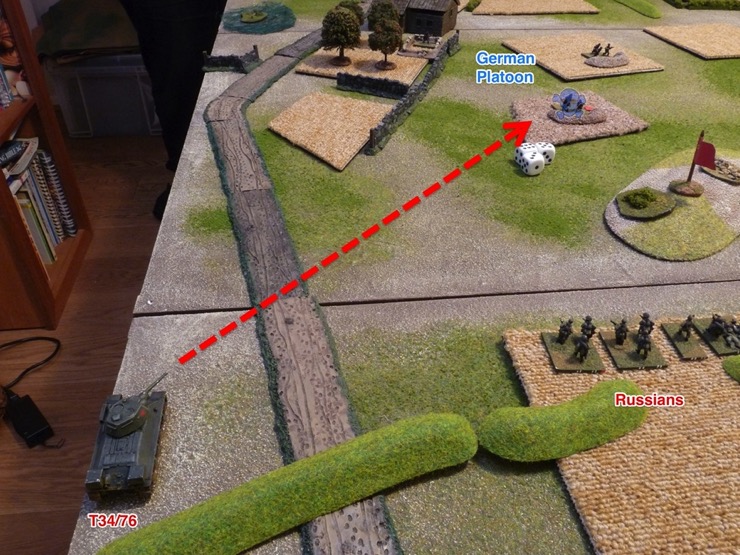
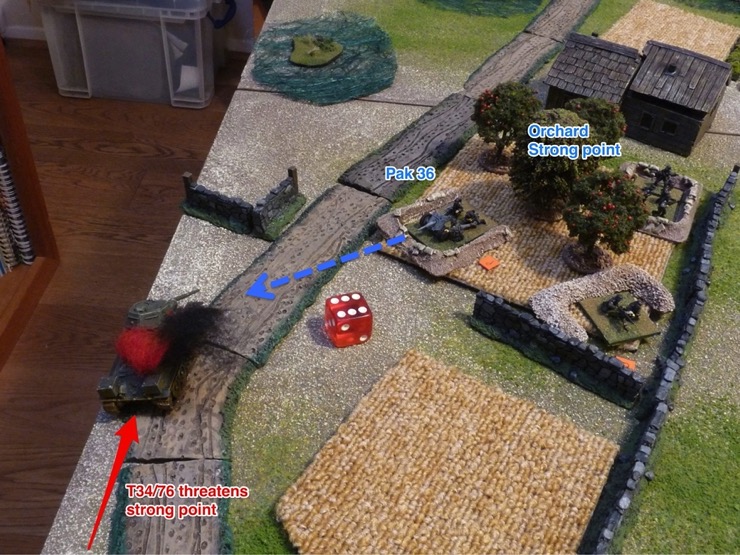
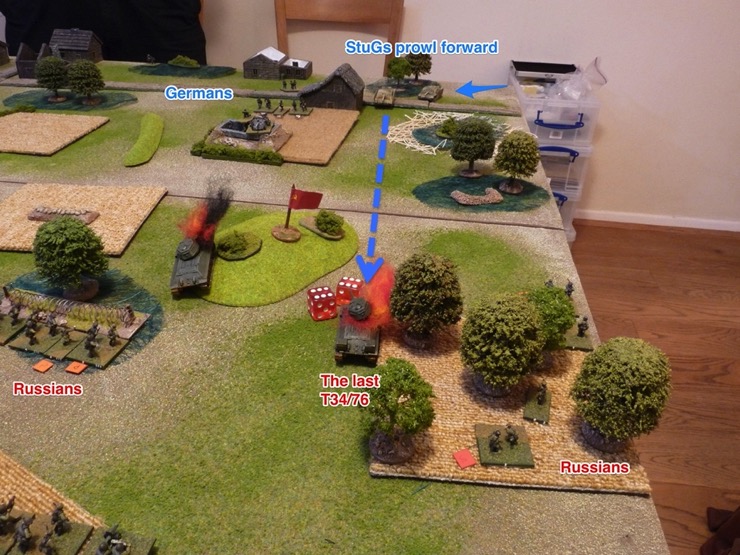
I thought I’d push forward my T34/76 to have a go at the strong point but Chris had been expecting this and revealed a Pak 36 with stielgranate. Bang. Another tank brews up.
In revenge my last remaining tank scored another kill.

1000 hours
After that furious action there was a lull in the battle.
1100 hours
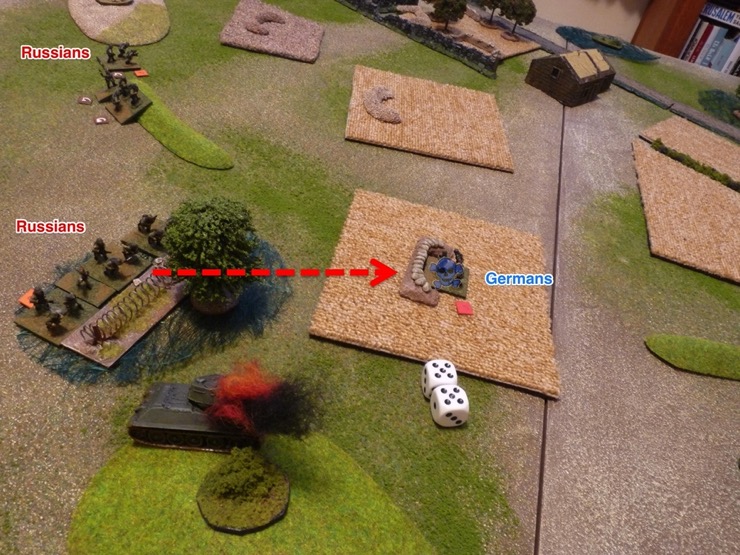
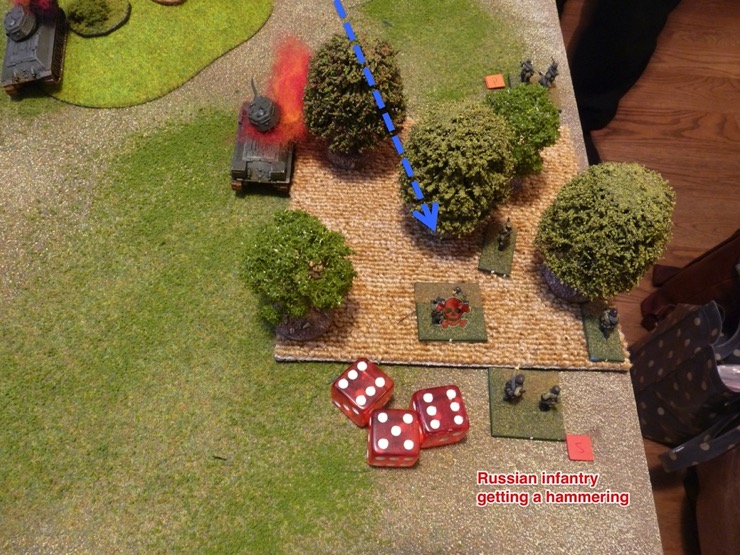
The action picked up again when a platoon of mine managed to get a crossfire on the MG34 nest in the orchard strong point. [The angles were a bit questionable but Chris had deliberately placed the nest in the corner so it could fire over the wall. By implication I could fire back.]
I might have had numbers but it wasn’t all one sided. The surviving German rifle in the orchard took our my stand in the hill objective. The trouble with having a good field of fire is that everybody can see you.
1200 hours
In retaliation I destroyed the German rifle squad in the orchard. That just left the Pak 36 to deal with.

Unfortunately, this was when Chris’s reinforcements arrived. First on the board were two StuG IIIs.

Then a weakened company of veteran German infantry arrived.

1300 hours
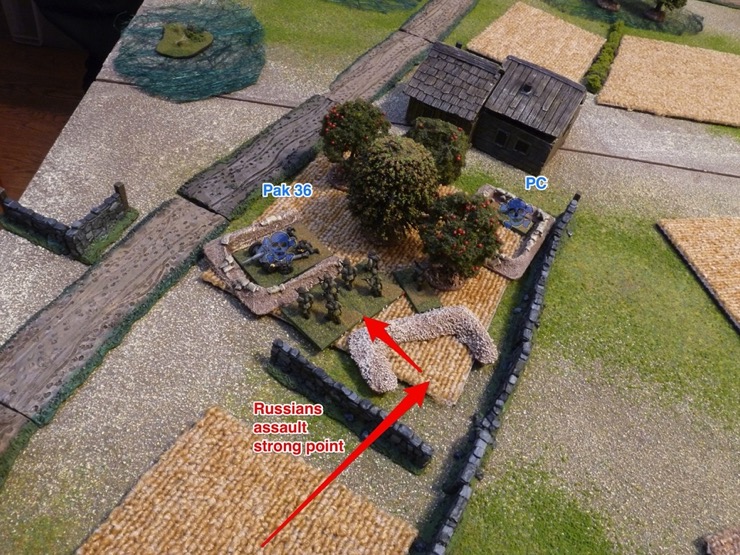
I sent a platoon to take the orchard strong point. They only had a Pak and a PC to deal to so easy pickings.
That platoon then pushed forward into a building with good fields of fire.

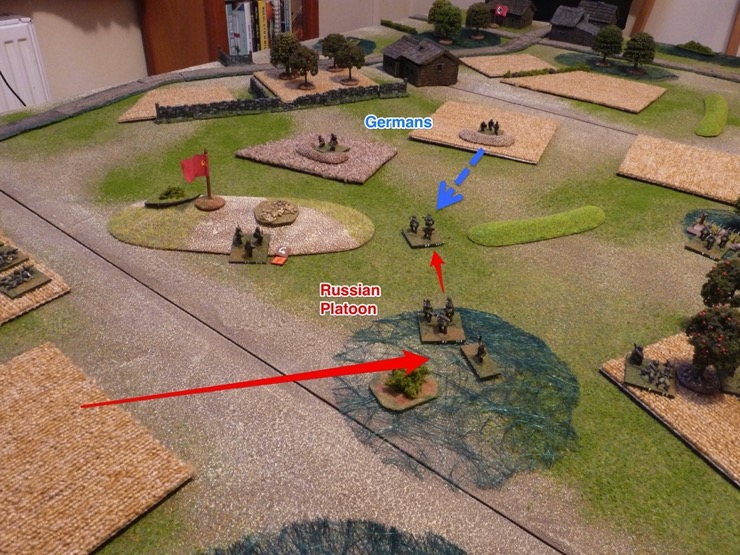
In the north the Russian platoon that was near the wire shot up the German squad in front of them.
The StuGs pretty quickly began to have an impact. They took our my last T34/76.
After that success Chris thought he’d reproduce my earlier trick of driving an armoured vehicle onto the mined objective hill. Unfortunately for him the StuG rolled over an anti-tank mine and brewed up.

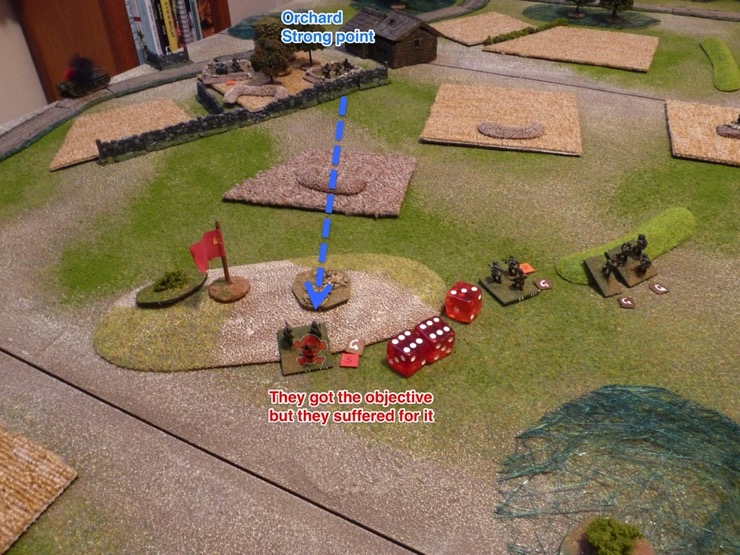
Back near the orchard strong point, I infiltrated a platoon to the back of the table and assaulted the fourth and last objective. A quick combat with the German CC and I had a full house of objectives.

But now Chris’s remaining StuG started wrecking havoc amongst my infantry.
So I moved another platoon in to soak up the damage. Reinforcements or cannon fodder the idea was to have some troops there to prevent the Germans swarming onto the objective.

By then it was 1.30 AM in the (real) morning, Chris conceded, and we called it a night.
I had successful squeezed the Germans into a small sector of the table.
Observations and conclusions
It was another good game. We thought the scenario was reasonably balanced. And it worked well as a stand alone offering (outside the Tarnopol 3 Round Campaign).
The outcome was heavily affected by Chris’s deployment. Specifically the fact he chose to mine the two hill objectives and not have troops on them. A reasonable strategy but a bit risky if you have to counter-attack. There are certainly other possibilities to be explored.
The armour, with my Balagan House Rules for Crossfire, is very potent. Tanks and assault guns played a significant part in this game and really hammered the opposing infantry. I think that is good and much better than the lacklustre standard rules for armour.
I used the Pre-planned Bombardment (PPB) but it had no effect. We also played the aircraft rules but no aircraft turned up. That is fine as both special rules were included for flavour. If you want them to have more of an effect you could beef them up.
Great game. I have a couple of questions. When The Germans fired out of the orchard, how come they didn’t have to reveal the Pak38? (I always played that every thin in a location that has a stand firing has to be revealed(except snipers). 2. I see what you used for wooded areas, but what is that “stingy” thing up in the Germans Sector? To get the photographic maps do you photograph while standing on a ladder(or some such) or does your photo program allow you to rotate the photo into a more perpendicular position? And Finally, what program do you use to place the arrows, ect. on your photographs?
Dick
“No scenario survives first contact with a wargamer”
It isn’t obvious from the AAR but Chris did not fire out of the orchard until the moment the Pak opened up.
We were using the beige stringy bit as a depression. My purpose built one is too big for most games
I did nothing fancy to get the photographic maps. Take camera. Stand on chair. Reach as high as I can. And hope.
I use three applications for the annotations and it is very annoying. This is all on a mac.
1. iPhoto to crop
2. Skitch to draw movement arrows and write coloured text with white shadow
3. Powerpoint to draw shooting dashed arrows, dashed boxes, skulls, bombs, etc
4. Skitch again to crop if Powerpoint adds white space to one side
All rather painful.
Another great AAR! Thanks for sharing.
Excellent- well diagrammed and explained- really helps to understand how Crossfire rules play out in practice, and why certain moves work or fail 🙂
Thanks for the feedback. Creating these AAR is time consuming so all encouragement appreciated.
Steve,
For the Mac, I can recommend Pixelmator for photo editing and Intaglio for adding arrows etc.
PowerPoint. Is, in my opinion, best avoided.
Ian
PS for mapping, Ortelius is good.
I have few annotating needs but no software fulfils them exactly. The goal for me is one tool for all of this (MS PhotoDraw 2000 did all this but MS stopped supporting it years ago – and it was window, bleh). I wouldn’t really want to swap like for like, i.e. I use 3 tools and learn some new tools and I end up still using 3 tools but different ones.
I would certainly leave PowerPoint out of image editing if I could. Trouble is it does a couple of things perfectly. (And a lot that isn’t.)
I had a quick look at Pixelmator and Intaglio. They look alright in a scary, new software kind of way. I’d have to check whether they do exactly what I need.
Ortelius is a proper serious piece of mapping kit. However, I have realised, after using Campaign Cartograher for years, that I don’t need a proper serious piece of mapping kit. Ironically for this I find PowerPoint fine (see Drawing Crossfire Maps with Powerpoint”).
Great stuff Steven. That’s how to report a battle! So easy to follow and a pleasure to read. Thanks for going to all the trouble!
I’ve used pixelmator for my MAC and finally got to grips with it. Lots of options with it but I never really enjoyed using it…
I use Comiclife 3 now. It’s not required to have the report in comic form (that’s just an option) I think there’s a basic version of it for free download
Awesome AAR!. Miss a new battle repport for SCW.