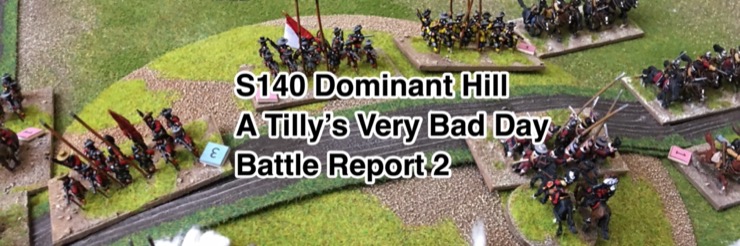
Jamie and I thought we’d have another go at S140 Dominant Hill – A Tilly’s Very Bad Day Scenario. Our first play test was a blast and we both had ideas for how to play it differently. Once again Jamie was Saxons as the Red Army and I was Imperialists as the Blue Army. Tilly’s Very Bad Day of course.
Summary: Another great game. Five game turns. 1.5 hours game time. Tense and gritty, with a decisive result. We will play it again.
I do like the look of Tilly’s Very Bad Day with my Big Bases. The games look like a proper battle of the period.

Army Lists
The scenario allows you to choose your forces, within certain constraints.
For my Imperialists I rather a historically put all my foot into the vanguard. I wanted my Pike∧Shot to contest the dominant hill. I put all my horse into the main body to reinforce anywhere I thought I needed it. I also took two cannons, partly to see if I could make them contribute effectively to the game.
- Vanguard
- 1 x Commander
- 7 x Pike+Shot
- 2 x Limbered Cannon
- Main Body
- 1 x Commander
- 6 x Horse
- 17 Units; 64 Coins; 6 break point
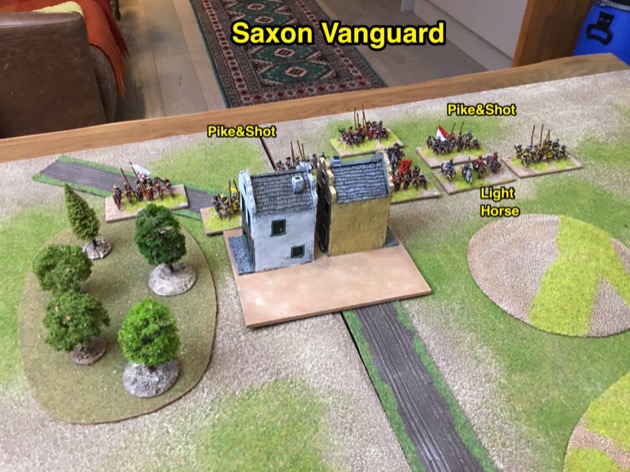
Jamie did something quite similar with his Saxons. His vanguard had pike&shot, like mine, but surprisingly his took a light horse unit as well. Now Croats were a peculiarly Catholic thing in the Thirty Years War so the Saxons shouldn’t have them, but they are allowed to both Red and Blue in the scenario, so fair cop. Like mine, Jamie’s cavalry was in the main body.
- Vanguard
- 1 x Commander
- 7 x Pike+Shot
- 1 x Light Horse
- Main Body
- 1 x Commander
- 6 x Horse
- 16 Units; 64 Coins; 6 break point
Deployment
The start of Game 2 saw a lot of infantry on table. On both sides.

My Imperialist infantry was lined up behind the village near my base line, headed for the dominant hill. My cannon were out to the left to get a line of fire to the approaching Saxons.

Jamie’s Saxon infantry was also lined up behind the village near his base edge.
Turn 1
Game Turn 1 saw both vanguards march forward and the main bodies arrive. Both main bodies appeared immediately behind the vanguards.

Turn 2
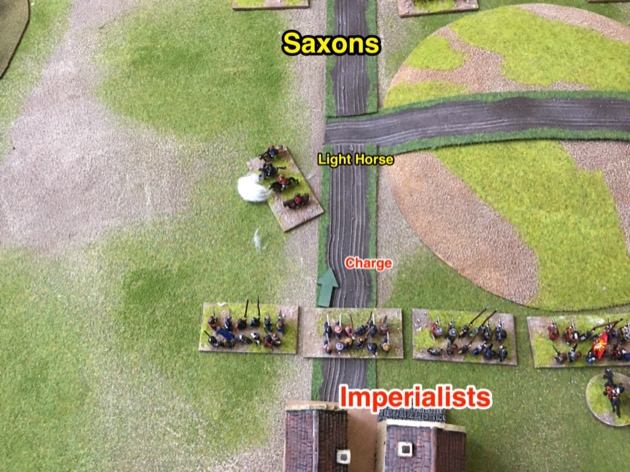
Jamie started pushing his horse out to the flank. Presumably to threaten my infantry’s right flank when I approached the dominant hill.

As my vanguard crossed the small hill, I extended my infantry line to the right to counter Jamie’s horse.

My cannon had a nice clear line of sight to the Saxons. I managed to maintain this for quite a while. One cannon doesn’t do much damage but two cannons, side by side, can pack a punch.

Jamie was experimenting with his Croats. He wanted to see if he could slow my line down. Not really.

Turn 3
My infantry started trudging up the slopes of the dominant hill.

On the other side of the hill, the Saxons also started their ascent.
The Croats were up for a fight and popped away at my foot.

Game Turn 3 saw a lot of charge declarations. The Croats evaded.

The charges went in. The Croats got sandwiched between the two infantry lines. I didn’t expect them to last long.

The melee results were slightly in my favour. Saxons suffered one rout and a rally back. I got a rally back. Surprisingly the Croats drew with the foot they were fighting, so became locked in melee.

The rout meant the Saxons on my left were a bit thin. Jamie would have to bring up more troops.

Turn 4
Jamie advanced his horse to threaten my right. He also closed up his foot so fill the gap facing my left.

Unfortunately for Jamie, combined fire from the Imperialist artillery and muskets routed one of those Pike&Shot units that moved towards the centre.

Imperialist musketry did quit well on the dominant hill as well, although there were no routs.

Jamie’s horse was a bit stymied by the Imperialist Pike&Shot I had out on my right.

With the Saxon unit facing my right wing routing, I saw an an opportunity and moved some horse to exploit it.

The Saxons still had a bit of pepper in them and conducted a couple charges. I had one in return.

Hmm, I lost a unit routed and suffered a rally back. The Saxons also got a rally back.

Both vanguards had taken a bit of a hammering. I had a hole in my centre that I had to fill. Jamie’s centre was intact but the resolve of those units was weakening. Jamie did have a problem where my left wing horse was going around his open flank. My right flank foot were preventing any ambition moves by Jamie’s horse.

Turn 5
I shifted one my my Pike&Shot units left to partially fill the gap in my centre. And used a horse unit to securely plug it. This movement intentionally opened a small gap on my right centre, a gap I filled with a couple of horse units. I advanced my left wing horse as did Jamie.

Lots of charges. Six of my units charged including three horse.

I scored four routs from six charges! Bang! Bang! Bang! Bang!

Here is what the battlefield looked like at the climatic moment. Very intense combat on the dominant hill.
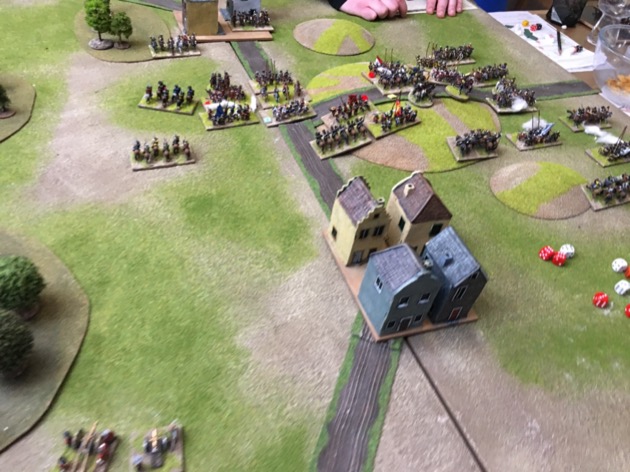
On the dominant hill itself the Saxon line collapsed.

A massive hole opened up in the Saxon line on the dominant hill. Not that it mattered because Jamie had hit his breakpoint. On the positive side Jamie’s Croats were still fighting at the end of the battle, despite being in melee for three consecutive game turns. A small miracle give they were frontally facing a Pike&Shot unit.

Game over.
Conclusions and observations
Another great game. The scenario offers some interesting challenges and we could both already imagine tweaks to how we would play the next time. And there will be a next time.
For myself, although I won this game, I wasn’t too happy about entirely splitting my infantry and horse. I was bumping the command range too often. Next time I’m likely to go back to mixed commands.
I think the game also showed that cannon work, if they have unobstructed lines of fire, and you have more than one of them. We did have a discussion about whether the red player (Saxon in this case) had sufficient open space to the west of the villages, to allow them the same trick with the cannons. We think, on balance, “yes” but I could tweak the map to nudge the medium size wood towards the western table edge.
The Croats won “player of the match” for this game. They were engaged the longest of any unit and survived. The question is, could Jamie have got more value from them if he’d used them differently.
And, I must say, it is nice to get the Saxons on table.
Next we’ll probably play S12 Fighting Across the River – A Tilly’s Very Bad Day Scenario as this is another scenario that Roger Calderbank has provided some feedback about.
Where to get Tilly’s Very Bad Day
Tilly’s Very Bad Day is available for Download (PDF). You can also get a printed copy from Lulu.
Looks a good game, as did the previous game using this scenario. The Croats did well, but a position between the two battle-lines isn’t where I would expect to see them operating.
Thinking about your games, and mine for this scenario, I note that there is little reason for either side to occupy the wooded part of the table (East in your scenario map). All the objectives are on or West of the centre line, and it is likely that one army will break before either village is contested. A possible variation of the scenario could be to move the crossroads nearer the East edge of the table. There might then be an incentive for one or both armies to have shot units, and the armies would have to spread out more, with choices about the order in which you try to take the objectives.
RogerC
A fair point Roger. Of course, I’m basing the scenario on the one from the book. But I agree moving the objective more to the centre would probably improve it.
Another fine game and write-up. Once again your addition of captions and arrows on the photos is an excellent idea that adds greatly to the understanding of events.
Regards, James
Thanks for the feedback James. The annotations take most of the time in preparing these reports so I’m glad they add value.
We are having our first go at this scenario with some changes for lack of units.
We enjoy very much the rules and scenario.
We play with 20 mm flats french and german made on 80mm bases.
The armies are from the Fronde, a french civil war within the franco spanish war (1648 1659)
Thank you for sharing this rules.
John from Paris
Glad you enjoyed it John.