
I hosted a couple of games between Chris Harrod and Jamie Wish. We tried StuG Smuggling by Nikolas Lloyd. Both games saw the Russian “defenders” go on a successful “StuG hunting” rampage.
Table
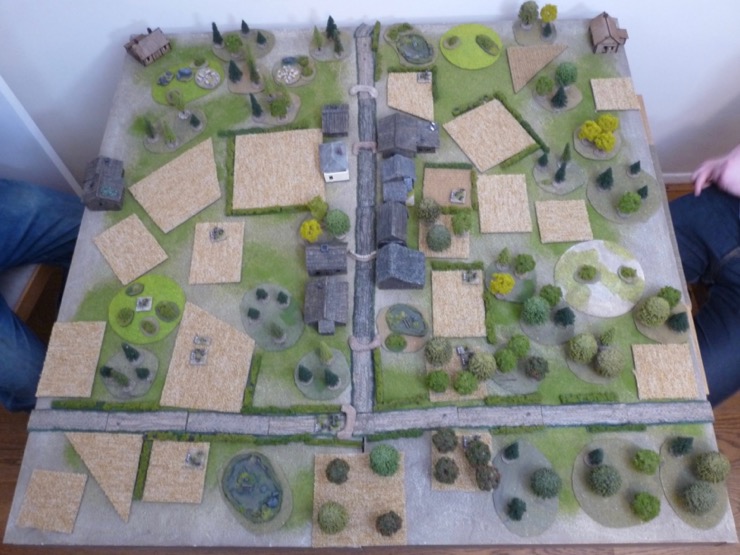
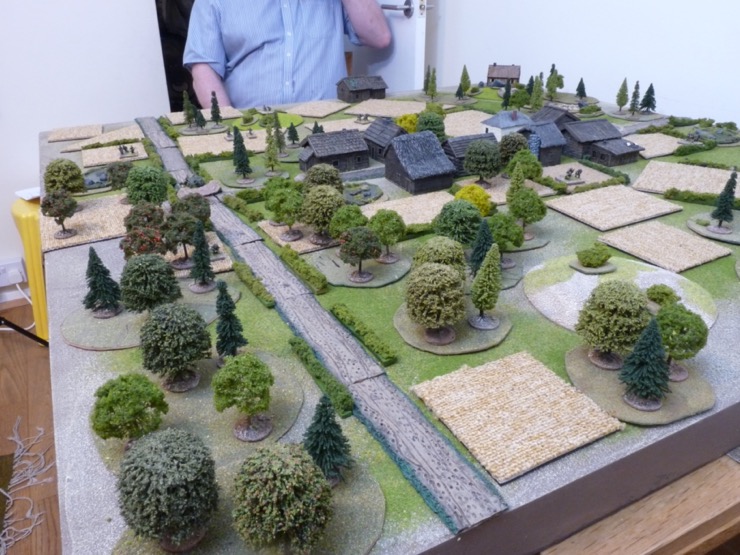
Lloyd’s StuG Smuggling Scenario is pretty vague on terrain. A T road junction, five barricades and a village. Lloyd also suggests the rest of the table should be “a dense mix of fields, hills, rough ground, quite a lot of hedges, walls etc.”
I looked at IanH’s table for StuG Smuggling as inspiration. IanH’s table was 6′ x 4′ and he commented that there was a lot of terrain.
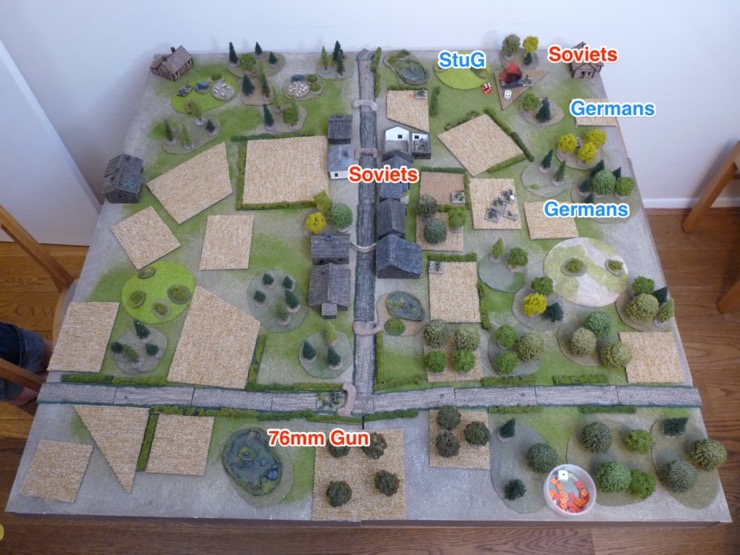
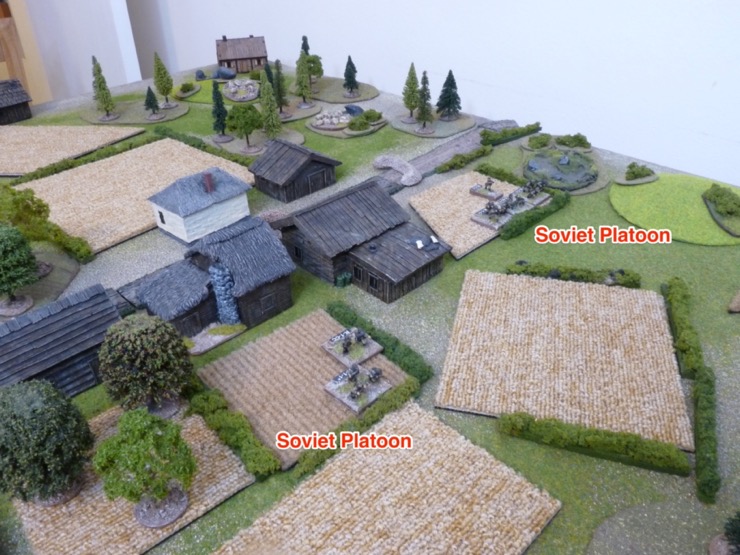
IanH also suggested this would play well on a 4′ x 4′ table. So I transposed IanH’s terrain onto a 4′ x 4′ table, trying to keep all of IanH’s terrain, but using my standard sized terrain features. The result looked like this:

When we put that on table, it looked great. Pastoral. “Idyllic” is how my wife described it. Ignoring the blood bath that was to come.

Game 1
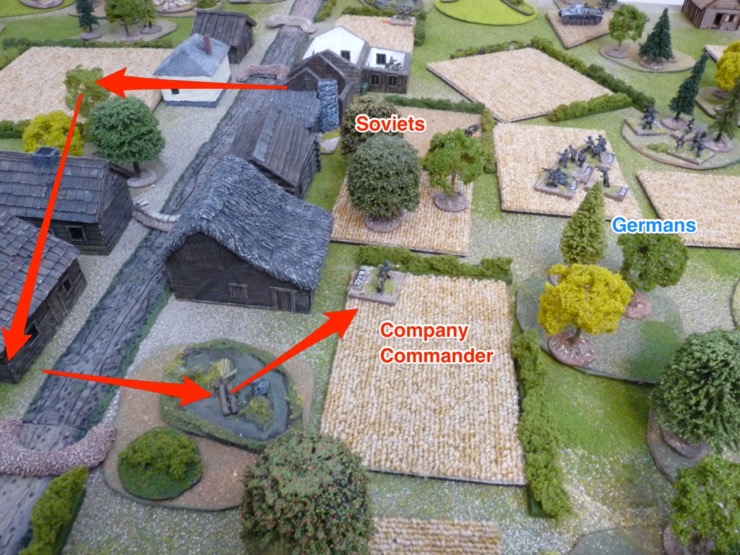
Chris took the defending Soviets in the first game. He deployed with two platoons forward and one back. The mortar team was with the reserve and the company commander in the front line.
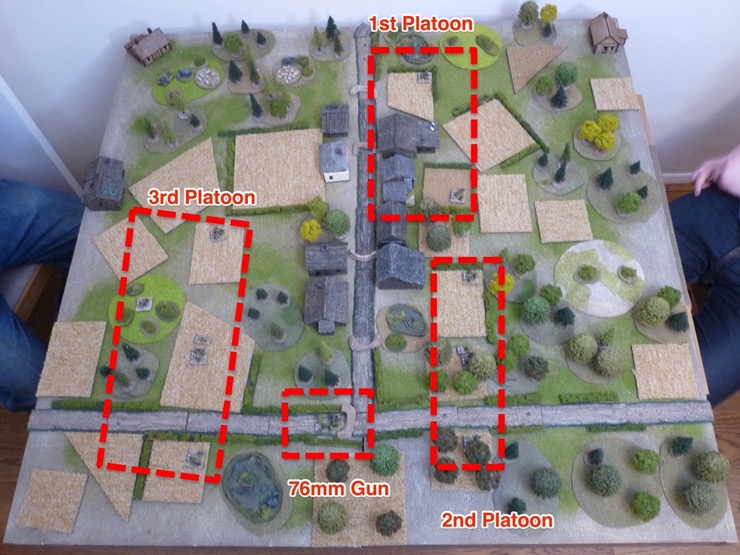


Chris left the 76mm without an escort.
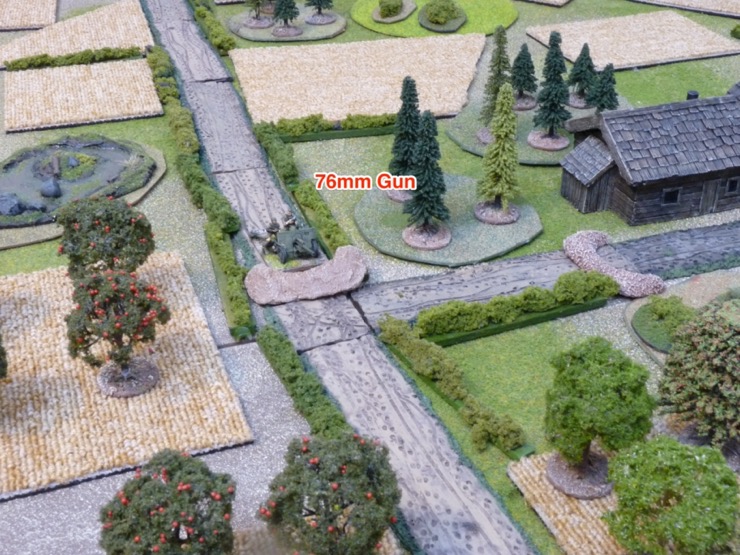
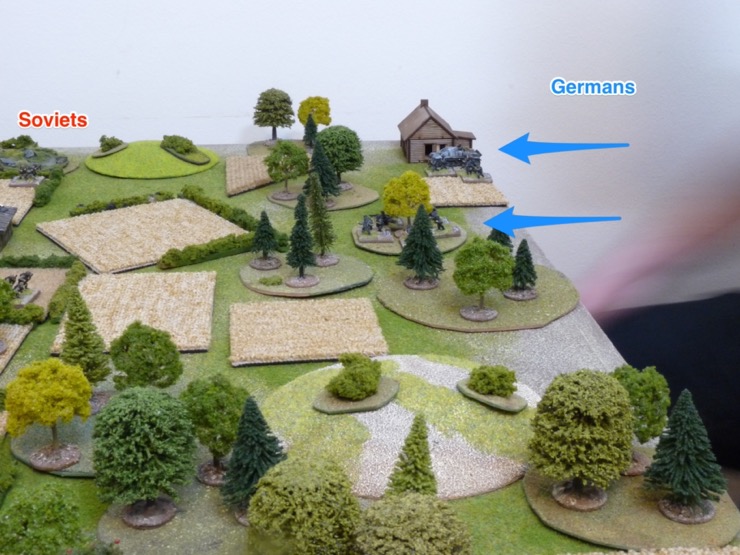
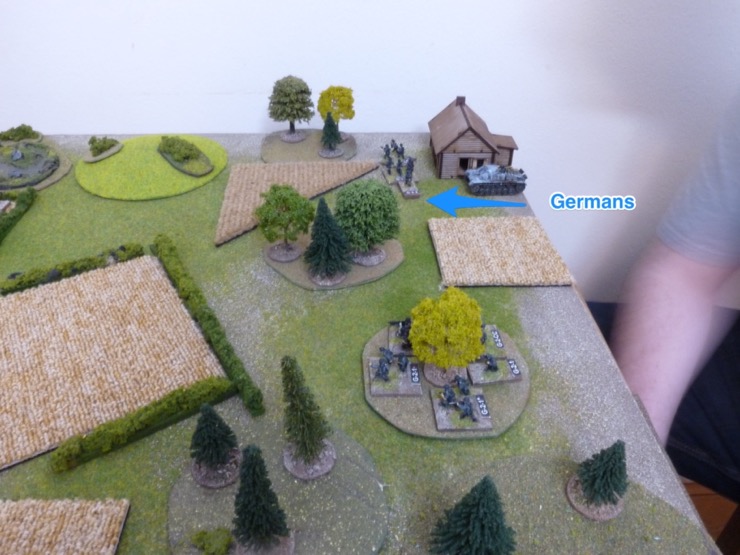
Jamie came on in the north-east corner of the table. A long way from the road and the 76mm gun waiting there.

The StuG had an escort platoon with the other platoon providing flank security to the south.
The StuG and it’s escort played leap frog. Jamie pushed the escort platoon forward.
And then the StuG caught up.

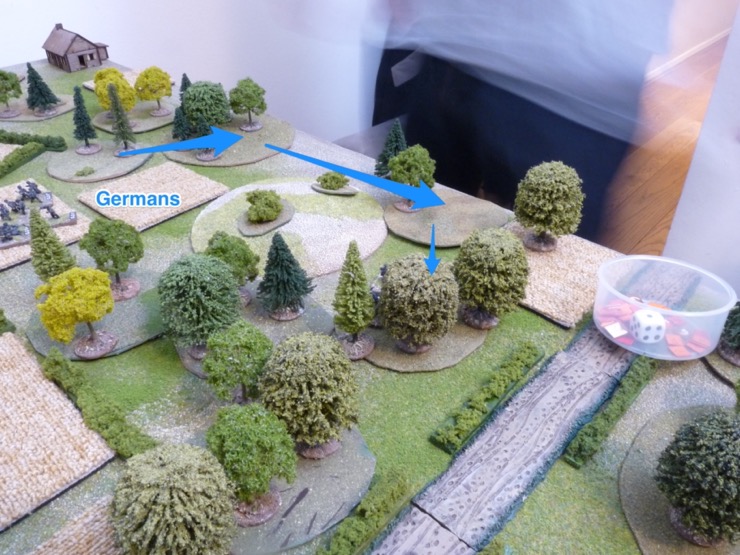
Both players were pre-occupied by the hill near the north-east corner. I could see Jamie debating with himself on the advisability of going up the hill. He chose not to.

Eventually initiative passed to Chris and he deployed his reserve (3rd Platoon) to cover the norther flank facing the advancing Germans.

Next Chris advanced his 2nd platoon from their defensive positions to hem the German into the north-eastern corner.
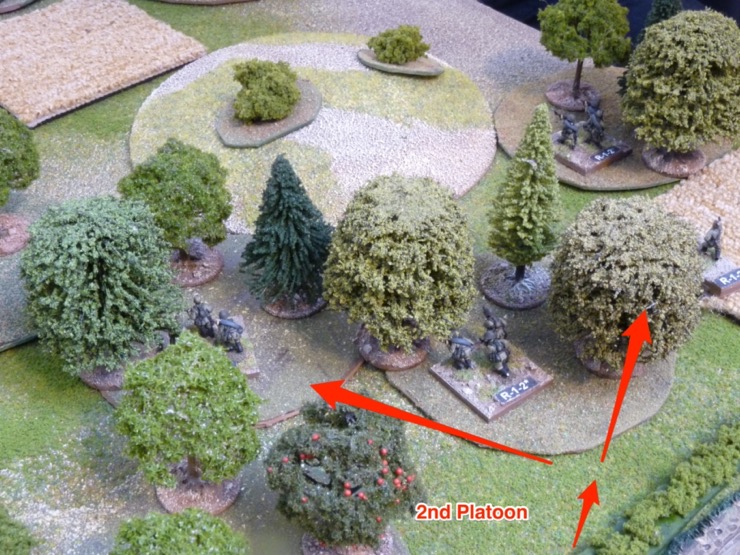
Not content to sit behind the hill in the centre, Chris pushed 2nd platoon closer towards the Germans. The moving stand got Pinned but Chris retained the initiative.

So Chris advanced more of 2nd platoon. This triggered a NO FIRE on the German side.

A NO FIRE German, with no other Germans able to bring defensive fire, and Chris was off. Charge!!!
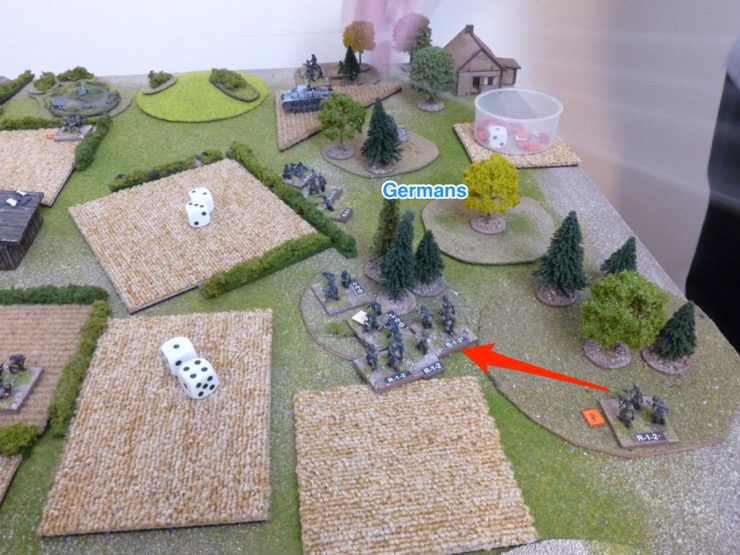
Good odds overcome by good dice rolling. 6-2 to Jamie and most of the Russian 2nd platoon evaporated.
Not content with that success Jamie finished off the last squad in 2nd Platoon.

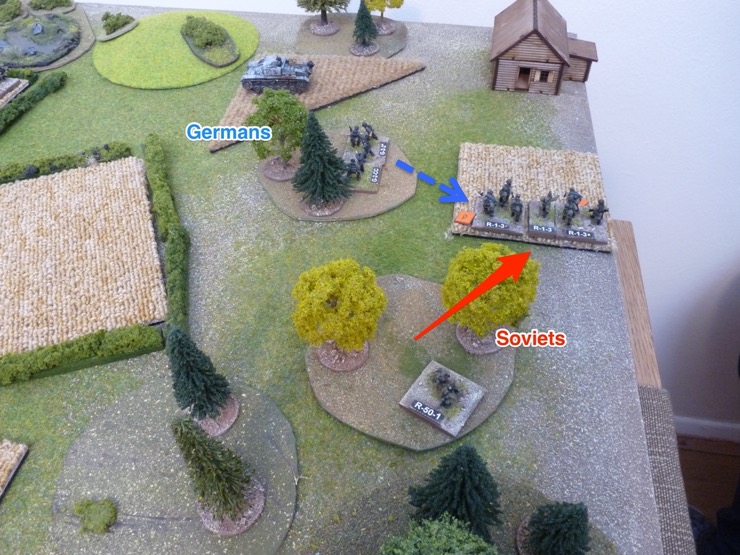
Jamie, deciding that the Russian 3rd Platoon had closed off the northern route, now starting redeploying to face the village in the centre.

Eventually Jamie got in range again and the shooting began.

With 2nd platoon gone, Chris realised he was open in the south. All he had to fill the gap was his company commander. I wasn’t sure how effective this would be because, of course, a company commander cannot shoot.
In the north Chris tried to get close to the, now unescorted, StuG. But the northern hill was really exposed and reactive fire drove back the Russians.

Jamie was more interested in the centre and used his initiative to start firing back.
Chris decided to reinforce his company commander and brought forward his mortar team.

About this point I suspect Jamie realised the south was open and moved a platoon that way.
It was looking pretty good for the Germans with a whole platoon to use. The question was … where?

Jamie elected to attack the Russian company commander. Lloyd’s scenario doesn’t specify this guys quality so we gave it the same as the Germans i.e. +2. That was enough to even the odds and Chris threw enough to kill off the attackers.
Chris advanced his mortar team through the Russian bodies to the hedge. But that just attracted German rifle fire.

Back on the northern hill Chris tried to push forward 3rd platoon again. No luck. Jamie still had the choice of rifle platoon or the StuG itself to conduct reactive fire.
Deciding that caution is the better part of valour Chris retreated 3rd platoon off the hill.

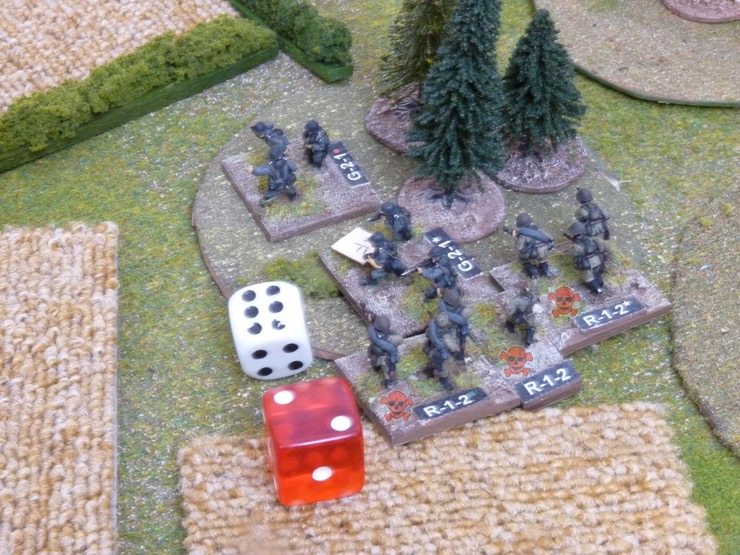
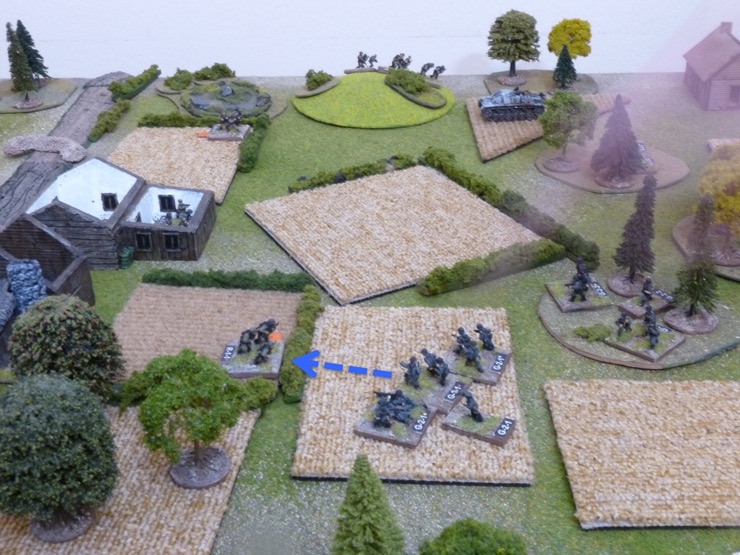
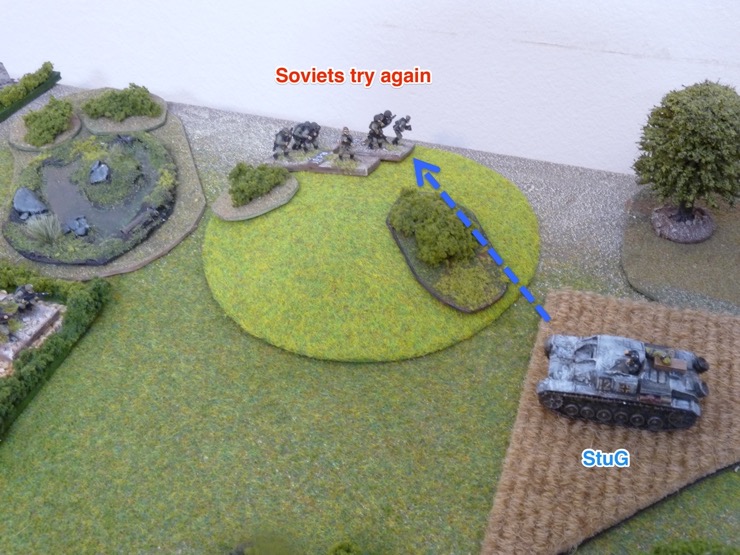
3rd platoon did a wide sweeping manoeuvre and ended up on the southern flank.

And of course, this being Chris, he attacked. Chris saw a mostly covered route to the StuG behind German lines.

German reactive fire caused a PIN but Chris was still going.

Chris brought forward more of 3rd platoon. And there was nothing that Jamie could do about it.
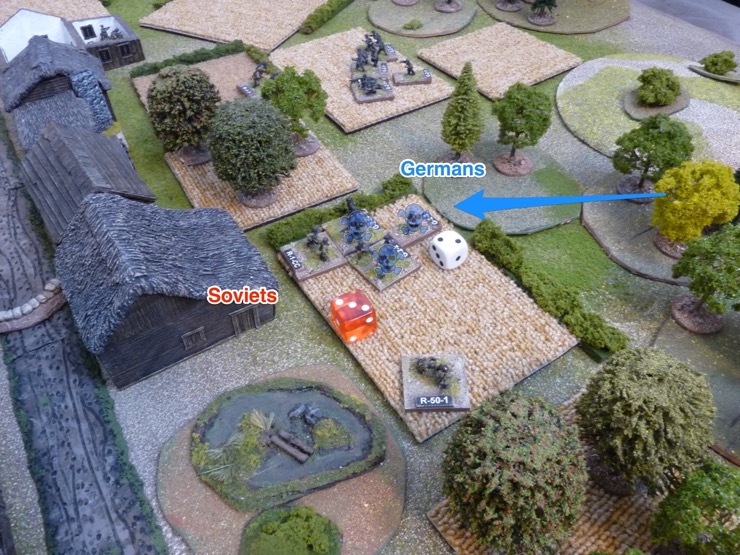
Urraah! The Russians were off. Target: the rear of the StuG.

Chris had numbers (we ignored our normal house rule of one squad when attacking armour) and the StuG was in terrain so didn’t get its +2. StuG burned.
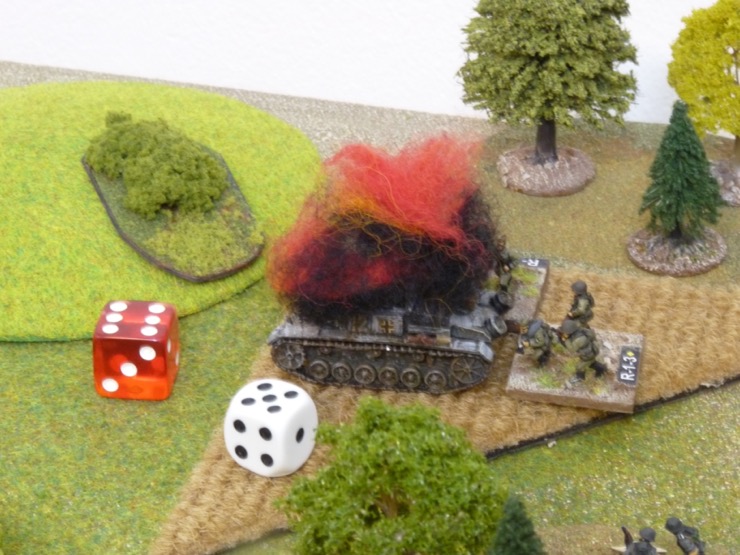
Chris had counter-attacked immediately and pinned Jamie on the base line. At the end of the game the Germans were still in the north-east corner where they started. They occupied 2 square feet of the table area, out of 16 square feet. Chris lost a lot of troops but had more troops to start with and found a way to get the StuG.
Game 2
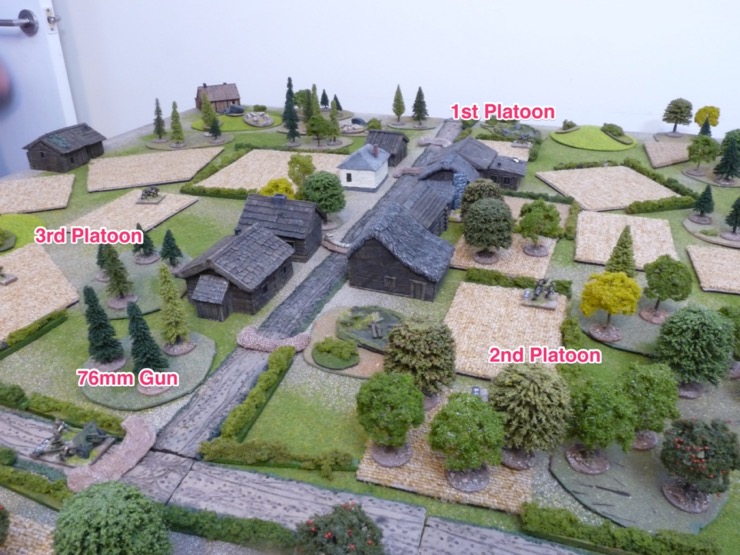
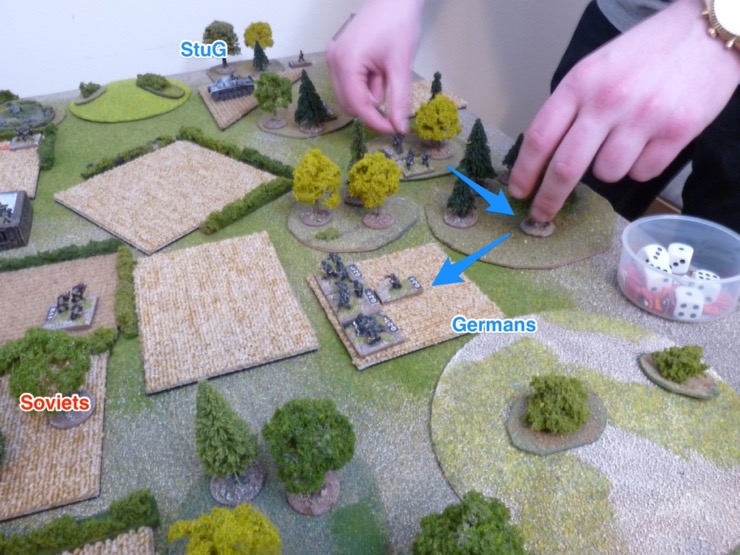
Jamie and Chris swapped sides. Jamie set up with all three platoons in a line across the middle of the table, where the village was. The mortar team was in the centre.

The Germans (Chris) arrived in the north-east again.

After that it was pretty much a re-play of the first game. Jamie boxed Chris into the north-east corner, lost troops, but used superior numbers to find an opening and kill the StuG.
Conclusions / Observations
Summary: nice looking table but played too much like chess.
After Crossfiregrad we were buzzing. After this scenario we left with a vague intellectual curiosity on how to make it a better game. “Bit like chess” was the most common refrain of the evening. Manoeuvring, sacrificing pawns, but eventually check-mate.
Two games that played out in almost identical fashion. In essence the Germans defended against marauding Allied tank killers. Firstly the Germans arrived. I can’t say “attacked” as they didn’t. In both games the Germans only got one initiative where they had much choice. As soon as the Allies got the initiative both games turned from “StuG smuggling” to “StuG hunting”. The Allies counter-attacked immediately and aggressively. They trapped the Germans on the base line in a small box. Then used numbers to wear the Germans down as they waited for an opening. Eventually the Allies can get a platoon at the StuG and “Bang!” After the fact we realised we could have played both games on a 4’x 2′ table with the Germans entering on a long edge. They never got more than 12 inches on table.
I think there are two reasons:
- Firstly, the dense terrain. I had, perhaps, taken Lloyd’s suggestion that the table be “fairly dense” too far. In fact I took a photo of the IanH battle report for this scenario and drew my map based on this – but my table is 2/3 the size. The end result was a terrain density that was about twice the Crossfire guidelines and my normal tables. This meant there were about 10 terrain features to move through on any particular route across the table (ignoring the road). A normal Crossfire table has about 5-6 terrain features across the table (which is Lloyd’s normal guideline). So, even without Allied intervention, it was going to take the StuG a long time to cross the table. Next time we would try with more normal terrain density for a Crossfire game.
- Secondly, the scenario gives the defenders no reason to defend. The goal is the StuG and in both games we played the allies immediately abandoned their positions and went after the StuG (“StuG Hunting”).
- The simplest way to encourage the defenders to defend is to give them a weaker, but hidden, force. Being hidden gives the defender an advantage that they squander if they voluntarily move. In terms of orders of battle .. maybe lose an Allied platoon but make them hidden. This might make the Allied line too thin on a 4′ wide table. For a bigger game lose an Allied rifle stand and add a German platoon, again with the Allies hidden.
- Alternatively add a scenario rule limiting when the Allies can move e.g. a stand can only move if any stand in the platoon has seen Germans during the game, or some such.
Next time I’ll also add some walls. We had plenty of hedges but no walls.
Finally, a few things that would have been nice in the original scenario. Nothing major but would have made a mid-game conversation unnecessary:
- Specify the quality of the Allied company commander. We assumed +2.
- Specify the command and control for both sides. We assumed German and British given Lloyd’s interests.
- Specify whether or not the StuG bogs in area features. The special rule mentions linear features (walls, hedges, fences) but not things like woods, orchards, rough, fields. We assumed it did not.
- Specify whether the fields are in/out-of season. We assumed in season.
This was great to see and read about, Steven. Thank you for posting. Beautiful table and miniatures.
Happy gaming!
Brett.
Thanks Brett. I’ll post your version of StuG Smuggling next week. 🙂