
Grant Floyd flew in from New Zealand to have a wargame, so Chris Harrod and I obliged with a game of my Crossfire at Position Four: The Village P Scenario. I picked this scenario because, after a prompt by Vaggelis, I recently drew the map and updated the victory conditions.
Summary: Great game that poses interesting choices for both sides. And despite being very, very unbalanced in force composition – the Germans are attacking into twice their numbers – the scenario seems balanced.
Introduction
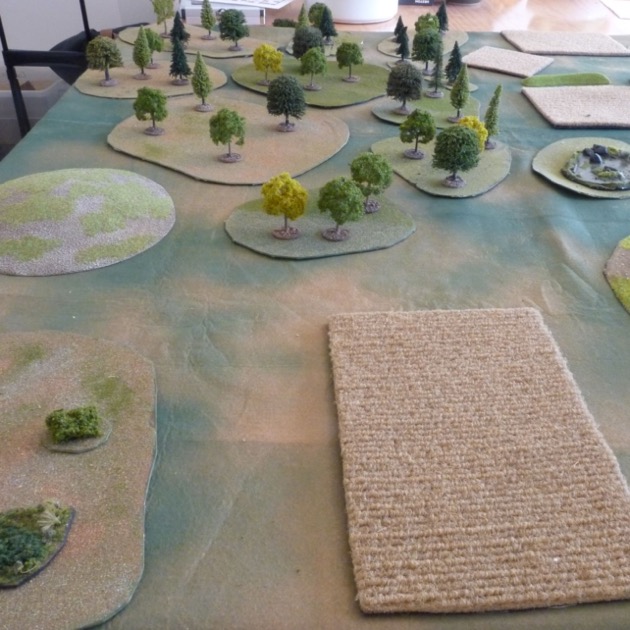
Grant was new to Crossfire so we spent a bit of time explaining the scenario and rules to him. The table has a normal mix of terrain: woods, fields (in season), rough, crests, hills (contour line with rough), a depression, buildings, and hedges.


The basic premise is that the German 87th infantry division is cut off along the road to the north. The division has pulled together a scratch force to break through from the south. Chris is the commander of this force – two companies of cooks and office clerks supported by three StuG IIIs.

Obviously Village P itself would be a focus of some action. If the relief force can capture the village they just need to take one other sector off the Russians to win the game.

Chris knew the sector north of the village was defended and that the rest of the Soviet force was in the woods to the north-west.

Plans
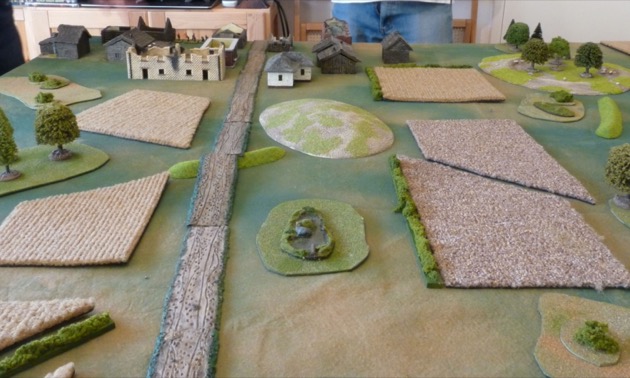
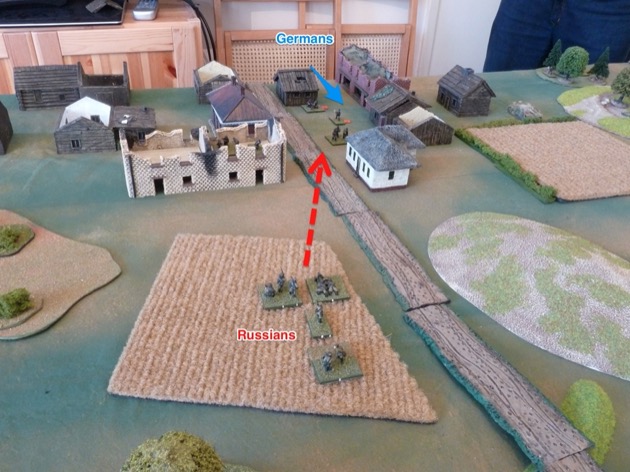
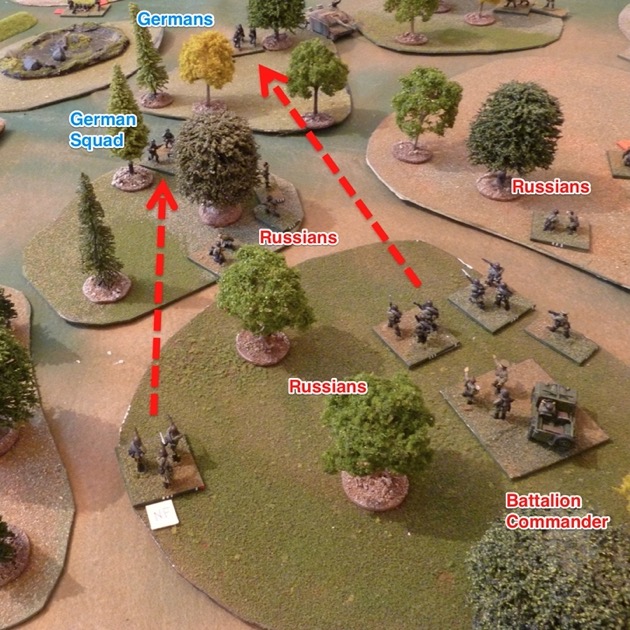
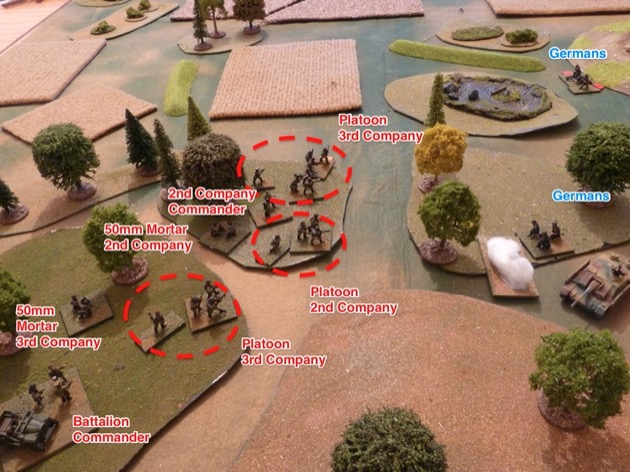
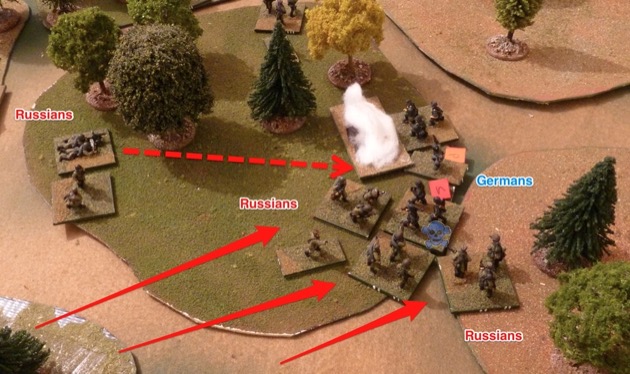
Grant and I shared responsibility for the Russian defenders. I had the Battalion Commander and five platoons in the woods. Grant had four platoons and the majority of heavy weapons (HMG, ATG, FOs) in the fields north of Village P. We adopted this deployment on the assumption that Chris would concentrate his forces, take the Village and attempt to take the north-eastern sector off Grant. All of the red circle areas, with the exception of the ATG, are Soviet platoons. Grant’s platoons all had HMGs attached.

[Notice the “mysterious wood” in the photo. We only discovered the “mysterious wood” later in the game. This was an extra woods feature that didn’t appear on the map. This extra feature had a bad impact on me as it meant the platoon I had on the base line didn’t have visibility into the woods where my front line platoons were located. Although I was inconvenienced we all felt this was a good simulation of the vagaries of war.]
Our trouble was that Chris knew we’d assume he’d attack up the road and made other plans. He was indeed intending to take the village however he was then going to contest the woods and ignore Grant.
Attack on Village P
Not surprisingly the Germans took the village fairly easily.
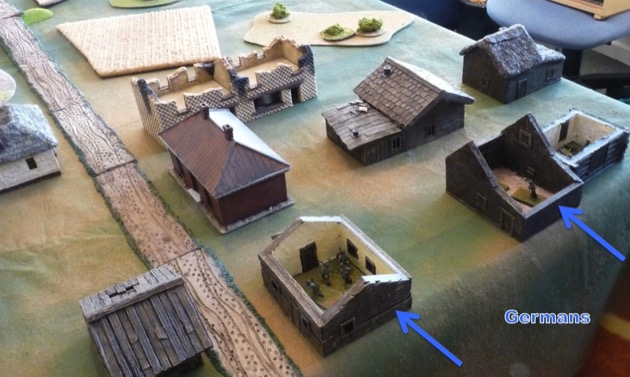
There wasn’t much the defenders could do, as they couldn’t even see the initial German advance.
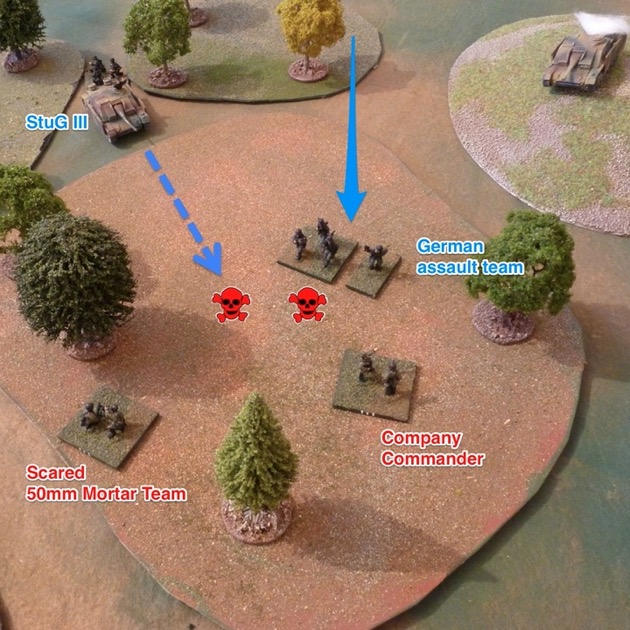
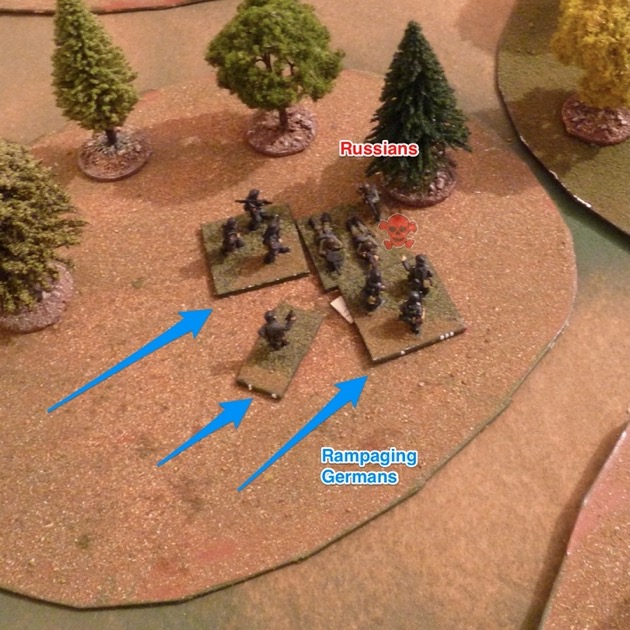
Then suddenly an opportunity opened up. A German platoon group moved across a small plaza in the village.

This area was in the line of fire of the front line of Soviets. The PC was pinned and two squads suppressed.

The first blood went to a Russian HMG and rifle squad entrenched in the field outside the village. [I put the entrenchment marker down after I took the photo.]
Not surprisingly Chris was worried about this and brought a StuG III to bear. As it happens this didn’t make a difference.

The Soviets in the field proceeded to mow down the German platoon in the building directly to their front then moved back to focus on the suppressed platoon in the little plaza. Quite a bloody harvest!

At that point things got quiet in and around the village. Not much happened there for the rest of the game. Chris didn’t try to come out. Grant didn’t try to go in. They both had a sector and they were content to keep what they had. Stalemate.
Attack on the woods
While the attack was unfolding in the village Chris had deployed his other company, and the StuGs in the south-western sector. He started by taking the depression. Which appealed to me given I’d made that depression feature the day before.
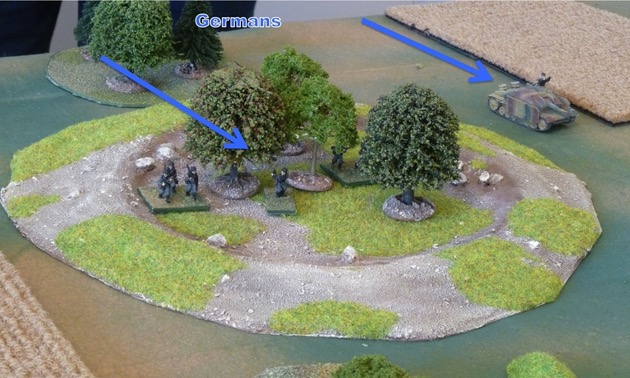
After the initial platoon more Germans, support troops, piled in.

And the three StuGs turned up in support.

Although that was a little surprising we we didn’t realise at the time was that Chris was intending to fight for the woods. He was busy taking the village and that is where we were all focussed. However, we got a hint of Chris’s intent when the last German platoon entered the table in the extreme south-west.

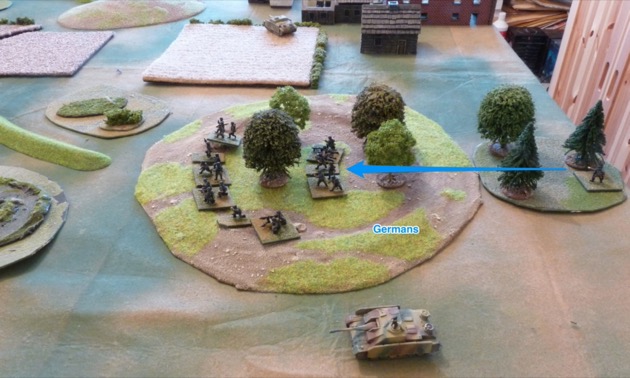
Chris started his south-western attack by lining the rim of the depression with a reinforced platoon.

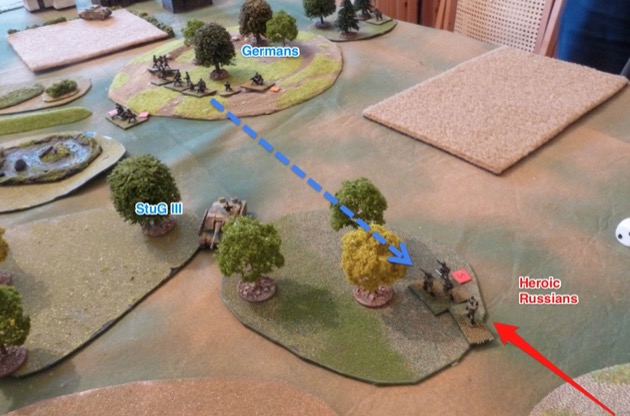
Chris then pushed ahead with the platoon on his far flank. That is when I revealed my first platoon. They suppressed the moving Germans in the open.

Once again, when his infantry were in trouble, Chris brought up a StuG to help out. Those things pack quite a punch in my house rules for Guns and Machine Guns on Vehicles – 2 x 4d6 (3d6 into cover) as a fire group. Ouch.

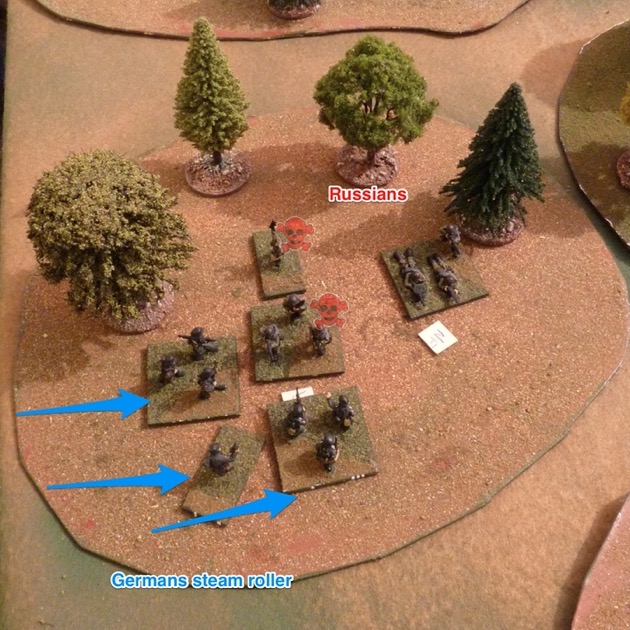
With things a bit stalled on his western flank Chris brought another platoon into the depression to try his luck there.
But again he got caught crossing the open ground before the wood.

However, once I was revealed Chris could bring a lot of fire power to bear. In this case he basically took out a platoon.

The survivors of the mauled platoon pulled back.

Chris then pushed one of his StuGs into the woods. Strictly speaking this was into the unwooded avenue between Crossfire woods features. Chris avoided the actual woods features to avoid getting bogged. However, this gave him enough access to cause my infantry quite a lot of grief.

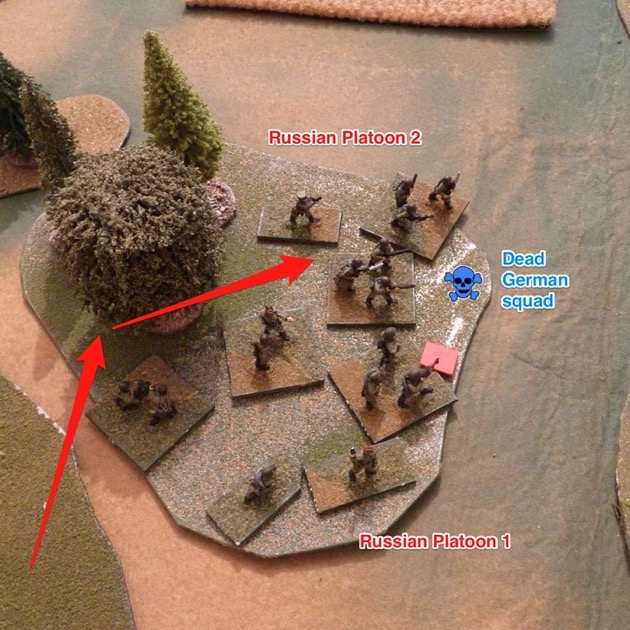
I was getting ground down so I had to do something, something dramatic. And in Crossfire “doing something dramatic” means close assaults. A bit of smoke gave me a covered route to some of Chris’s suppressed squads. Urraah! Dead Germans.
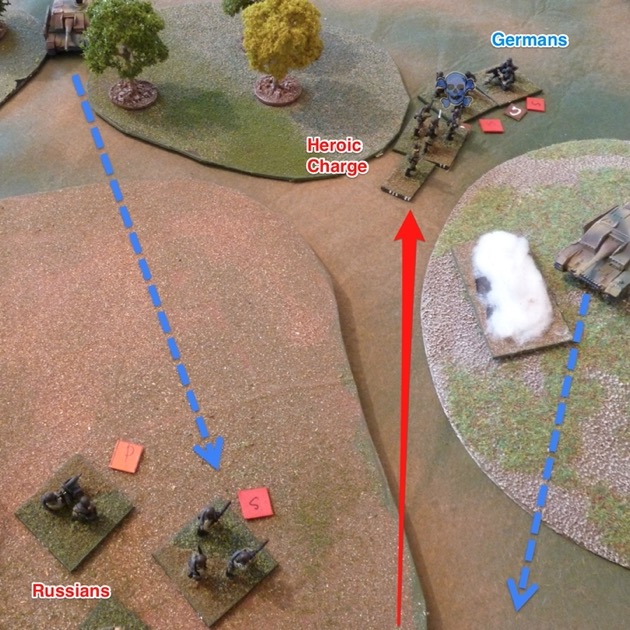
Then more dead Germans.
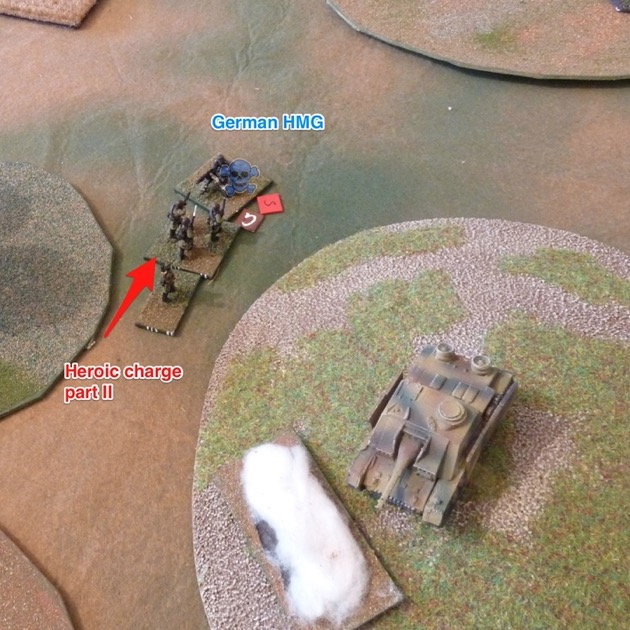
And finally a dead StuG. The best Russian anti-tank weapon is, in fact, Ivan himself.

At that point the luck of my heroic Russian squad ran out. A single distant rifle squad managed to suppress the squad in reactive fire.
Chris pushed forward his own attack. We found ourselves with a German squad in a woods feature with a suppressed Russian squad and some supporting assets. Looked bad for me, so I reveal the platoon behind to lend a hand. As often happened in this game my reserves couldn’t bring sufficient fire to bear because of the stragglers from the mauled platoons in front of them. In this case all I could do was get a single rifle stand to have line of fire on the offending German. That was just enough to cause a stalemate in that feature.
Chris took his revenge on my heroic StuG-killing Soviets. Ah, well.

However, for the fourth time in the game Chris didn’t spot a reactive fire opportunity and got one of his squads caught in the open. This time the shooter was a Russian HMG.
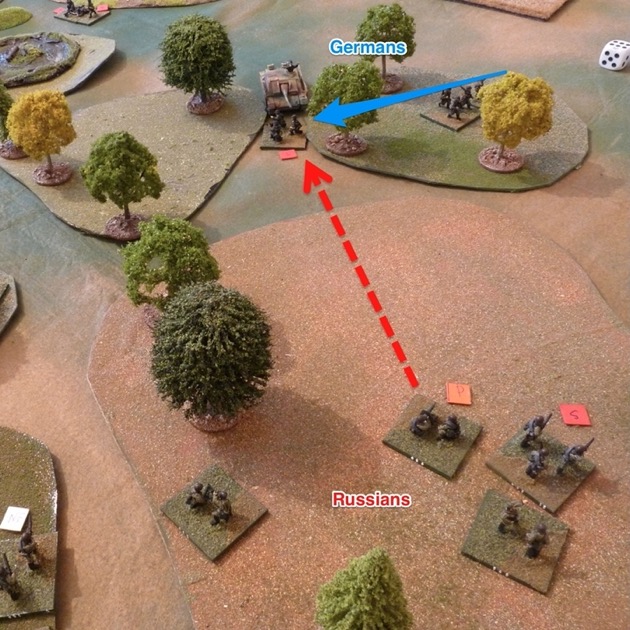
Chris quickly got his revenge. He brought forward one of his StuGs to suppress the HMG then sent a squad in for the kill. The Germans took out the HMG and the suppressed rifle squad next to it.
It, of course, wasn’t all one sided and I took out the German squad that had been causing me grief earlier.
All this action left my force in rather a jumble. I had bits of two companies all mixed up. And several of my platoons were down to a single squad.
Grant started to play a part in the battle again when he revealed the platoon on the hill outside Village P. This position had long fields of fire and he could influence the battle on the edge of the woods. Chris tried to smoke him off and brought a StuG up to threaten hill but Grant seemed impervious.

It was then that I experience the No Fire from hell. An entire platoon went No Fire and Chris charged in a platoon. My entire unit evaporated in quick succession. Ouch!

But again it was a bit tit-for-tat and I took out his platoon in turn.

Chris’s no longer believed he had sufficient force to take the victory so he conceded. Kind of convenient as Grant had to leave at that point anyway.
Conclusions and Observations
A great game. I hope Grant enjoyed it (and his flight home afterwards). Chris and I certainly did.
We like the fact the scenario gives both sides interesting choices and decisions:
- Where should the Russians defend and with what?
- Should the Russians go on the defensive or be aggressive and try to take the village?
- Where should the Germans attack and with what?
Grant and I went for a conventional deployment. We assumed Chris would attack through the village and up the road. But he didn’t. Chris split his forces, took the village and with the remaining force tried to take the woods. He failed but it was a close thing.
The orders of battle mean the Russians outnumber the German attackers by two to one, are the same morale (Regular), and start hidden. In a normal game that would be really bad for the Germans. Play testing revealed more balance that there looked on the surface. A few factors balanced up the scenario despite the vast disparity in numbers:
- Chris easily captured Village P so he just needed one other sector to win
- The deployment rules split our Russians so we couldn’t bring our full numbers to bear on Chris’s attacking force.
- My Russians in the woods were quite congested so often didn’t get a good shot – there were always stragglers from decimated platoons in front of the fresh reserves and the mauled platoons only had a single squad which was often suppressed anyway
- Chris had three StuGs and in my Balagan house rules they are potent portable fire power
- Our Russians didn’t have effective anti-tank weapons, just a single 45mm ATG and some anti-tank rifles – none of which took a shot in our game
- Russian PCs can’t rally and this had a massive effect on the game. Chris used his good German officers to keep his men moving. Grant and I struggled to rally our guys and lost the initiative at critical moments in failed attempts. Damn Stalin for the military purges that decimated the officer ranks.
The wooded area was fairly open. The assumption in Crossfire is that the avenues between woods features are not empty but are very lightly wooded – so lightly wooded that armour is not inconvenienced. If I wanted to make the wooded area more armour unfriendly in this scenario I would butt the woods features up against each other to prevent the armour getting in without the risk of bogging down. We discussed this and didn’t see the need to do that.
On balance I wouldn’t change the scenario.
One final thing. An innovation in this battle report are the little skulls I used in the photos. They show where stands were killed or are about to be killed. I hope it clarifies the narrative given sometimes the affected stand is in the photo and sometimes we took the photo after killed stands were already removed.
Other material at Position Four
Don’t forget to have a look at the related scenarios:
If you want to play the whole battle then have a look at my Position Four Megablitz Scenario.
Steven
Great battle report – makes me wish I had Russians so I could do it! WAIT A MINUTE! I have Chinese and N. Koreans which have the same command problems as the Russians. I may try this as a Korean War game. But I want to do the SU 76i scenario re-play first.
The overall shot of the battlefield at the beginning of the piece was awesome. How high up did you have to get your camera to accomplish that? I have been trying to do this for some time with little success, as I like the idea of setting up the table and giving the side commanders photos to the terrain rather than a map for planning.
Dick Bryant
“No sceario survives first contact with a wargamer!”
A Korean version seems a good fit.
I took the first photo standing next to the table. I took the second photo – the one I think you mean – in the same spot but standing on a chair and holding the camera as high as I could but retaining visibility of the display at that back. It wasn’t taken from such a great height.