John McLennan turned up, with his almost finished British, and wanted a bash. I didn’t have a prepared Crossfire scenario so we decided upon the Hit the Dirt scenario “Reconnaissance Before Pontecorvo” (p. 19). The gist of the scenario is a Canadian company must try to identify the positions of a reduced company of entrenched Germans, without taking undue losses themselves.
Lloydian Tweaks
We used some of the Hit the Dirt: Scenario specific errata and clarifications published on Nikolas Lloyd’s site and our own interpretation of these. In particular:
- Germans deployed outside LOS of the Eastern table edge (so the Canadians could come on table unmolested).
- “Emplacement” for victory points (VP) meant trench or bunker.
Ooops
You will, however, have to forgive us for a few faux pas:
- My Germans/Spanish are early/mid war and not 1944.
- John’s British are NW Europe not Italy.
- John hadn’t finished basing his British, so you’ll see some unpainted edges, and no flock.
- We didn’t have a copy of the map for me to draw my hidden deployment on, so we used Numbered Terrain Markers with a Touch of Flock and I scribbled down who was where. You’ll see the markers in the photos that follow.
Set Up and Plans
Setting: Pontecorvo, Italy; 19 May 1944
The first thing to mention about set up was that the map for this scenario was difficult to reproduce on the table. The map has many tiny features, some down to 2″ across. These features are illegal in Crossfire as you are meant to be able to fit 4-6 stands, and you can only fit 1-2 in these tiny ones. More importantly, we didn’t have such tiny terrain features available, so we used bigger ones (starting at 4″ across) and adlibbed.
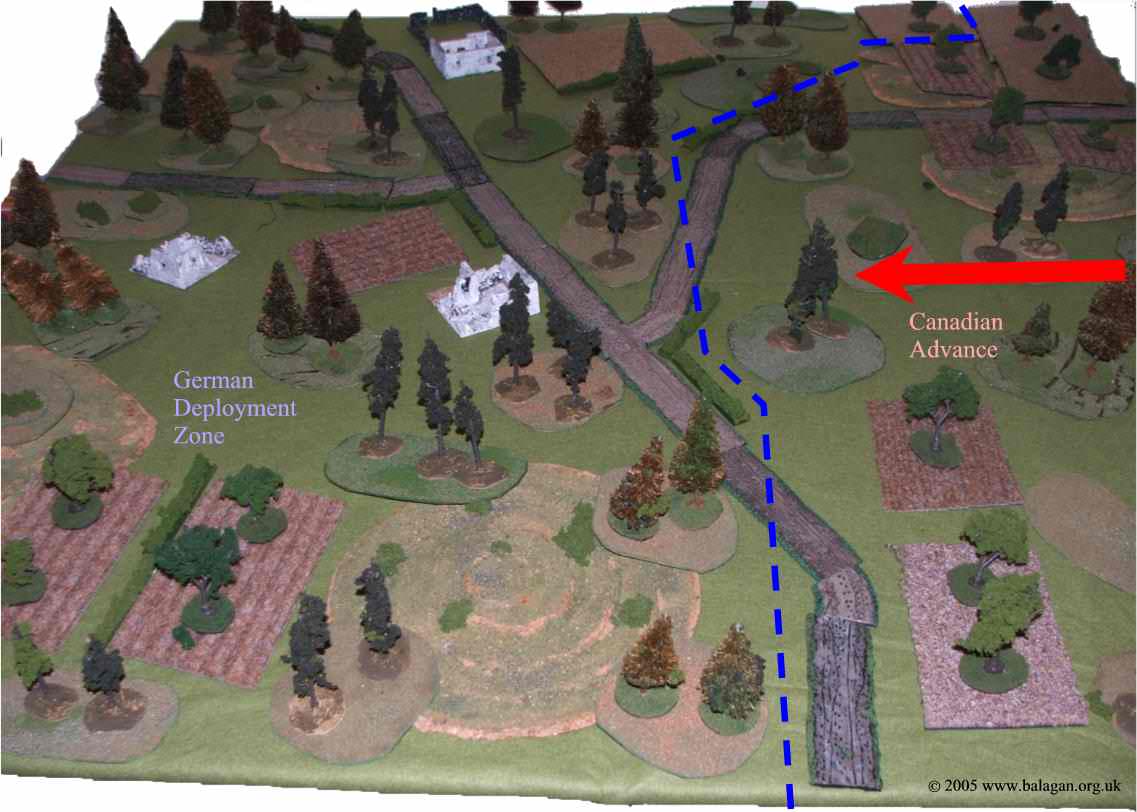
Table from the South
In terms of deployment I, as the Germans, set up hidden outside LOS of the eastern table edge. So, anywhere to the left of the dashed blue line. I had a reduced company, a bunker, minefield and three wire sections. As it happens I deployed entirely in the south-western corner of the table, within the bounds of the roadway.
John’s Canadians, with a full strength company, then came on via the Eastern table edge.
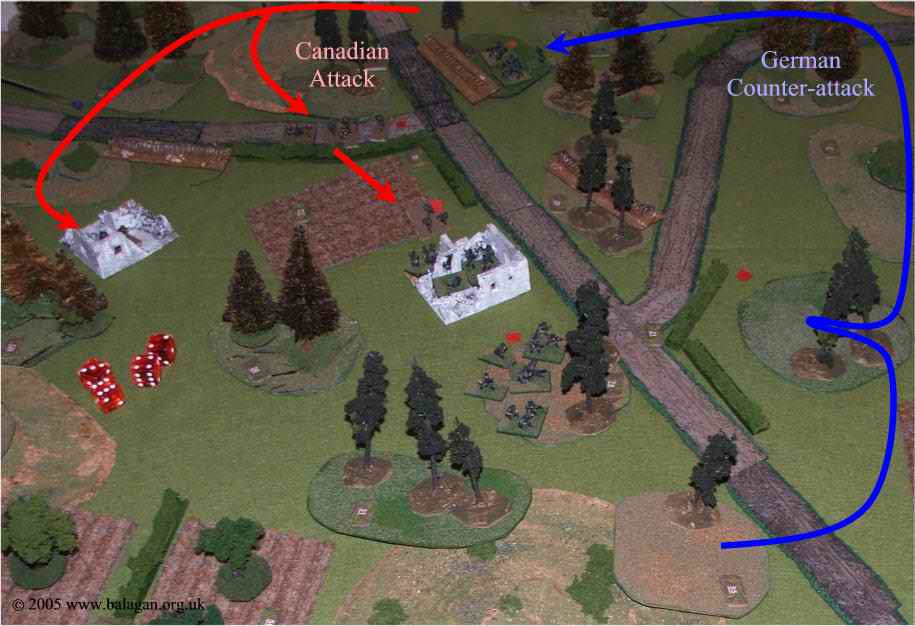
Canadian Attack in the Centre
John advanced a platoon in the north (top of photo), another in the centre, and his third in the south (bottom of photo). He kept his company level assets in between the north and centre platoons, but, being on hills, with good visibility forward.

Canadians Advance
John advanced cautiously using smoke to shield the advance of the centre platoon, and using a lot of recon by fire (RBF) to probe for my defences. This took up a lot of time and due to some unfavourable dice for John, the moving clock moved rapidly.
John’s centre platoon was soon blocked by wire it encountered in the woods next to the centre road junction. The wire had been hidden, and although John successfully RBFed the feature, I didn’t reveal the wire as it wasn’t a stand, which meant he discovered it when he moved in. In hindsight, considering RBF includes general spotting ability, I should have declared the wire during the RBF.
Wired
John’s central platoon quickly retreated from the wire to a defensive position further east, and subsequently played little part in the rest of the game.
Watching
Canadian Attack in the South
John then pushed forward his southern platoon. To counter them I revealed a rifle squad and attached HMG, and tried reactive fire … oops, NO FIRE with both.
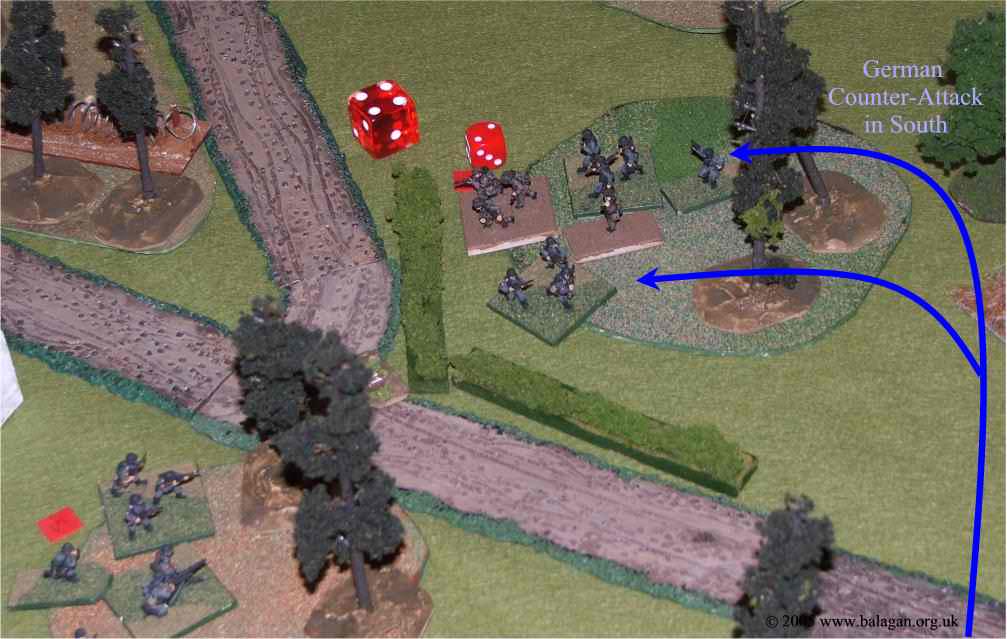
John, thinking “assault” rather than “recce”, saw an opportunity and went for it. He sent his platoon into close combat, or so he thought. The plan looked like this photo, but …
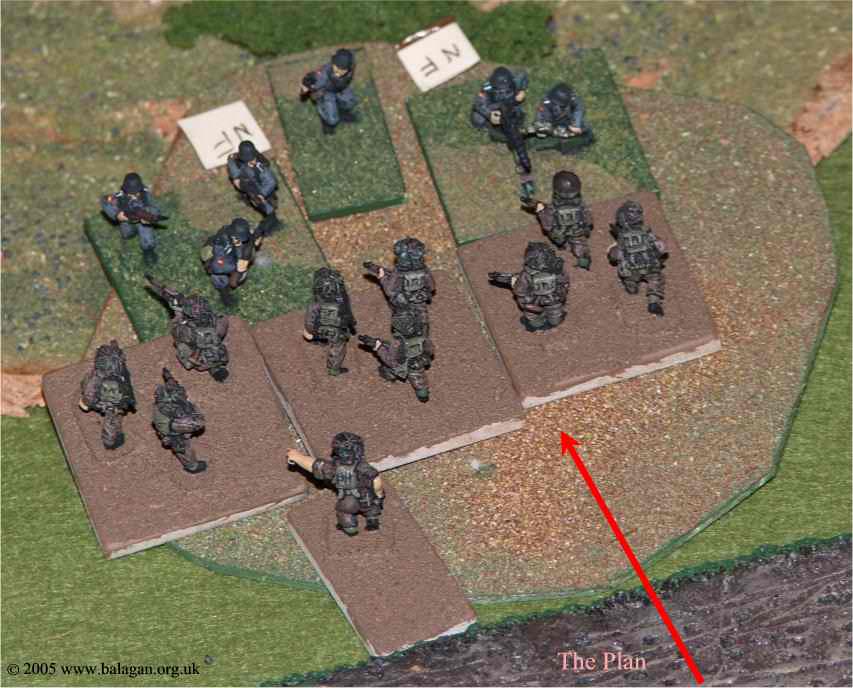
Good Idea?
Unfortunately for John, my centre platoon was right next door, and as the Canadians rushed across open ground my HMG and two rifle squads opened up to their north. Mayhem ensued. The photo is actually part way through my reactive fire, two stands pinned already, and the last guys – shown next to my stands – actually died immediately.
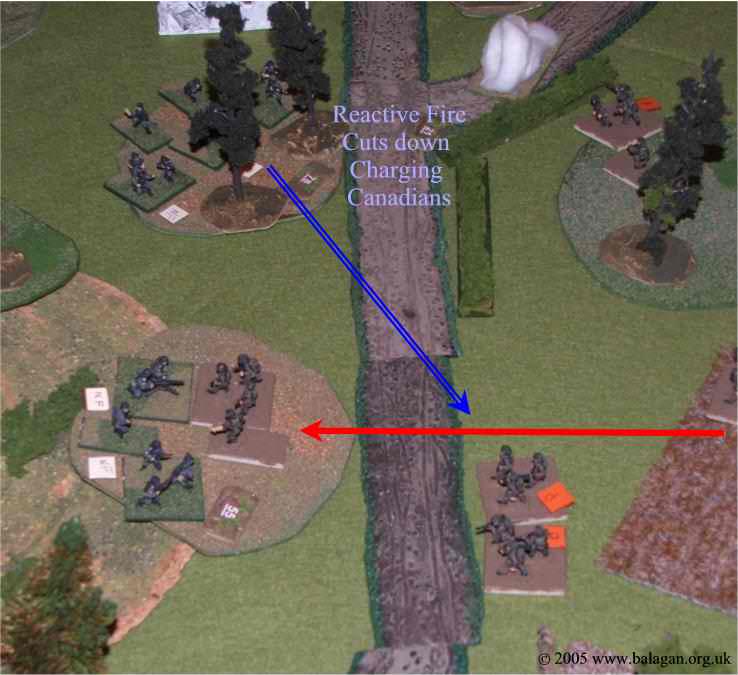
Or not a good idea
The two pinned stands were later picked off in the open.
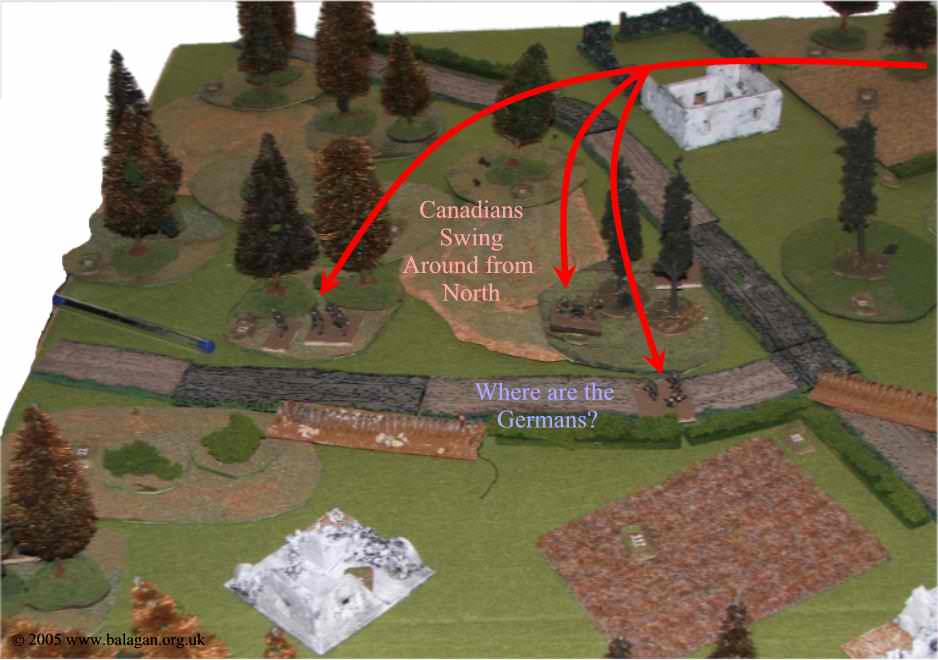
Canadian Attack in the North
With the advance in the centre stalled, and the attack in the south mauled, John pushed forward in the north. Once again relying on RBF and losing time as a result.

Cautious advance
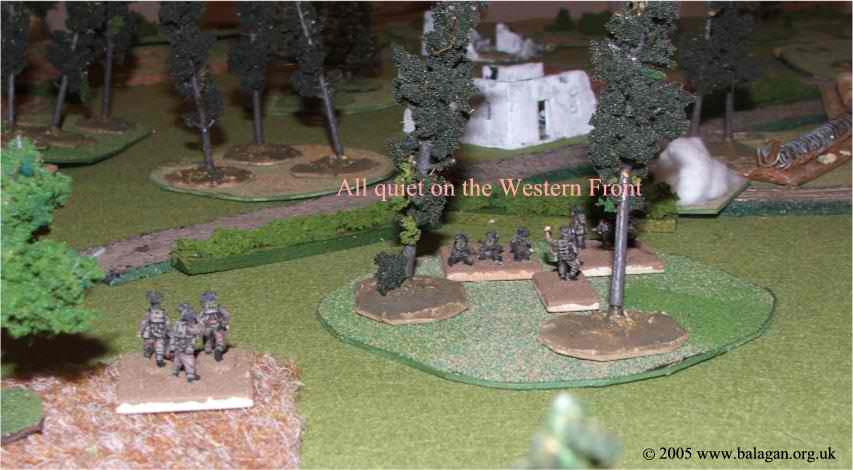
Unknown to him, I had nothing in this sector, but it took him a long time to discover this.

Cautious advance
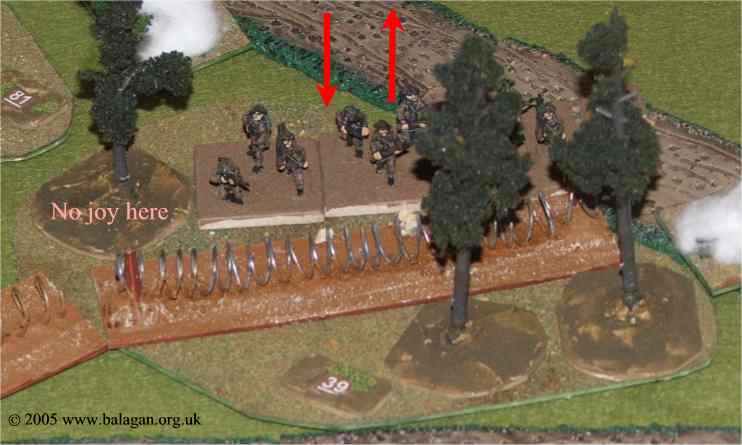
With time running out (it was 1100 hours and the game ended at 1200) John abandoned RBF and sent a scout squad ahead. This guy quickly discovered I didn’t have any defences in the north. With confidence returning John advanced to the road where he found my next section of wire – between the hedge and the western most wood.
Last Minute Dash
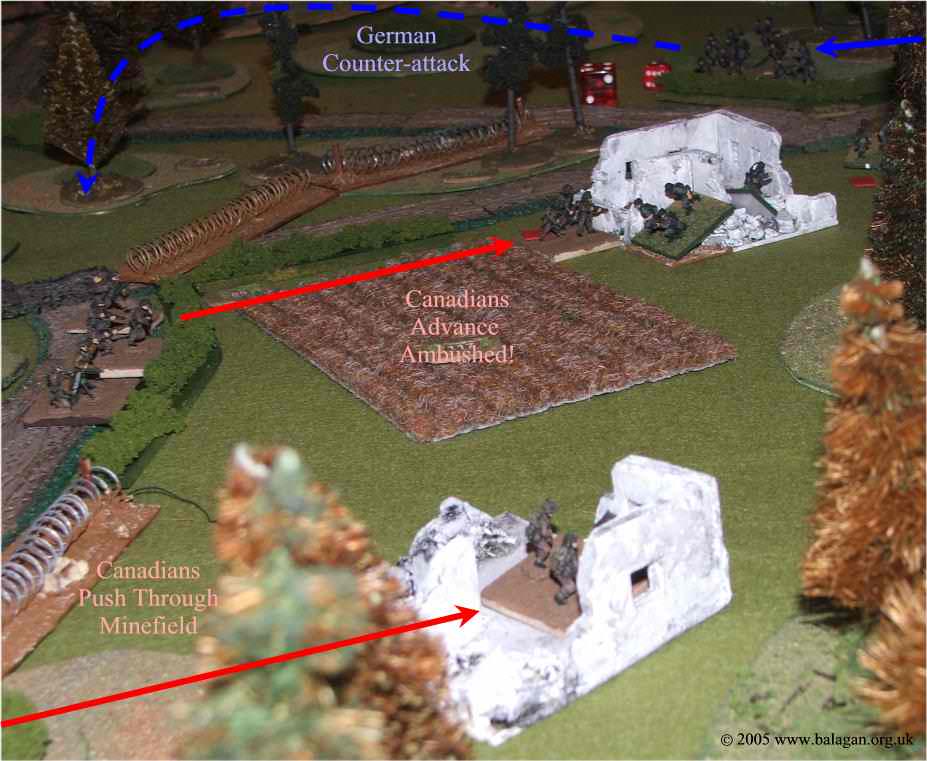
A Canadian squad advanced through the western most wood, only to discover it was mined!! Luckily they took no casualties and pushed onto the house on the far side.
Limit
At this point I was frantically checking my notes to see where my third platoon was hidden. I had thought it was in this house, but apparently not ….
Eventually I found them – they were in the house near the centre road junction. It turned out I’d deployed all three platoons in a line in adjacent terrain features!! I’m still puzzled by how I managed to do that.
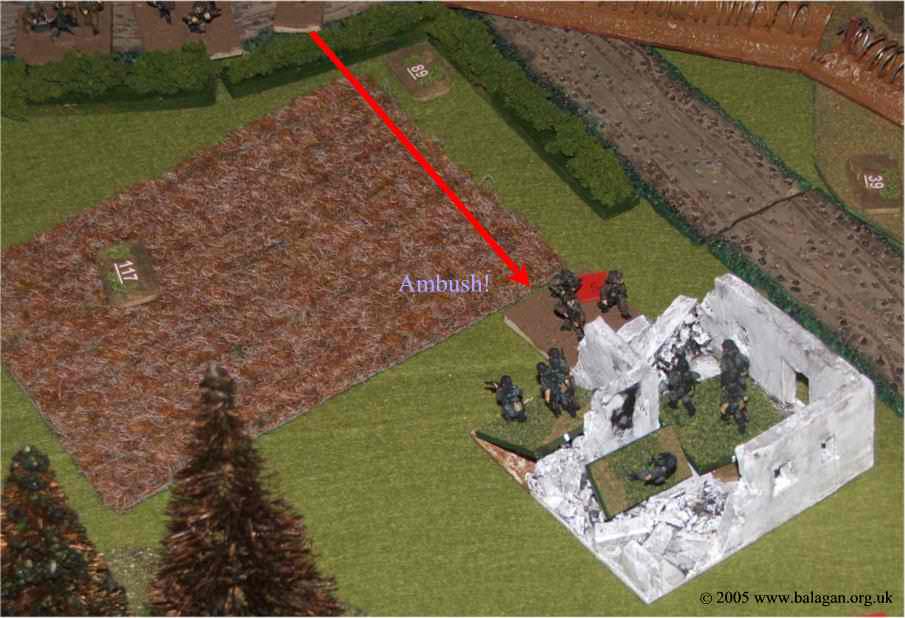
Ambush
Anyway, I didn’t get to ambush John’s western scout, but I did get the guy who came across the hedge and field in the centre and then tried to enter my (heavily defended) house. Suppressed!
German Counter-attack
Now, with only 30 min to go on the moving clock, I decided it was time to counter-attack. The first target were the Canadian dribs and drabs holding the centre, then the company assets in reserve. All easy game for my southern platoon.
German counter-attack
This platoon then moved on to threaten the flank of John’s remaining troops in the north. Effectively the Canadians were caught in the open with no covered path to get them off table.
Caught
Conclusions
It was a decisive German victory. The main problem for John had been mind set – he started thinking attack-defence and it took a long time for him to start thinking reconnaissance. The charge across open ground by the Canadian southern platoon was the extreme example of this. Although my NO FIRE platoon was tempting, it still wasn’t worth the risk as John still hadn’t explored other parts of the table. On the other hand when he was in scouting mode, he relied overly on RBF; although this is safe, it is slow, and he found time running out.
All that aside we decided there were some oddities in the victory conditions, and we’d play it a bit differently next time. In particular there was no incentive for the German player to use or man his emplacements (bunker and entrenchments). I put them at the back, out of the way, so they were hard to find. They were also unmanned, so technically weren’t worth any victory points anyway. This behaviour, albeit sensible given the victory conditions, led to a couple of conclusions about how to play it next time:
- We decided the Germans must be obliged to man all emplacements (bunker and entrenchments) at deployment. This would encourage the German to place them forward and/or reduce the number of stands available to block the approaches to them.
- The Canadian should get points for spotting/entering all buildings, bunkers, trenches, wire, and mines (Lloyd also recommended something similar).
- The Canadians should require more points to win. This is to compensate for the fact there are more objectives to spot.
- Lloyd also points out that the Canadians don’t have to push hard to win, as they can just leave the table to get most of their VP. We’d concur. We actually played the game twice; in the first game John came on and left again immediately. This gave him 16 VP and a win. Bit silly really. We’d suggest they either need more VP to win, or their “leaving” VP are only allowed if they get some “observation” or “killing” VP first.
- Lastly, it might be worth giving VP for spotting German stands – not sure about this.
Despite the problems it was an interesting game and we liked the concept of a recon mission.
I playtested this scenario before it went into the book. You can definitely game the system as pointed out and that needs correcting. I think John and Bill just never thought of the Canadian player not attempting the recon first. I will need to read the scenario rules again.