
Brett Simpson developed an idea of a friend of mine into a Crossfire scenario called “Where is the Fuel?”. Brett sent through the scenario and associated battle report for the play test.
Where is the Fuel – the Scenario
The scenario begins following a German scouting mission in which their reconnaissance vehicle (an Sd.Kfz222) was targeted and destroyed by a 6-pounder Anti Tank Gun.
The German Objectives
The Main Objective is to capture the British HQ and Fuel Dump located in the north of the Village (hold for 5 friendly initiatives). This will become a staging point for a much larger German force who will then use the Village as their HQ and refuel their vehicles using the stolen English fuel.
Minor Objectives are the two British ATGs and the Lone Hill being used as a base for the British 3-inch Mortar (the latter is being used for fire support for a battle raging OT to the east).
The British Objectives
Hold the Village and the Lone Hill, and give the Germans Lead and Hell! Vanquishing more than half the German force will result in an Allied Victory.
The Table
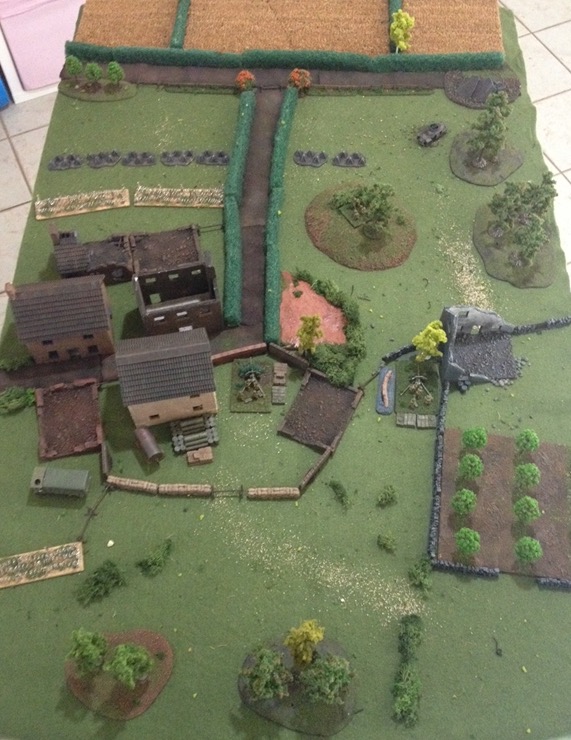
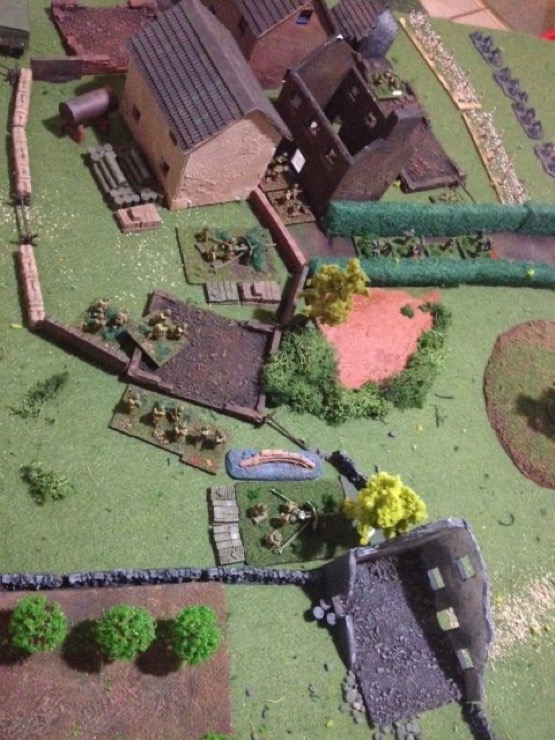
The first photo is a view of the table from the German (southern) end.

The second photo is a view of the table from the British (northern) end. Note the location of the British HQ (beige building) and fuel dump, and the position of the 6-pounder guns and 3-inch mortar on the Lone Hill. The wrecked Sd.Kfz 222 can also be seen to the southwest of both photos. In our scenario, this acted as a sight block.
British – Defenders
British Order of Battle – Initial
- Reinforced Rifle Company
- 1 x CC (+2)
- 1 x Rifle Platoon: PC (+2), 3 x Rifle Squads, 1 x PIAT team
- 2 x Rifle Platoons: PC (+1), 3 x Rifle Squads, 1 x PIAT team
- 1 x HMG
- 1 x 2″ Mortar (12 FM)
- 1 x 3″ Mortar with FO (12 FM)
- 2 x 6 Pounder ATG
- 3 x Barbed Wire Stands
- 7 x Dragon’s Teeth Stands
British Order of Battle – Reinforcements
- 2 x Sherman 75mm
German – Attackers
German Order of Battle – Initial
- Reinforced Rifle Company
- 1 x CC (+2)
- 1 x Rifle Platoon: PC (+2), 3 x Rifle Squads
- 2 x Rifle Platoons: PC (+1), 3 x Rifle Squads
- 1 x Panzerschrek Team
- 1 x Panzerfäuste Team
- 2 x HMG
- 1 x FO for off table 81mm Mortar (12 FM)
- 1 x FO for off table 120mm Mortar (12 FM)
- 1 x Assault Engineer Section
- 1 x Panzer IV Ausf G
- 1 x Panzer III Ausf J
German Order of Battle – Reinforcements
- 1 x Armoured Infantry Platoon: PC (+1), 3 x Rifle Squads, Sd.Kfz 251
Scenario Special Rules
1) IAT weapons were based separately. British IATs were attached to their respective platoons, but the German IATs operated independently.
2) The British 3-inch mortar could fire either directly via the LOS of its crew, or indirectly using its FO team. Either way, only one attack was allowed per initiative. The British 2-inch mortar fires directly only. Failed direct fire mortar hits (HE or smoke) result in loss of initiative. Indirect mortar fire does not (as per the standard rules).
3) German vehicles could not pass through bocage or tank traps, but sections could be removed by engineers on a roll of 4+. Failure to do so when attempted results in loss of initiative.
4) The Sherman tanks were equipped with hedgerow cutters, and could plough their way through the bocage on a roll of 5+. Failure to do so when attempted results in the loss of initiative.
5) Reinforcements may be rolled for once per friendly initiative until they arrive. A result of “6” indicates they arrive (the Shermans were each rolled for separately). A second die roll determined where they arrive from: 1-2 is left flank. 3-4 is the owning player’s table edge. 5-6 is right flank.
6) Mortars were given separate FM for HE and for Smoke. Red tokens for HE. Blue for Smoke

Where is the Fuel – Battle Report
Deployment
British 1st Platoon positioned to the north of the Orchard.

British 2nd Platoon and 2-inch mortar positioned in the ruined Orchard Building.

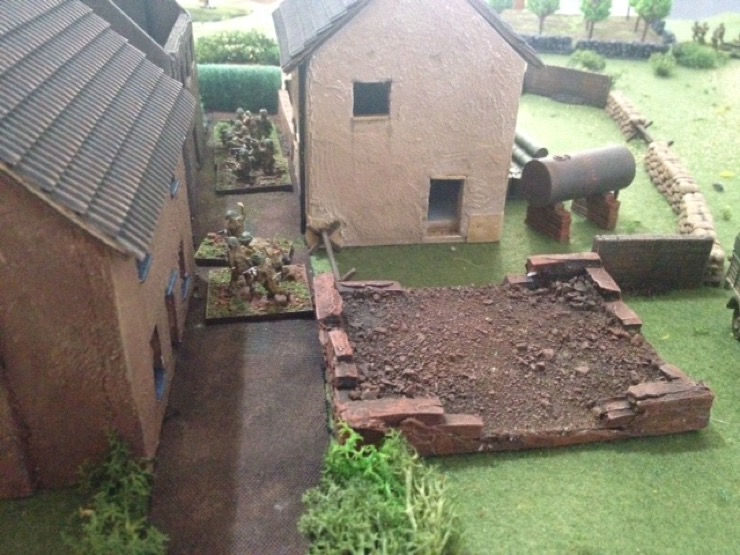
British 3rd Platoon positioned in the Village. The CC is positioned in the HQ Building directly behind them. The Vicker’s MG and FO for the 3-inch mortar are positioned in the ruined buildings directly to the front.
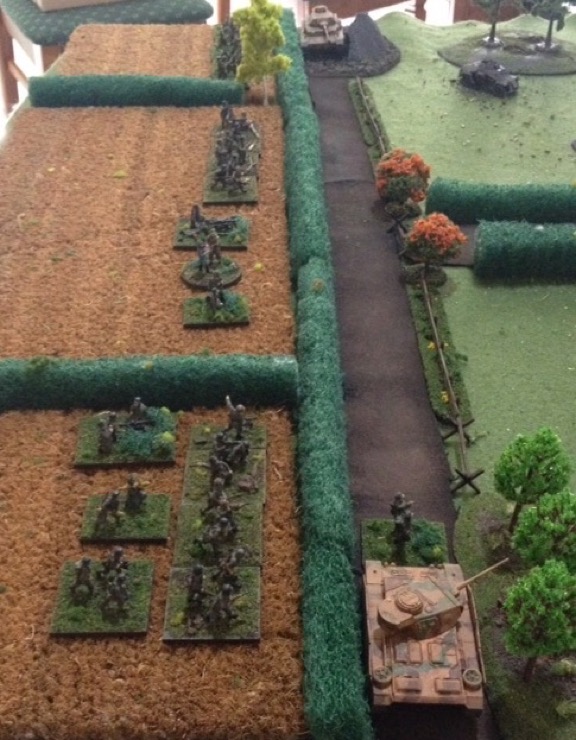
German deployment in the Field and behind cover on the Farmer’s Road.
Eyes in the Woods
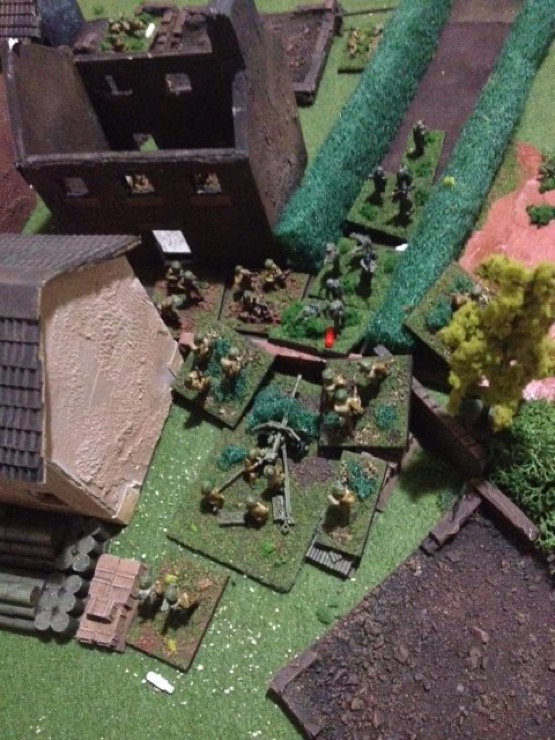
The Germans began with the initiative, mobilising the FO for their 120mm mortar into the glade northeast of the Farmer’s Road. This was an unfortunate decision as they were immediately spotted and killed by a Vicker’s Crew housed in nearby ruins.
The FO for the 120mm Mortar enters the Glade.

The Vicker’s Crew open up: “Two sixes and a five!” Instant kill!

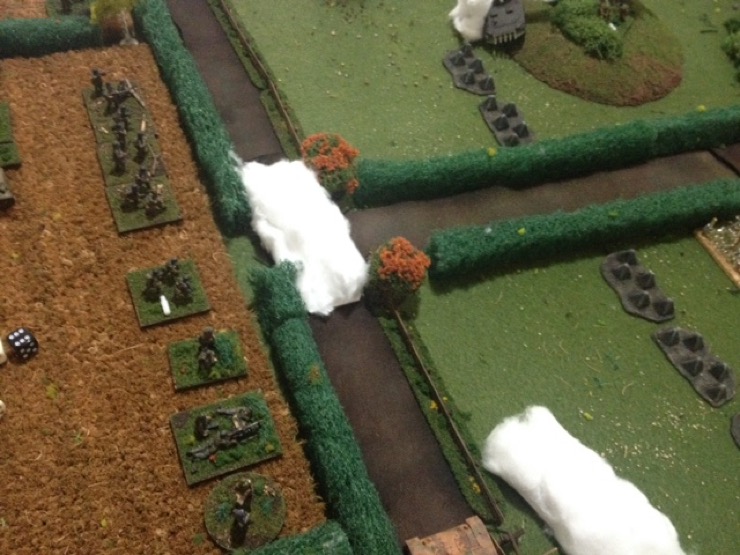
Having won the initiative, the British mobilised their 1st Platoon from behind the Orchard and into the section of wood nearest the burned-out Sd.Kfz 222. A failed pot-shot at the Panzer IV lurking behind the nearby boulders cost them the initiative.
The Panzer opened up on the mortar team on Lone Hill, but only achieved a Pin result.
Miraculously, both Shermans suddenly appeared on the table, and although their deployment was randomly determined, they both entered from the Western Wood. This quickly resulted in a tank battle between Sherman and Panzer IV…
British 1st Platoon enters the Woods.
At this point, the German Armoured Infantry arrived — Veteran Panzer Lehr complete with Sd.Kfz 251. They pulled up behind the main German force, and Engineers were immediately called in to blast a path through the bocage using explosives so that the 251 could pass.
Arrival of the Armoured Infantry.

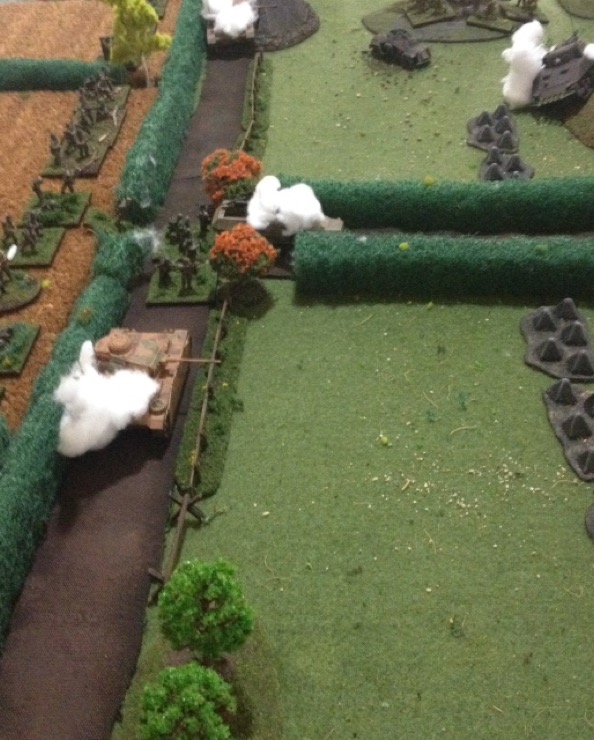
The Tank Battle continued, with the Panzer destroying one of the Shermans. Meanwhile, the Engineers succeeded in demolishing the bocage and 81mm smoke was called in to obscure the 6-pounder crew’s view of the Farmer’s Road.
A failed attempt by the Panzer IV to damage to the 3-inch mortar crew cost the Germans the initiative.
A direct hit on the Sherman.

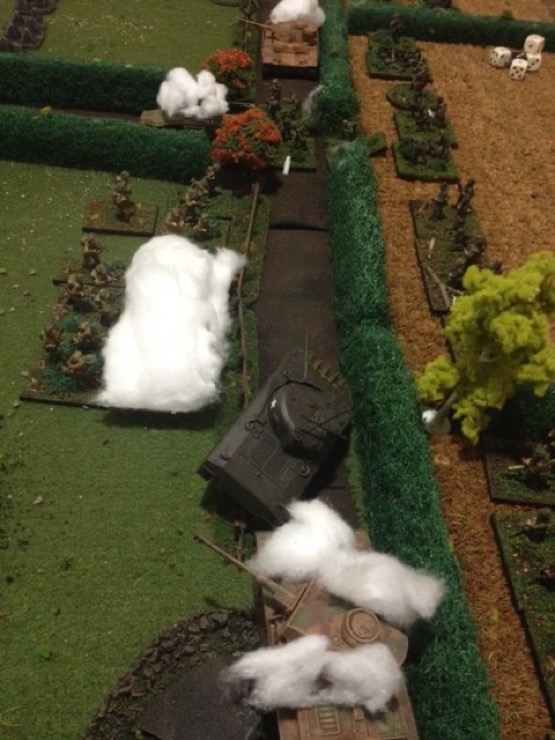
The Engineers blast a hole through the bocage.

81mm mortar smoke (centre) and 3-inch mortar smoke (bottom right).
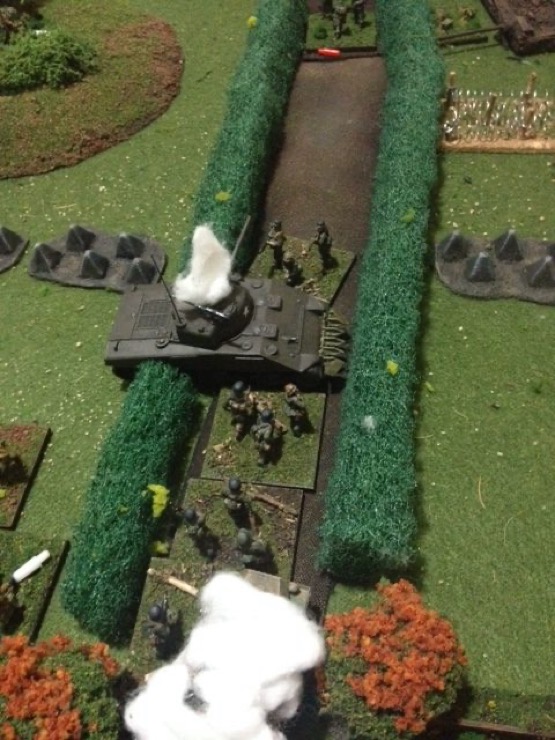
The second Sherman moved in behind the Panzer IV and shot a hole lengthways through its hull, but a failed PIAT shot at the Panzer III on the other side of the battlefield resulted in loss of initiative for the British.
Sherman out-flanks Panzer IV.

The Panzer III opened up on the Vicker’s crew, resulting in a Pin.
The FO for the 3-inch mortar called in smoke to obscure the Panzer’s LOS. A failed second shot by the PIAT team shifting the initiative.
The Panzer moved forward beyond the smoke and opened up on the Vicker’s crew once more, but the British held tight.
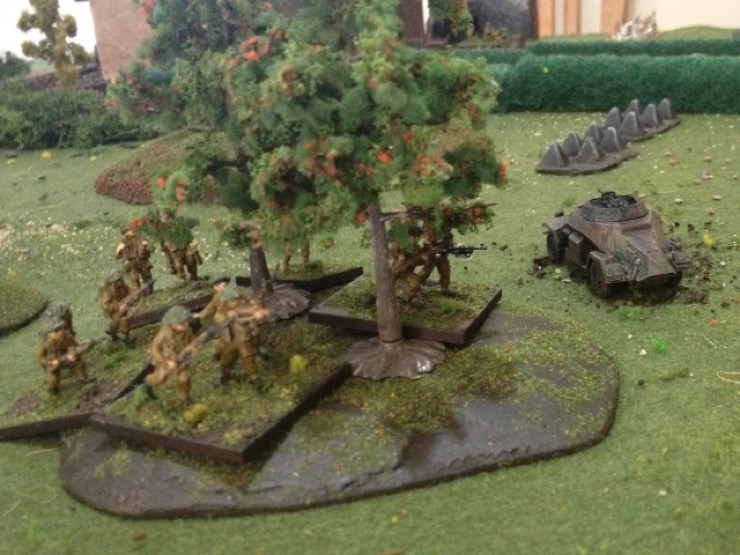
Third time was the charm for the PIAT team, with a flank attack disabling the Panzer III.
Meanwhile, the German Armoured Infantry advanced forward in a foolhardy attempt to rush the 6-pounder Gun at the end of the Main Road, resulting in the destruction of the 251.
PIAT round disables the Panzer III. Smoke rising from the Sd.Kfz 251 can be seen up ahead.
The British called in 3-inch mortar smoke along the fence-line of the Farmer’s Road to cover the advance of 2nd Platoon from the ruined orchard building to the road, and the remaining Sherman crashed through the fence to attack the Armourer Infantry, but this resulted only in a Pin.
A Panzershrek team appeared beside the tank, and the resulting exchange of fire allowed the Armoured Infantry to break away and advance along Main Road toward the 6-pounder. The ATG crew reacted by opening up on them, but this resulted in “No Fire” — in essence, the crew ducked down and took cover, awaiting close combat!
The Sherman crashes through the fence.
Suddenly realising that two squads of the British 3rd Platoon were waiting in the side street, the Armoured Infantry halted their advance and hit the dirt. Rounds fired at the ATG crew behind cover the Germans them the initiative.
Armoured Infantry advance along Main Road.

With neither side seeming able to hit the broad side of a barn, the Sherman versus Panzershrek battle raged on for a painfully long time. The tank proved victorious in the end, reversed back, and then accelerated forward, ploughing it’s way through the bocage along Main Road and immediately opening up on the Armoured Infantry, suppressing two sections. A Pin result on the third section cost them the initiative, and in their preoccupation with the Armoured Infantry, they failed to notice the advance of the German 2nd Platoon. A vicious close assault ensued resulting in the destruction of the tank.
The Armoured Infantry PC attempted to rally his troops, but failed.
Close Assault on the Sherman.
The 3-inch mortar once again dropped smoke along the fence-line to cover the retreat of 2nd Platoon who advanced around the western flank of British HQ. They had previously become involved in a close range firefight with a German MG42 Team who had moved in under the cover of 81mm smoke to set itself up on the Farmer’s Road directly opposite them. Realising the importance of what they were about to do, they decided to leave behind a wounded PIAT team for fear that trying to rally them might cost them the initiative.
Redeployment of British 2nd Platoon.
Once on the grounds of British HQ, the 2-inch mortar team braved rifle and LMG fire to set itself up opposite the Armoured Infantry Platoon and fired a HE shell at them, but this was largely ineffective.
The Armoured Infantry bolstered their spirits and rushed forward, in an attempt to assault the British on the other side, but were caught by well-trained Lee Enfield fire, with the resulting bloody melee from front and side proving too great for them.
A bloody close combat.
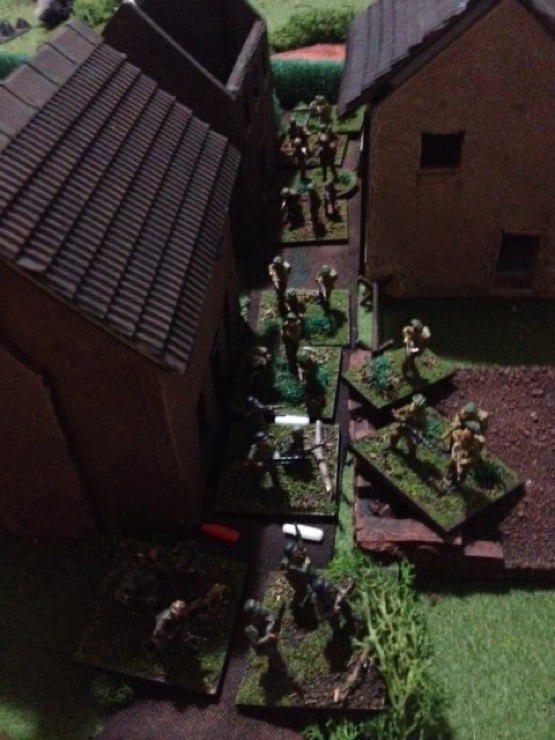
The British CC then emerged and starting giving direct orders. Smoke from medium and light mortars was dropped on two fronts in order to mobilise the Vicker’s Crew and reestablish itself facing south along Main Road with the intention of gunning down 2nd Platoon once the smoke cleared, but the Germans used the British smoke as cover to escape eastward through the bocage. They were shot at by one section of troops in a nearby building, but this resulted in “No Fire”. 2nd Platoon swiftly captured the 3-inch FO and mobilised around the easternmost edge of the Village with 1st Platoon in tow.
German 2nd and 1st Platoons advancing on Side Street.

Bloody street-fighting and close combat followed, resulting in irreplaceable losses to the German Company, leaving the British victorious and in control of their HQ and Fuel Dump.
Street-fighting!
Conclusions
Finding it difficult to recall every action in Crossfire battles, I rely chiefly upon photo’s to write my reports. What I have captured here was the bulk of the action, but there were a few minor skirmishes and unsuccessful mortar strikes in addition to what is recorded. I do know that the Germans launched three 81mm smoke bombs, the British launched three smoke and three HE bombs from their 3-inch mortar, and two smoke and two HE bombs from their 2-inch mortar. The German 120mm FO was the first casualty of the game, nullifying that weapon.
The British 1st Platoon mobilised into the southernmost section of woods near the start of the game, where they largely remained for the duration. This proved useful though as it prevented the German 3rd Platoon from moving forward and flanking the British HQ — the farthest they advanced was behind the cover of the boulders along the Farmer’s Road.
It was an exciting game and one worthy of replaying.
I really enjoy these scenarios and the after action report. Thank you for sharing.