
Aidan Boustred has been running a Normandy Campaign using Crossfire. My wargaming group are not involved because we couldn’t sign up to the commitment of regular games, but as a one off Aidan asked us to play Game 7. The 5th Duke of Cornwall’s attack towards Feugret and Orbois with 2nd Battalion, 2nd Panzer Grenadier Regiment defending.
Summary: Big game but fun. Being part of a campaign gave the game features that were not possible in a one shot. I’d say it was a bloody draw.
Objectives
Aidan sent through separate briefings for both the German players (Adam, Steven) and the British (Chris, Jamie). As the umpire I had access to slightly more information and so let Adam command the Germans. The briefings had objectives specified by the respective Commander-in-Chiefs and I’ve included short excerpts to give the context for the game:
British:
Take the high ground at 797640 overlooking Orbois. If you can take this ground, dig in and summon a FOO from 94th Dorset and give him a slit trench with a nice view.
German:
If there is the opportunity then push the British back, in particular to relieve pressure on Hottot to the north-east, which the British are threatening to encircle. If necessary fall back on Orbois to the south, but either way try to preserve your battalion as a fighting force without excessive casualties. A company of Pz IVs has been assigned as a reserve. Do not hesitate to use these. Currently the division is more short of quality infantry than tanks, and so the armour should be used to relieve pressure on the infantry.
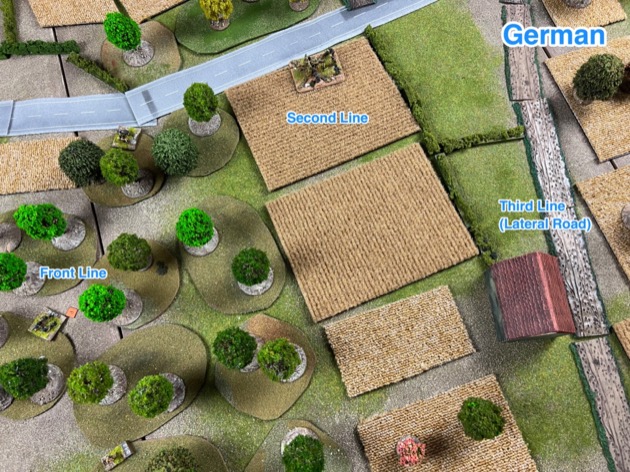
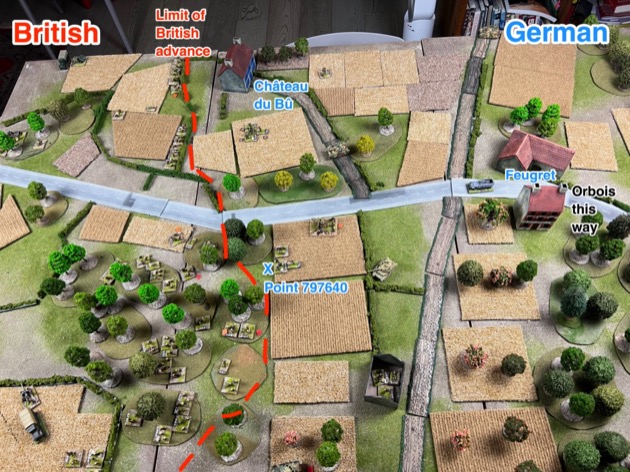
Map
The only overlap in the two briefings was the map, although even that carried different annotations for each side (specifically the deployment zones).

When we put this on table we had to make some compromises due to my terrain pieces/style. But I think we got pretty close.

Forces and deployment
Neither side knew where the other was located. As it happened the British arrived from a table edge. The Germans had a forward and rear deployment zone and also had reinforcements coming on a table edge.

The players only had a rough idea of the strength facing them, however, the British benefited from some prior scouting by 43 Recce.

43 Recce identified some German infantry positions along the edge of the wood. No ambush fire from these boys.

43 Recce also found the German 8.8cm anti-tank gun in a field behind the wood.

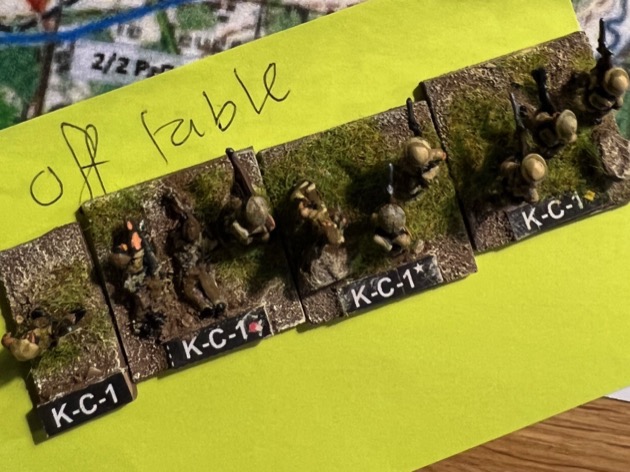
I had the German main force in a box off table. This was to maintain the surprise element as long as possible. Unfortunately I only remembered to take the photo after I’d already removed the scouted troops. You will also see from the photo that I haven’t finished my battalion commander stand for the Germans in Italy; still needs a kubelwagon and crew.

I had another box for the German reinforcements. Tanks. Lots of tanks. Adam gave me the four Panzer IVs to command. Ooo. Thanks for the tanks.

I was a bit more open about the British main force as it come on table immediately.

And I pulled the British reinforcements out of their storage box just before they came on table.
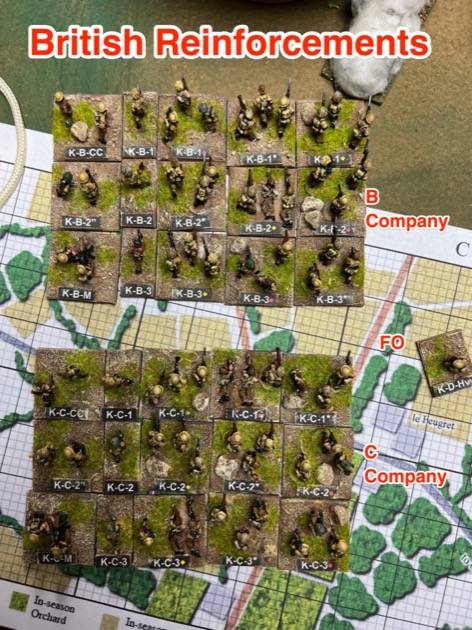
All the figures are for the Italian Campaign so not quite right for NW Europe. Too much tropical. Not enough temperate camouflage.
06:30 Hours
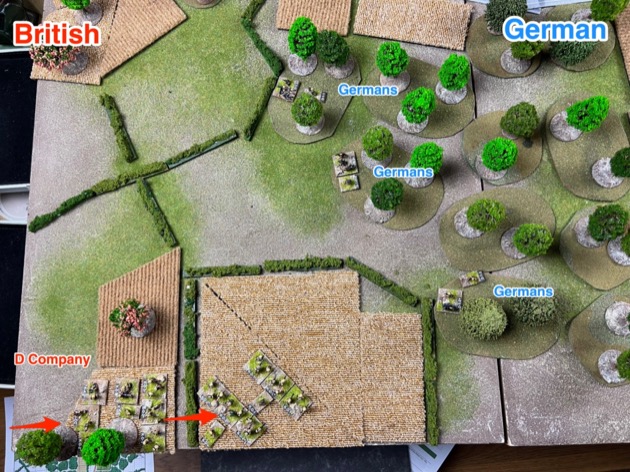
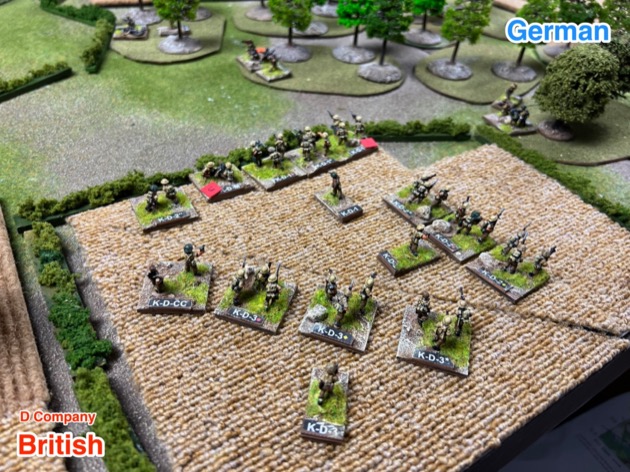
The British came on table in an “L” shaped part of the table edge in the north. D company (Jamie) came on table on the right.
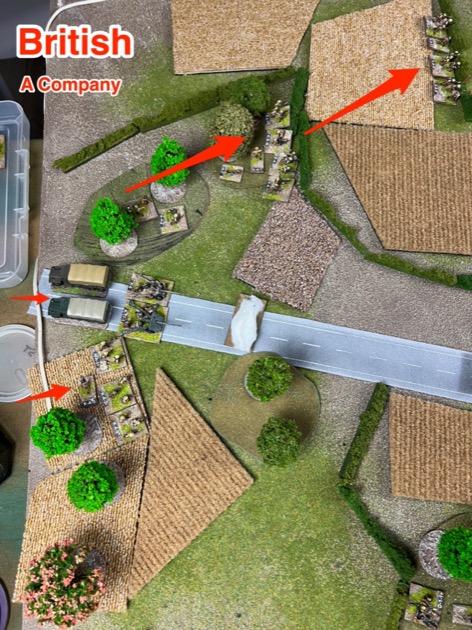
A Company (Chris) arrived on the left.

07:00 Hours
Chris decided that he would use the 6 pounders to cover the road. So down went some smoke and the guns drove on and unlimbered. Okay, you might notice that I used a 17 pounder in place of second six pounder – shoot me.

Then he moved his infantry through the fields towards Château du Bû.
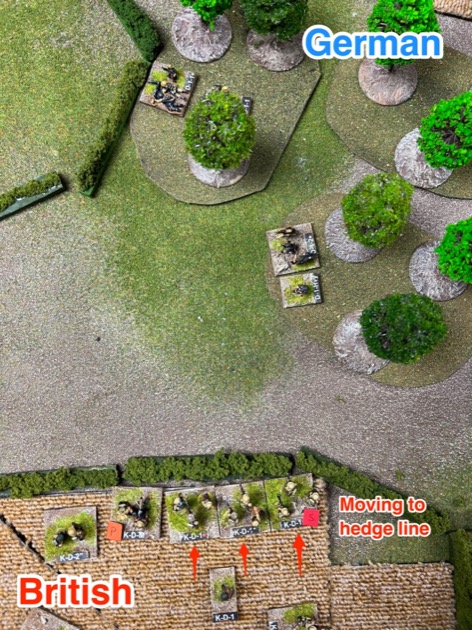
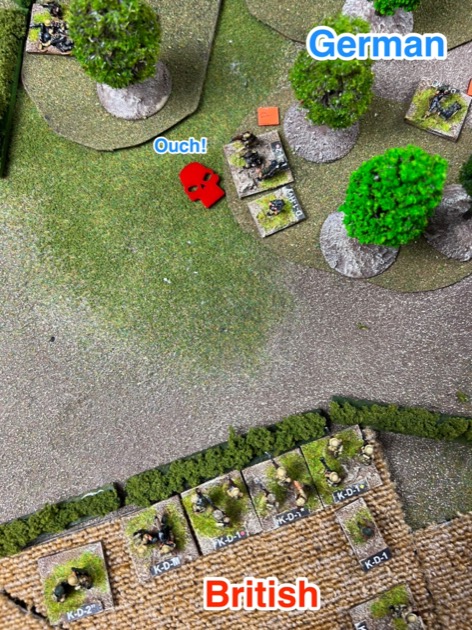
On the other flank, Jamie also moved D Company through the fields. But German fire stopped Jamie’s infantry when they got to a hedge line.

And a general fire fight broke out as more British lined the hedge.
07:30 Hours
As is usual with Crossfire both sides were feeling nervous and out numbered. Nominally the Germans had three lines of defence. The front line focused on the woods, a second line in the fields behind where the 8.8cm was located, and a third line along the lateral road. What Chris and Jamie didn’t know is we only had a single company to cover the entire table width so we really only had troops in the front line. More would come, but at the start we basically had a platoon against each of the approaching British rifle companies.
D Company would spent quite a lot of time in that field.
On the main road the 6 pounders had unlimbered and Chris was waiting to get his shot.

The British smoke lifted giving the German 88 a chance at the 6 pounders. But, despite getting 5d6 at a target in the open, it scored no hits.

On the right British fire power scored in the woods.
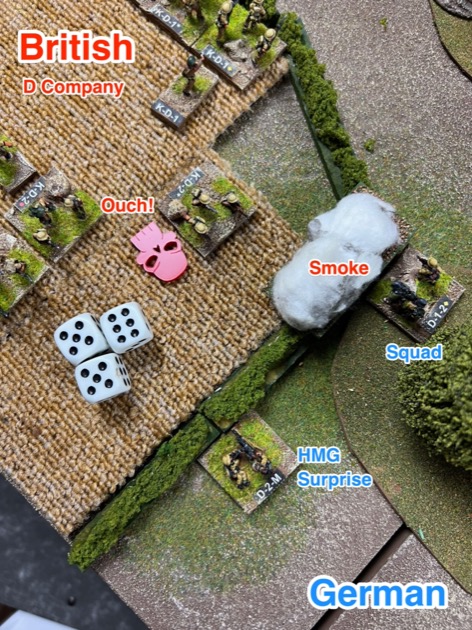
But Adam had thought ahead and hidden an MG-42 team (HMG) in the hedge at the end of the fields in which D Company found itself. This German stand would pose a tactical challenge for Jamie for quite some time.
This was the moment when Chris and Jamie called for reinforcements. All of them. Another two rifle companies (B and C) were on the way. As was the FO from the 94th Dorset & Hampshire Field Regiment mentioned in their objectives.
On the left A Company moved through the fields towards Château du Bû. Behind the infantry line you can see the British 6 pounders have changed position. After only one exchange of fire with the German 88 they realised they were not going to come off well and limbered up and rolled off to the shelter of some nearby woods.

Chris was convinced the Château was occupied, but found it uncontested when A Company moved in.

Actually the German defensive line was behind the Château and Germans started appearing.

Adam showed good mastery of German small unit tactics and launched an assault on the Château. A weak platoon went in. Chris decided to split the melee – this is an open when close assaulting a building – so his suppressed squad fought separately from the steady squad. The steady British squad won its fight.
But then the German wiped out the suppressed squad.
And then took the Château.

Despite the victory, Adam clearly didn’t feel strong on that flank and moved some supporting elements over.
The now German occupied Château du Bû became a strong point and started dishing out withering fire.
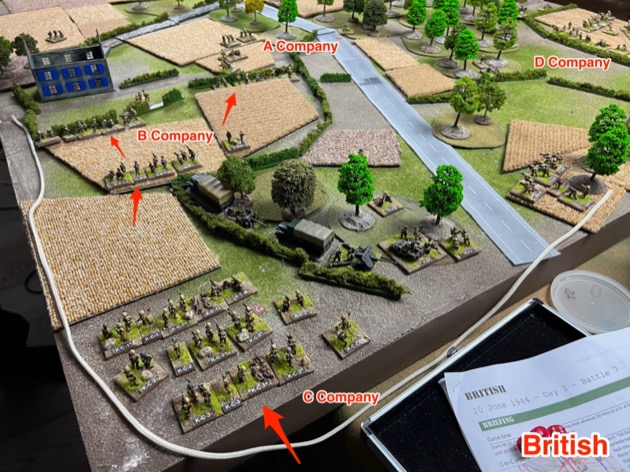
B Company arrived on the British left.
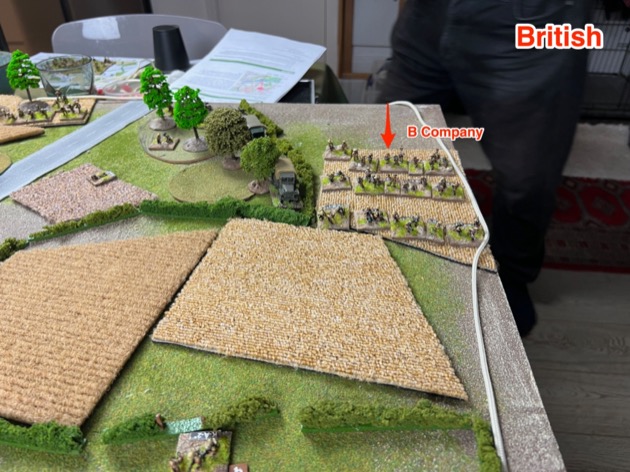
And then spread out across the fields towards Château du Bû.

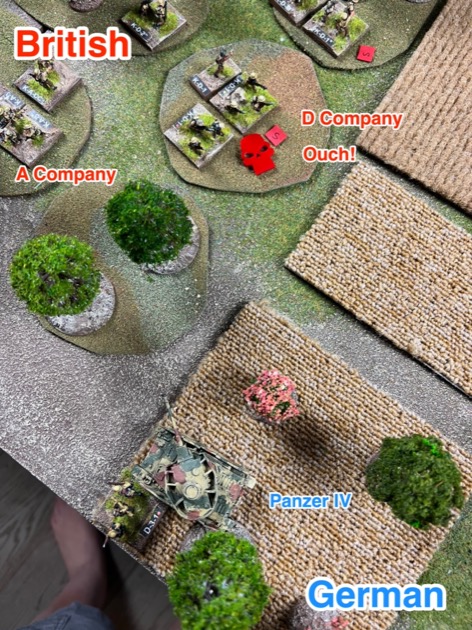
C Company arrived behind them, so also on the British left. That gave three British companies (A, B, C) facing Château du Bû under Chris and one company (D) on the right facing the woods.
08:00 Hours
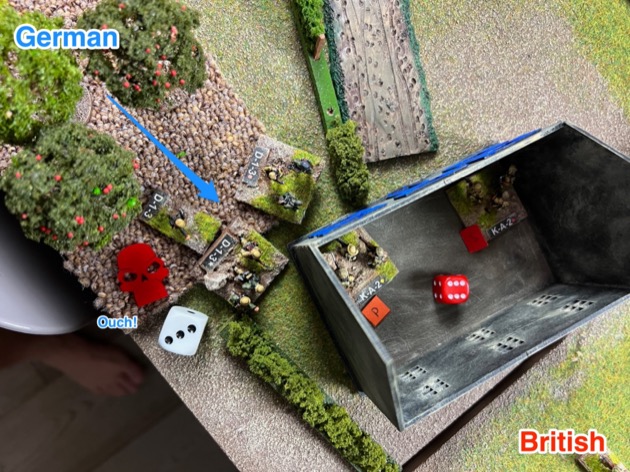
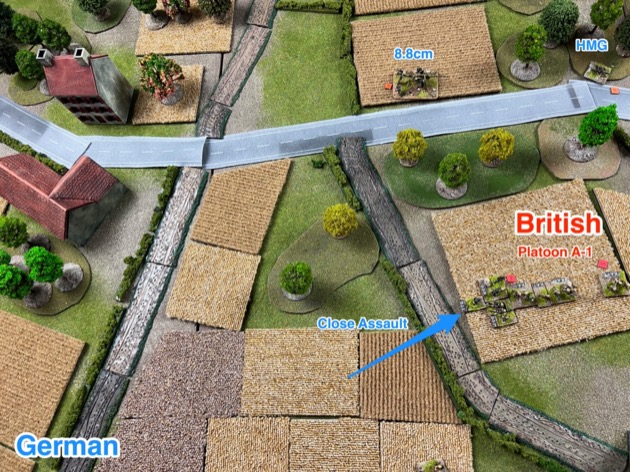
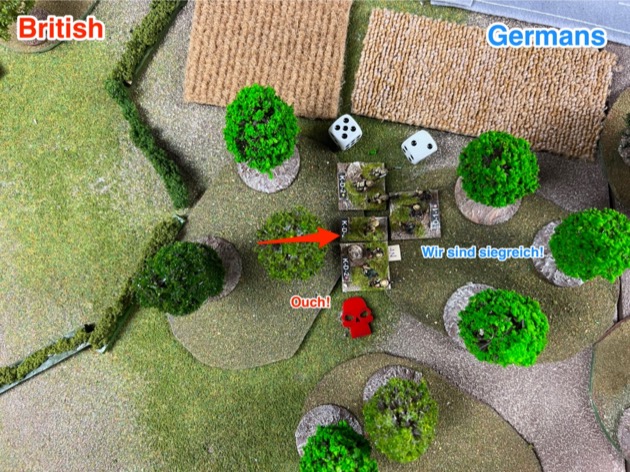
A hidden German FO called in mortar fire and got a squad in the most advanced British platoon, 1st platoon, A Company (A-1). This platoon was in a field near Château du Bû.

08:30 Hours
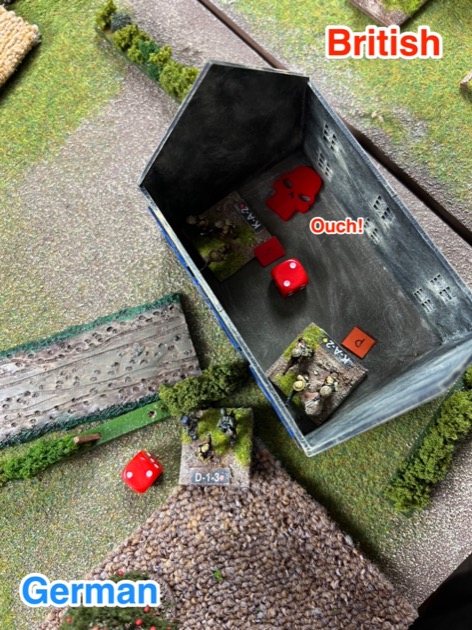
The exposed British platoon (A-1) was too tempting and Adam charged.
Adam got a immediate kill, the second on the platoon.
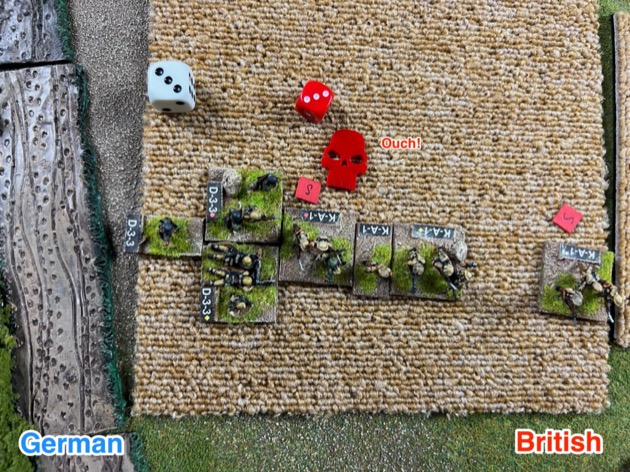
And then another.

And another.

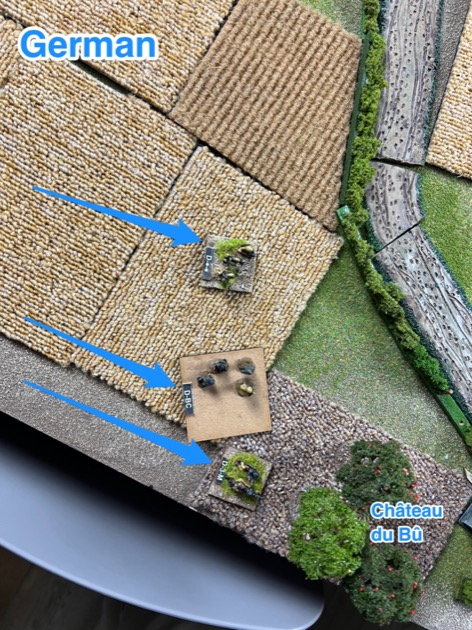
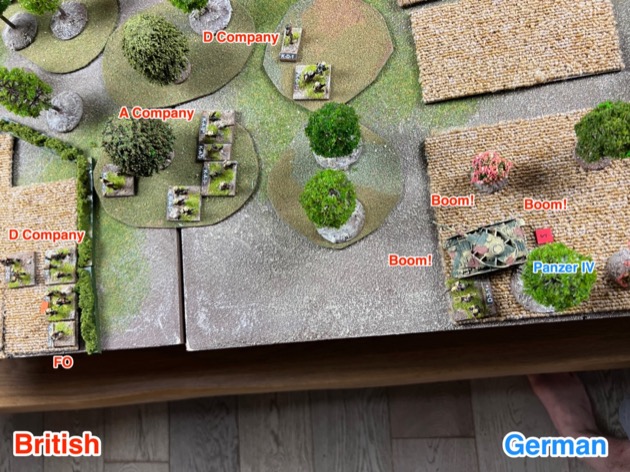
Now I made my entrance with the panzers. Four Panzer IVs. Exciting. As per the objectives, I was to use my tanks “to relieve pressure on the infantry.” I decided to form a supporting line so the infantry had somewhere to fall back.

I put one Panzer IV on the right, near Château du Bû

A couple were in the centre.
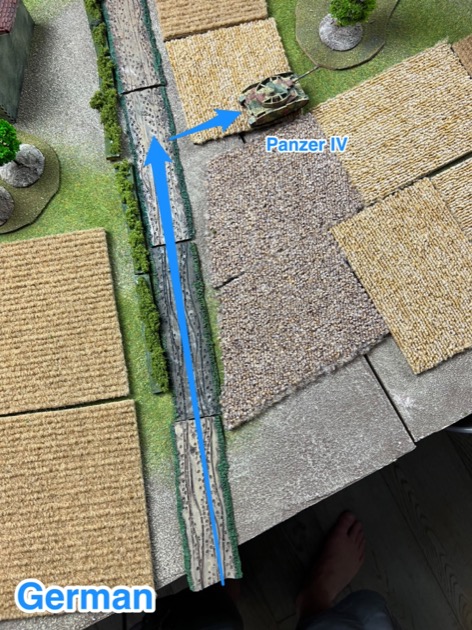

The last one was on the German left, near the wood.

Further back on the British left …

And the the garrison of the Château du Bû kept firing.

I decided to adjust the position of my centre panzers. So they had longer fields of fire.


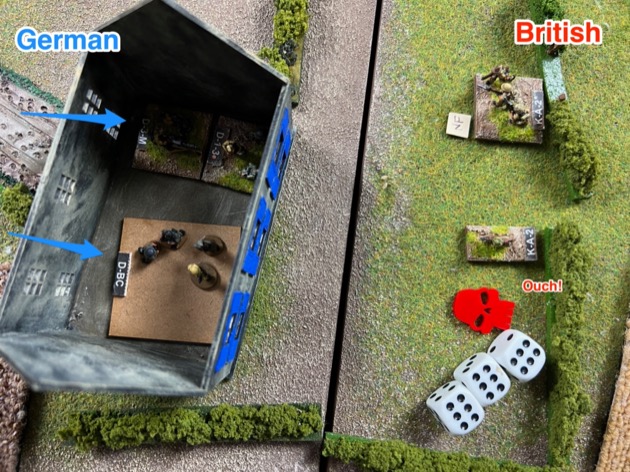
On the British right, Jamie laid some thick smoke then charged a platoon over the hedge, out of the smoke, and into the flank of the annoying MG-42 team. But the dice rolled against him and he lost all the attackers.

Then the British started their big attack on the woods. In the end they had elements of A, B, and D company in the woods. It started by some effective fire by D Company. They took out a couple of German stands.


Jamie took the opportunity to reorganise and shift a rifle platoon towards the centre.

Then this platoon entered the woods. They discovered and despatched an unaccompanied platoon commander.

The D Company platoon then charged a German squad but were eliminated in close combat.
At this stage the centre of the woods look empty. But the Germans have units on each side.

Following D Company’s failure, a platoon from A Company entered the woods.

The swung right and eliminated a squad on the hedge line facing D Company.

With things on the British right looking shaky, Adam brought forward some of the few reserves.

But I was headed the other way, and pulled the Panzer IV at the Château du Bû back to the lateral road. Chris had been making threatening moves with his 6 pounders and I saw no reason to risk it.

Adam also released the Sd. Kfz. 251/22 Half-Track with 7.5cm PaK40 to my care. This was hidden in Feugret and I moved it to cover the junction, freeing up a Panzer IV to advance.

On the German left, my Panzer IV started shooting at the British infantry emerging from the woods.

And finally the British destroy the MG-42 team that had held up D Company for so long. But it was the wide ranging platoon from A Company that did it. And by fire, no less, not close assault.

09:00 Hours
My Panzer IV scored a hit in the woods.
But the British kept piling infantry into the woods. This time B Company and they were advancing up the edge of the woods near the main road.

Chris saw a chance to charge the suppressed squad, but was stopped by reactive fire from a German squad further back. [Technically this squad should have been revealed in the pre-game scouting by 43 Recce, but we let is pass.]

Chris didn’t let up and found a way to get stands into contact with the suppressed squad, killing it.
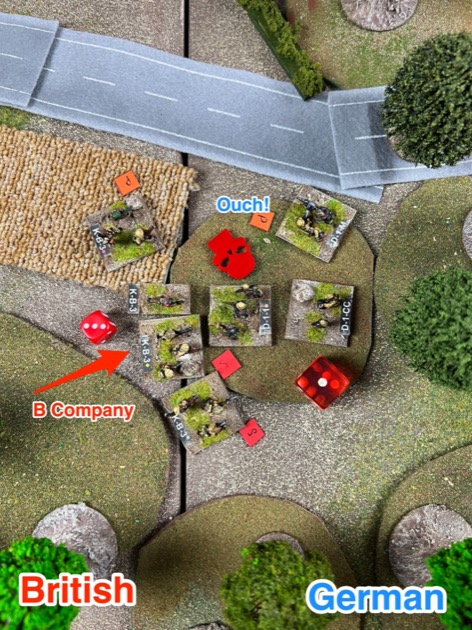
And then B Company cleared the patch of woods they were in.

09:30 Hours
Jamie thought he’d give indirect fire on vehicles a go. This is an optional rule from Hit the Dirt. Basically the tank got a -1d6 modifier. But it was suppressed. Ooops.
At this point, Chris decided he could afford to sacrifice a platoon for the greater good and sent it eastwards to either cause grief in the German rear or just to get lost. He wanted to send all of C Company but at this point in the game Jamie and Chris decided they needed the troops on table.
We were approaching midnight so assessed the game status. The British were just shy of achieving their objectives, i.e. capturing Point 797640. But they were close enough to realise that it didn’t give the promised view of Orbois.

On the other flank the British had made even less progress and the Château du Bû was still in German hands.
Behind the front line the Germans had panzers spread along the lateral road. They had good fields of fire and packed a punch. So the Brits would take losses to advance.

But as the Germans we decided that the only way to “try to preserve your battalion as a fighting force without excessive casualties” was to pull out. We’d already lost most of a company of infantry and that was pretty bad, so we didn’t want to lose more.
We agreed with the British that the Germans would pull out and the British could occupy the table.
Summary for Aidan as Campaign Organiser
The next morning I sent Aidan a summary of the game. This was to allow him to move the campaign along.
Objectives
The British had already summoned the FOO from 94th Dorset when they took the high ground at point 797640 and found it wasn’t overlooking Orbois and in fact didn’t have a nice view of anything much. The British however managed to detach a rifle platoon to exert pressure on Hottot to the north-east. From my biased German perspective, this was a rather feeble attempt at encirclement.
The Germans didn’t succeed in pushing the British back but gave them a solid whack in the nose with the British losing most of two rifle companies in the attack. The defenders used the reserve company of Pz IVs to relieve the pressure on the infantry and cover their withdrawal. However, they lost a company of infantry – their mounted panzer grenadiers no less. I suspect they would have lost less if the infantry had pulled back rather than fighting and dying in place.
Moving Clock: Started 6:30; Ended 9:30.
Casualties
German Casualties
1st Company
– CC
– 1st Platoon: PC, 2 x Rifle Squads (inc Panzerfaust), dismounted HMG
– 2nd Platoon: PC, 2 x Rifle Squads (inc Panzerfaust), dismounted HMG
– 3rd Platoon: PC, 1 x Rifle Squad, dismounted HMG

British Casualties
A Company
– HMG
– 1st Platoon: PC, 3 x Rifle Squads (inc Piat)
– 2nd Platoon: PC, 3 x Rifle Squads (inc Piat)
D Company
– 1st Platoon: 1 x Rifle Squad
– 2nd Platoon: PC, 3 x Rifle Squads (inc Piat)
– 3rd Platoon: PC, 1 x Rifle Squad

Committed Reserves
The British committed all of their reserves. Rather gleefully, it seemed to me. Definite overtones of Soviet human wave flooding onto the table.
The Germans committed their Panzer reserve but not the infantry.
Final Unit Locations
By 09:30 the British had fought to the edge of the woods just before point 797640. More or less a line along the edge of the woods and then across the table but excluding the Chateau. All surviving Germans then withdrew off table to towards Orbois. So the British could follow them up unimpeded.
We had run out of time so we did not play the withdrawal, just agreed it. In practice it would have taken a bit of time to extract the troops, and there would have been losses on both sides. If the British had charged the tanks they would have got mauled.
The British detached a rifle platoon (1st Platoon, C Company) in a hopeful attempt to pinch off the German salient. Or at least cause a bit of mischief. Or just get lost. One of the attached photos shows their intended route on the campaign map – look for the black sharpie arrow.
Heroic Actions
Not so much heroics as a bit rash … The two 6 pounder guns unlimbered in the main road to duel it out with an 8.8cm anti-tank gun that had the entire main road under observation. The first roll revealed that 6 pounders are not so good at HE. They were lucky as the 88 rolled abysmally in return, missing on all 5 dice. Realising they’d done the maths wrong, the British players dropped smoke, allowing the guns to limber up and dash away to cover.
Conclusions and Observations
Full credit to Aidan for running a biggish campaign.
Originally we declined to participate in the campaign because of the big games. This one was big with an entire British battalion in attack. And we ran out of time. I started to set up at 19:30 hours, the game started sometime between 20:00 and 21:00 and the players left at midnight (00:00 hours). By 01:00 I’d packed up. That is a big commitment for us on a week night and we don’t fancy it too often. But even with that time commitment, we did not finish the scenario. At midnight we agreed and outcome rather than playing to a conclusion. If it was easy to fit in these big games we would already have finished our Krasny Bor campaign.
Despite the length of play, We really enjoyed this game. The scenario was good with an asymmetric goals and forces. It was super exciting that neither side knew nothing about the other, not orders of battle, deployment or mission.
We were not playing operational zones and in hindsight we should have. The British had B, C and D companies all mingled up in the woods. This was pragmatic in a game but would have been very bad for real commanders. Operational zones prevent that kind of shenanigans.
Both sides played rashly. The British threw everything they had at the defensive line. All four companies. And took a mauling. The 5th Duke of Cornwall battalion is not going to be much good for anything for a bit. Adam did a good job on defence, as shown by the British casualties. But the German orders asked to protect the infantry I think he should have been more cautious. They could have staged a fighting withdrawl but instead fought and died in place. The Panzers would have covered any withdrawal as they had the lateral road well and truly secured.
The Piats didn’t feature in the game but they did have an impact. I found them daunting. We were playing my Armour House Rules, which like official Crossfire, lets infantry anti-tank weapons shoot across the table. So I wasn’t willing to drive my panzers into range of any of the British infantry. I now think that across-the-table-range is too generous for Piats and such like. They should be potent but only in the infantry dare to get close. My revised anti-tank rules are addressing this.
I like the ebb and flow of games using the moving clock. This game advanced in 30 minute blocks. 08:30 to 09:00 didn’t see a lot of activity, reflecting a pause in the action. But after that time there was furious activity. But from the gamer’s perspective, we spent virtually no time on 08:30 to 09:00, perhaps only a couple of minutes. All our player time was spent on the action. That is something I love about Crossfire. It focusses on the action, epic cinematic action rather than every single detail.
It was great to have my new Germans in Italy battalion on table. I love the combination of temperate uniforms, with tropical and late war camouflage. I’ll feature some close up photos in a subsequent post. And, of course, I liked having my Kiwis on table again.
This game did however highlight that I need some more figures:
- 1 x Kubelwagon for the German Battalion Commander; this really is a priority
- 1 x British 6 pounder anti-tank platoon of 3 or 4 six pounder guns; I have the 6 pounder imbedded in the leg infantry battalion but not any such supporting guns
- 1 x German Sd. Kfz. 251/22 Half-Track with 7.5cm PaK40
Great write up Stephen. Do we know what happened to Chris’s platoon that attempted the wandering off table encirclement?
No. That is entirely up to Aidan. They might trigger a campaign changing encirclement. They might wander into a bunch of Panthers and get wiped out, or get captured by Panzer Grenadiers, or they might just spend a few days lost and turn up again. Anything is possible. But personally I’d put my money on “lost”.
The last battle of Day 3 has finally been played, so I’ll be posting an update on the whole of Day 3 shortly. Glad you enjoyed it.