Jamie and I played a draft version of Cassinograd – A Crossfire Scenario based on Crossfiregrad. We played two games in a couple of hours. Jamie was the attacking Kiwis and I was the Fallshirmjaeger. This is the first of our games, making the second Cassinograd game with Bruce Stewart’s being the first.
Summary: Okay game, but could have been better. I had a small veteran force. The smaller forced lacked resilience, despite the higher morale, and Jamie took the objective (Municipal Buildings) relatively easily.

The draft scenario
I published the scenario – Cassinograd – A Crossfire Scenario based on Crossfiregrad – after this game, and the draft scenario differed in a couple of ways.
There is the map for the game we played:
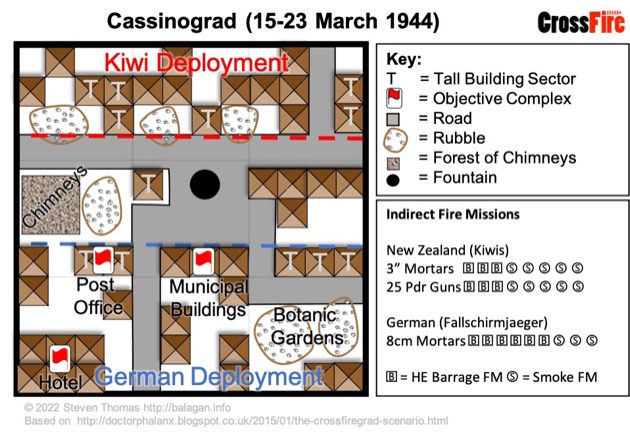
It looked alright on table.
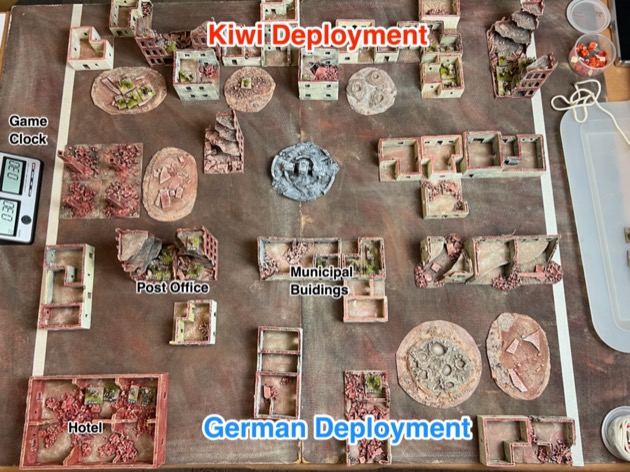
The problem was the draft map had fewer buildings on the German table edge. This meant the Germans had to risk Kiwi fire to move laterally. It was only as we started the game that I went, “oops, that is going to be a problem.”


Originally I wanted to try out a couple of variants for the defender’s order of battle. In both cases the German defender had a Fallschirmjaeger company, but there were small Veteran and larger Regular options. I went for the smaller veteran option in this game.
The veteran order of battle simulated the defenders later in the battle for Cassino after they have recovered from the shock of the aerial bombardment, but also having suffered losses. The OOB had higher morale but less HMGs and one less Rifle Squad.
Defender Order of Battle – Veteran
- 1 x CC (+1)
- 1 x HMG
- 2 x Rifle Platoon: PC (+1); 3 x Rifle Squads
- 1 x Rifle Platoon: PC (+1); 2 x Rifle Squads
- 1 x FO for off-table 8cm Mortar (6 x HE Barrage FM; 3 x Smoke FM)
- Morale: Veteran
- Command & Control: Good i.e. German
- Total fighting stands: 10
This is what the forces looked like before the game:

Deployment
I had a platoon in the Post Office

And another in the Municipal Buildings.

My third platoon was split with one squad holding the left flank.

The other squad and PC were in the hotel with the CC. I could split the platoon because they had good command & control. I also had a HMG in the hotel with a line of fire up the road by the Post Office.

Jamie had long lines of fire into my positions. And that was another reason for splitting the reserve. I couldn’t guarantee I could redeploy them where I needed them.
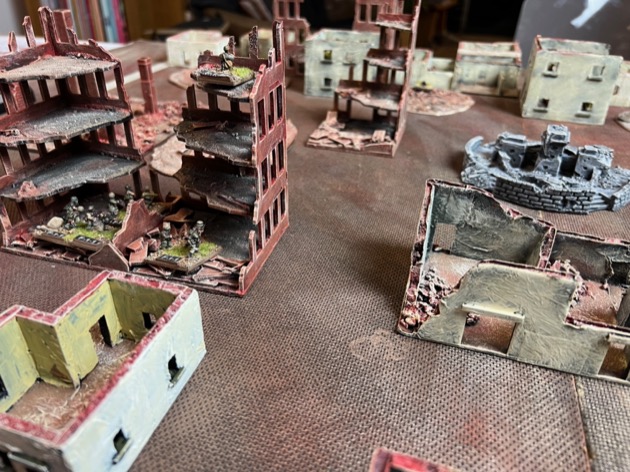
The Kiwis seemed to be everywhere. Well, to my paranoid thinking they were.

In practice Jamie had a holding force on his right (my left).

And he had weighted his left flank (my right). Two platoons over there.

The battle
Jamie had a pretty solid plan.
1. Skirmish on the other flank so I couldn’t redeploy troops. Tick.

2. Lay smoke. Tick.
3. Push down the German right flank. Tick.

4. And keep pushing. Tick.

5. Then bring overwhelming firepower to bear. Tick

6. And advance. Tick.
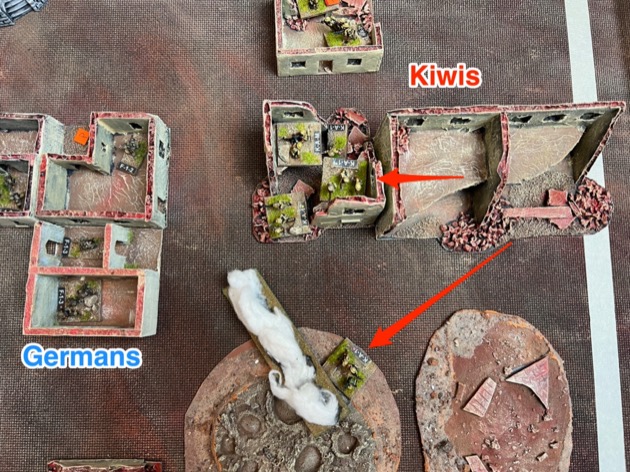
7. Lure me into a false sense of control by letting me redeploy my reserve. Tick.
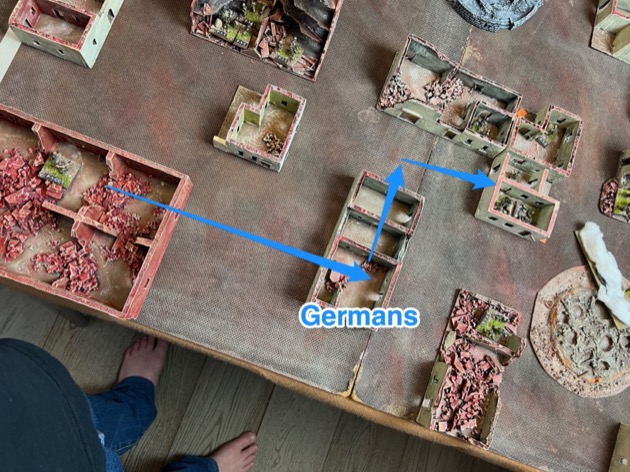

8. Then, despite the German reinforcements, assault the Municipal Buildings. Tick.

9. Go Fallschirmjaeger hunting inside the Municipal Buildings. Tick.

10. Consolidate. Tick.
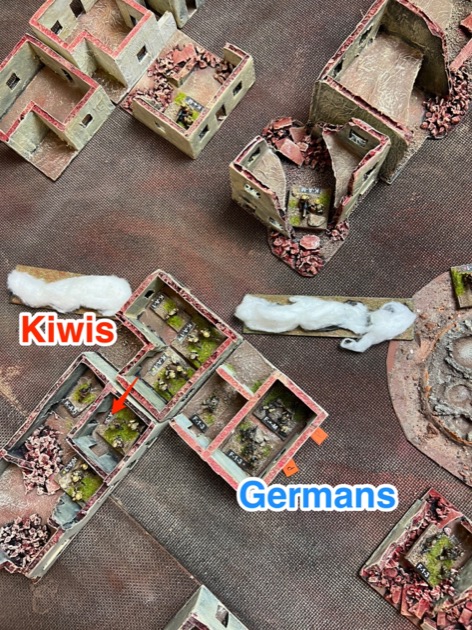
11. Bounce the inevitable German counter-attack. Tick.

12. Clear the Municipal Buildings. Tick.
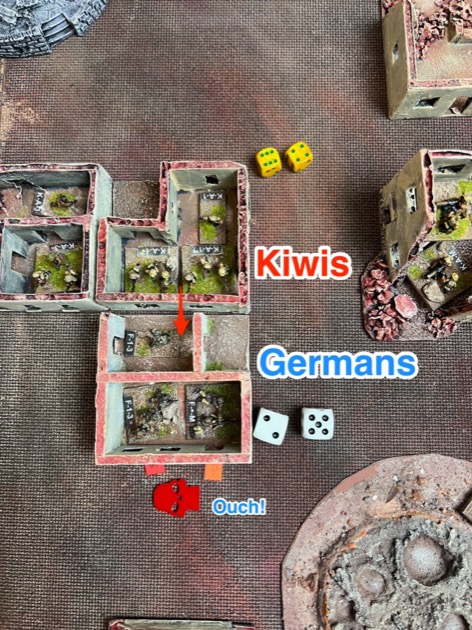
13. Calmly check the clock to see how much time there was to spare. Tick.
14. And confirm Kiwi Victory. Tick.

Conclusions and observations
Firstly, due credit to Doctor Phalanx and his Crossfiregrad Scenario. Brilliant starting point. My draft Cassinograd Scenario was a good build on the Doctor Phalanx scenario, but the play test showed my scenario could be improved. In fact it was improved before I published the scenario.
Despite the fact I’m the actual Kiwi, Jamie said he enjoyed fielding the New Zealanders, and that it gave him an aggressive edge. I was just pleased to get both Kiwis and Fallschirmjaeger on table again.
We both enjoyed using the Saitek Competition Pro Game Clock . It really adds an urgency to the game, particularly for the attacker. Even more urgency than Hit the Dirt’s Moving Clock offers.
This was a pretty quick game. Jamie still had 6 minutes on his clock. Total play time was probably 34 minutes. The game was never really in doubt. I don’t mind losing if I have a chance (see 3Fs of Crossfire Scenario Design) but I didn’t feel like I did in this game. Perhaps I could have weighted my reserves right, but then the hotel would have been empty and I didn’t know he was going for the Municipal Buildings.
In my revision of the Doctor Phalanx map (you can see version 1 above), I had deliberately given the attackers a covered mechanism to do lateral movement. But it took this play test for me to realise I hadn’t done the same for the defenders. So I had to position my forces carefully and risk Kiwi fire on lateral moves. In practice that meant I had to split my reserve, part in the hotel and part on the right flank. Neither part of the reserve was strong and I really felt the pain of that on the right. I didn’t have enough to block the Kiwi advance.
Probably more significantly, I had the veteran Fallshirmjaeger. Strangely I found them too brittle for this scenario. The two sides deploy visible and within shooting range. This makes it a shooting contest. In this context the veterans lacked firepower to stop the Kiwis and could not themselves absorb kills. In a different scenario Veteran morale is great, because PINS and SUPPRESSES get rallied. But in a stand up fire fight the numbers count and the Kiwis were scoring KILLS. So for the published version of the scenario I’ve dropped the veteran option. Not historical but better game.


Are you using hidden deployment for these games?
All deployment is deliberately visible to allow games to end within one hour.
34 min total play time? That’s fantastic. There’s something to be said for “blitz” wargaming, even if the actual scenario needs more tweaking to be fair.
We played the original Crossfiregrad scenario three times in a single evening. Very satisfying.
I’ve been playing HTD Assault on Tula the past few weeks and found the same result. Once the defensive line is broken, the attacker usually rolls up the defenders fairly easily. Especially in building complexes where the defender cannot use reactive fire to stop them. The only benefit in building fighting is that you don’t lose your entire force on a single roll, since combat is divided up between units (as in pictures 227, 229, 231). Assuming you have more than one unit in each building section.
Maybe more units on the table may fix that, which I think would be historically accurate where frontages decreased when sight lines shrunk. Make it harder to pierce the defensive front by making the defensive line deeper. Maybe pushing the defensive deployment zone further out to allow occupation of the first set of buildings to provide a buffer between the objective and the attackers.