After a 10 month gap, Adam and Chris played the tenth game of Populous, Rich and Rebellious, our four player Campaign using Tilly’s Very Bad Day, and set in the English Civil War. Unfortunately we’d forgotten about Game 9 so it was a bit of a replay … with a different result.
Summary: A strong Royalist attack crushed the Parliamentary defence of the South-East.
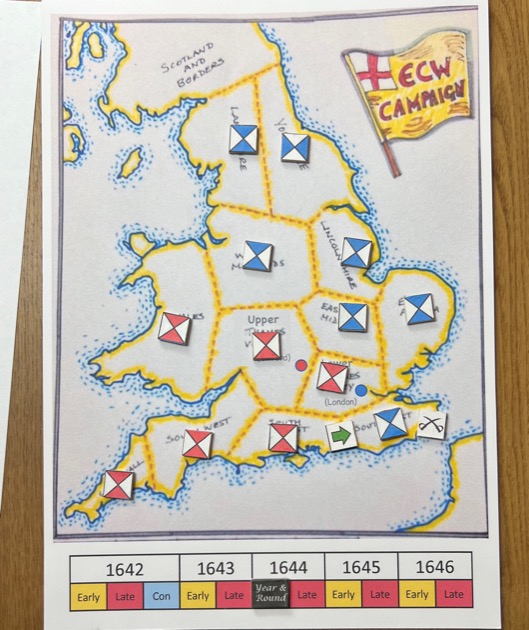
Strategic Situation
The last game saw Parliament successfully defend the South-east. Strictly speaking this should have been a Parliament campaign turn but due to a bureaucratic mix up (we forgot a game) I let the the Royalists have another go.
Phase 1: Game Set up
The mechanics of Populous, Rich and Rebellious influenced most of the game set up.
1.1. Agree game size
I wanted to play, so made it a big game, with big armies on a big table.
1.2. Recruit armies
In Populous, Rich and Rebellious, campaign cards influence the orders of battle.
Campaign Cards
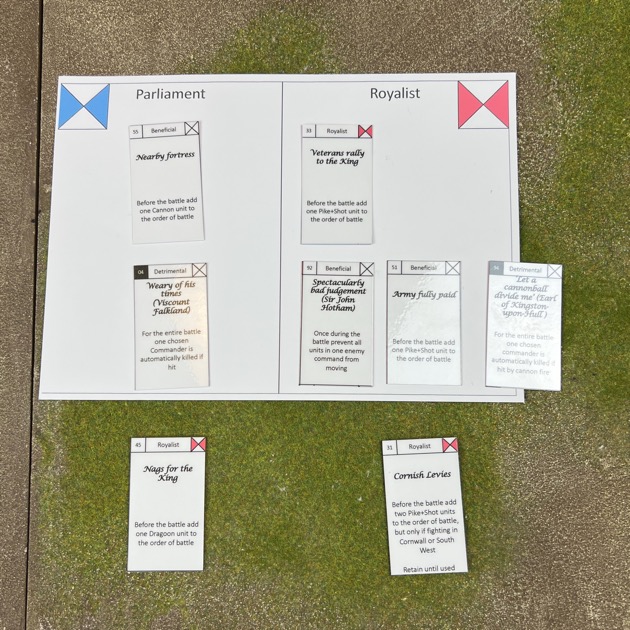
Adam got five campaign cards for the Royalists: Two Royalist, Two Beneficial and one Detrimental:
- [Royalist] Veterans rally to the King: Before the battle add one Pike+Shot unit to the order of battle
- [Beneficial] Army fully paid: Before the battle add one Pike+Shot unit to the order of battle
- [Beneficial] Spectacularly bad judgement (Sir John Hotham): Once during the battle prevent all units in one enemy command from moving
- [Detrimental] ‘Let a cannonball divide me’ (Earl of Kingston-upon-Hull): For the entire battle one chosen commander is automatically killed if hit by cannon fire
- [Royalist] Cornish Levies: Before the battle add two Pike+Shot units to the order of battle, but only if fighting in Cornwall or South West. Retain until used.
The Royalists couldn’t use the Cornish card in this battle, but could hold onto it for later.
Chris drew three campaign cards for Parliament: one Beneficial, one Detrimental, and one to discard as it was a Royalist card:
- [Beneficial] Nearby fortress: Before the battle add one Cannon unit to the order of battle
- [Detrimental] Weary of his times (Viscount Falkland): For the entire battle one chosen Commander is automatically killed if hit
- [Royalist] Nags for the King: Before the battle add one Dragoon unit to the order of battle
Orders of Battle
For a small game with a player a side, we started with the small order of battle. After applying the campaign cards, the the Royalists got a 16 units, compared to the Parliamentary array of 15 units.
Royalist Order of Battle
|
Parliament Order of Battle
|
1.3.A. Determine attacker
The Royalists had 16 units to Parliament’s 15 units. That made the Royalists both the strategic attacker and tactical attacker.
We give the tactical attacker the initiative in Tilly’s Very Bad Day.
1.3.B. Game duration
10 Game Turns because it was Autumn (10 game turns), with fair weather and an early start time.
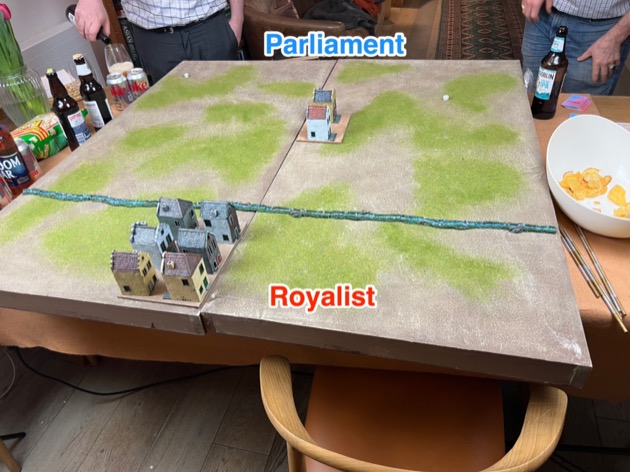
1.4. Place Terrain
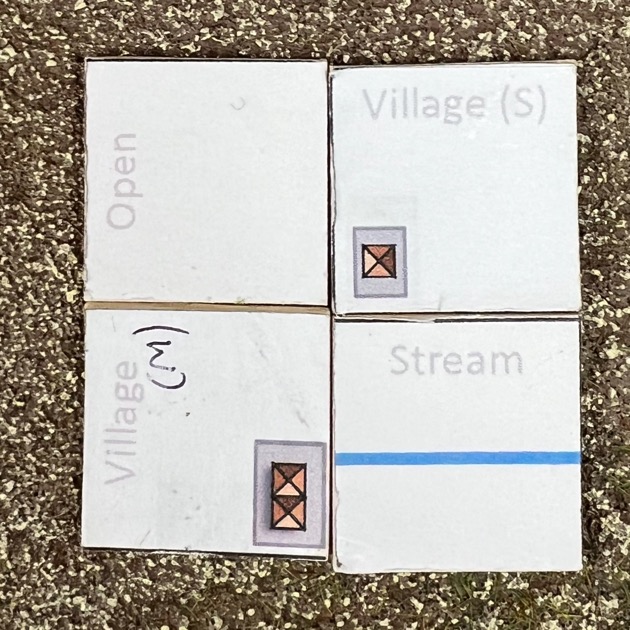
Terrain Cards. Chris drew a stream, a small village and medium village. He rotated the terrain card with the small village so the built up area was in the centre of the table.
1.5. Scouting
We still didn’t do scouting. Next time as it gives dragoons more value.
1.6. Deployment
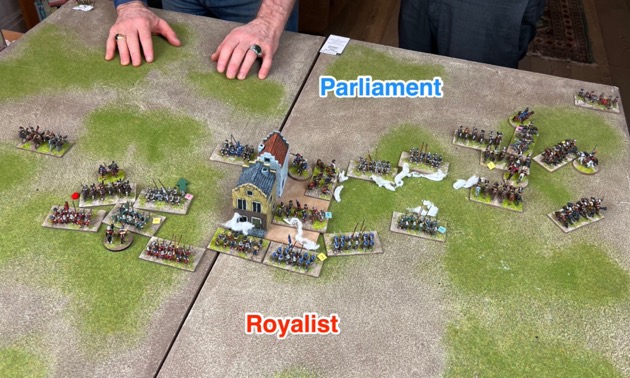
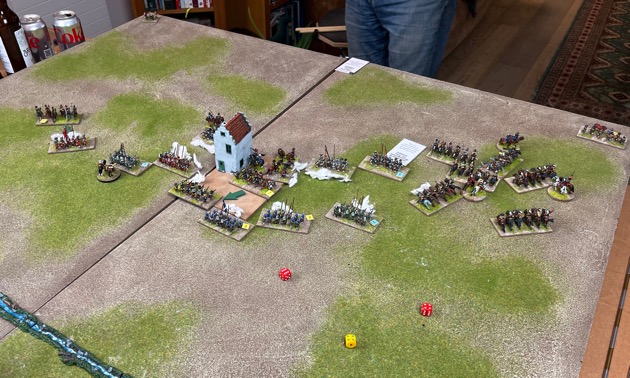
Chris had thought the stream would run the centre of the table but in fact streams run through the centre of the 2′ x 2′ sector they appear in. So the Royalists deployed across the stream and were not hindered by it.
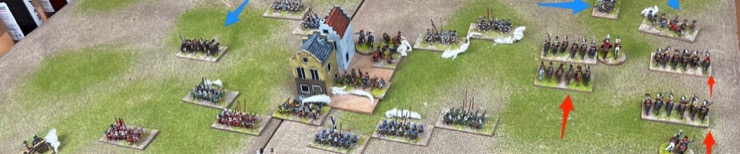
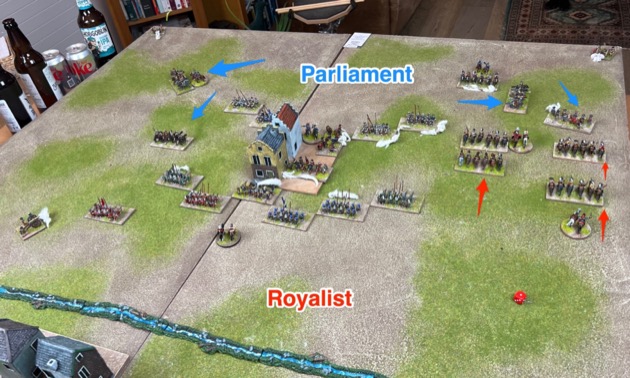
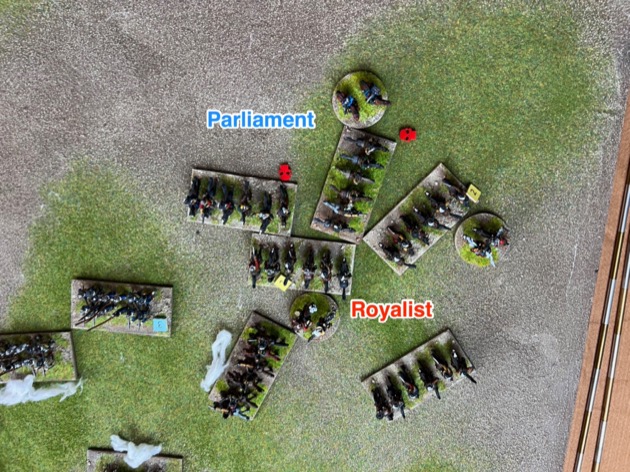
Adam chose an unconventional deployment. He had his big infantry command in the centre facing the small village. But on his right he deployed two small commands with all of his horse and dragoons. Parliament had the smaller army and to compensate, Chris deployed from the large town to the far table edge.
Chris more or less deployed behind the small village. The infantry centre were to the front and the small cavalry wings were echeloned behind. To give his guns the maximum field of fire he put a cannon in each rear corner of the table. This meant they had no supporting troops.
1.7. Bombardment
Nothing much happened, as usual.
Turn 1
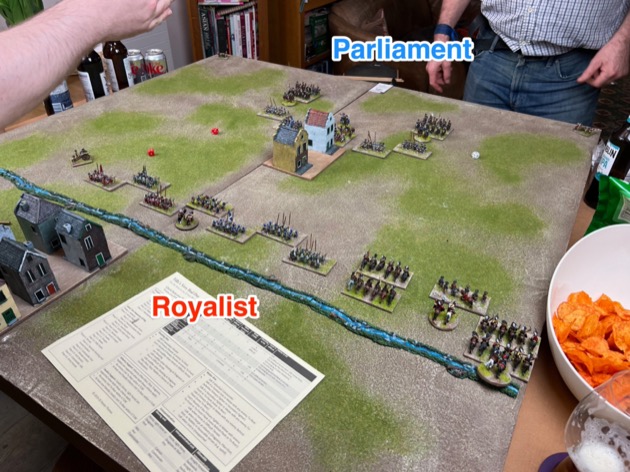
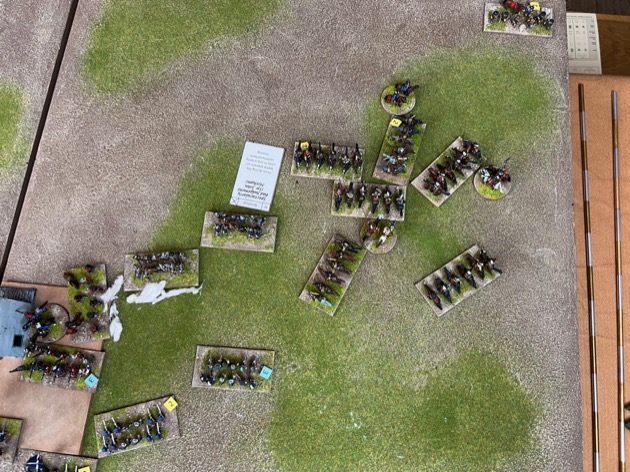
Adam tentative pushed forward with his two small mounted commands on his right.
Turn 2
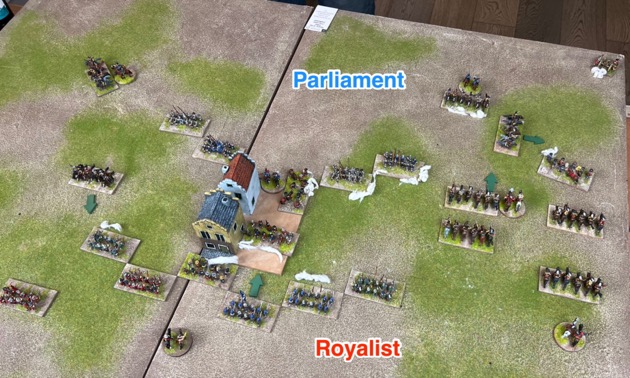
In turn 2 both sides started rushing towards each other. The entire Royalist army moved forward. Parliament also advanced. Chris had moved his infantry into the centre village in game turn 1 and now his cavalry started to move towards the flanks.
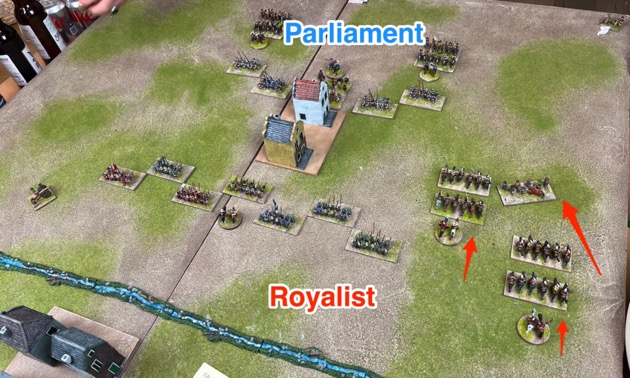
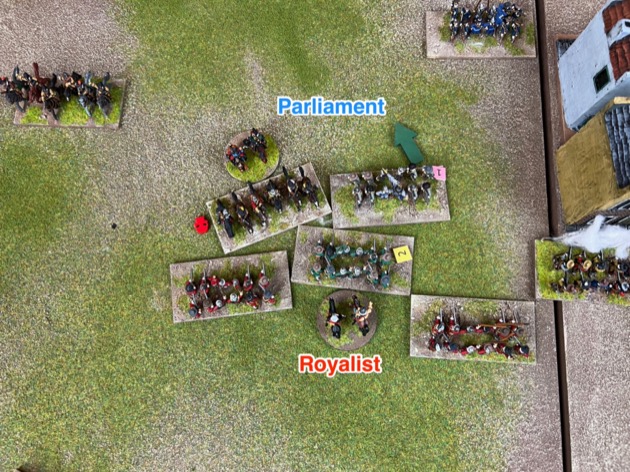
Turn 3
The infantry fight at the village increased in ferocity and a big cavalry skirmish was shaping up on the right. Chris was trying to get some advantage on the Royalist left, where his cavalry were only facing slow moving infantry.
The charges began, on the left, centre and right.
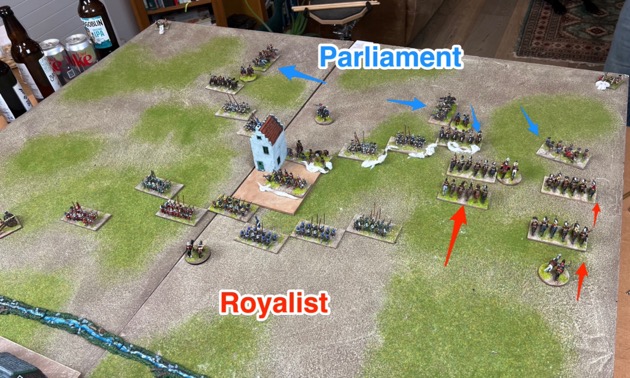
Turn 4
Adam kept pushing forward on the right where he had a considerable numerical advantage.
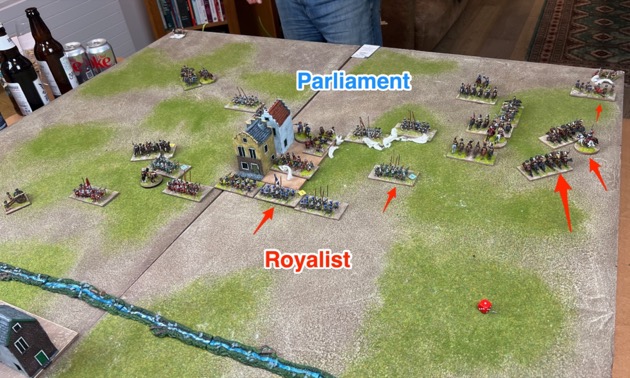
But Chris’s Parliamentary horse were up for challenge and continued to advance on both left and right.
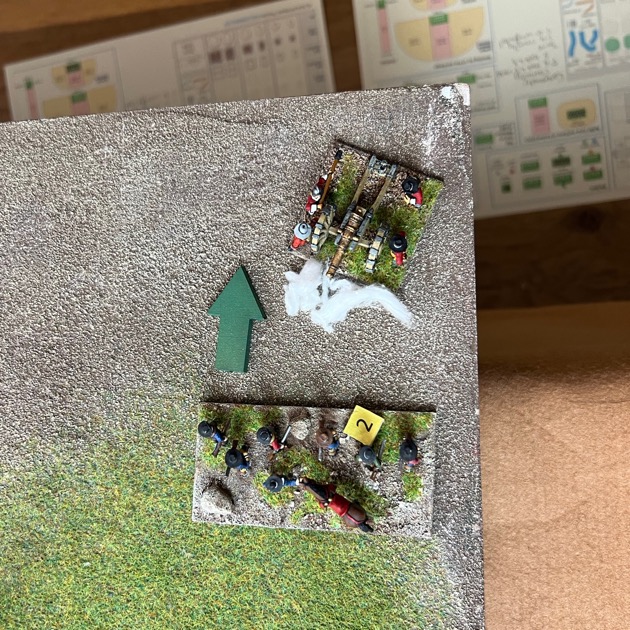
In the far right corner of the table, the Royalist dragoons charged and eliminated the Royalist cannon.
To the left of the small village, Royalist infantry routed some Parliamentary horse and pushed back some of their pike+shot.
The armies were now fully engaged. It was getting messy.
Turn 5
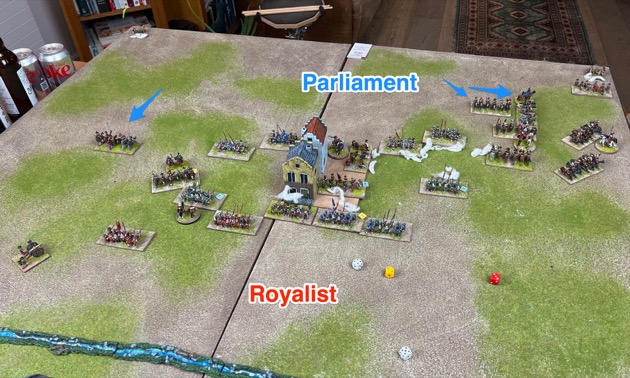
After his own movement, Adam applied his campaign card: [Beneficial] Spectacularly bad judgement (Sir John Hotham): Once during the battle prevent all units in one enemy command from moving. This canceled the Parliamentary movement and, in particular, prevent Chris from responding to the Royalist advanced on the right.
That immobility probably contributed to two routs on the right. Cavalier horse rode down their Roundhead opponents.
In the small village, the Royalists killed the Parliamentary general.

Game over.
Conclusions and Observations
This was a quick game but all of us thought it was great fun.
Once again Chris was on the defensive. But this time Adam’s head long charge smashed his Parliamentary force.
When he drew the stream terrain card, Chris assumed it would run through the centre of the table and interfere with the Royalist advance. Actually the Terrain Cards system has streams run through the centre of the 2′ x 2′ sector they appear in. So the Royalists deployed across the stream and were not hindered by it. As the defender Chris might have been better off not rotating the small village into the centre of the table, which in the end gave him no advantage, and instead rotating the stream so it ran along the edge of the table. This would have narrowed the fighting frontage, hopefully to his advantage. If, instead, the stream had been on his side of the table, Chris could have deployed behind the stream and let the Royalist army come to him across it.
On game turn 1 Chris decided to advance. The Parliamentary infantry centre advanced into the small village and both cavalry wings moved outward to extend his flanks. Counter-attack is always an option but Chris counter-attacked everywhere and didn’t have tactical advantage anywhere. That decision mean his army was defeated in detail. He probably should have a waited a bit, tried to inflict casualties on the advancing Royalists and then picked one place to counter-attack.
Chris placed his cannon in the rear corners of the table. I’m not sure this is a great tactic. This does give them a wide field of fire (good) but without supporting troops they are exposed to elimination as soon as they are hit. And this is exactly what happened to one of Chris cannon – ridden down by dragoons of all things. I suspect the traditional approach of putting the guns in front of the army and accepting their field of fire is blocked when the army marches past is a better approach.
We had some discussion about some of the campaign cards …
[Detrimental] Weary of his times (Viscount Falkland): For the entire battle one chosen Commander is automatically killed if hit
[Detrimental] ‘Let a cannonball divide me’ (Earl of Kingston-upon-Hull): For the entire battle one chosen commander is automatically killed if hit by cannon fire
- This conversations came up about Chris’s Viscount Falkland card but the same question arises for the Earl of Kingston-upon-Hull.
- I had imagined this meant the general was killed any cannon hit the attached unit.
- Chris’s view was that the general had to be hit, i.e. in this case on a 6 from 1d6. And he wasn’t so he survived.
- There is a huge difference in those interpretations. Mine is 6 times more lethal. But Chris’s is plausible and literally what the card says, so we went with that.
[Royalist] Cornish Levies: Before the battle add two Pike+Shot units to the order of battle, but only if fighting in Cornwall or South West. Retain until used
- Adam suggested we forget about this as we’ll never have battle in the South-West.
- I disagreed. “No Way! You never know what might happen.”
- So we can call upon the Cornish levies if we need to
The wording around the number of campaign cards is a bit confusing as evidenced by the fact we got different numbers the two battles in the South-East. I’m going to reword this bit. Currently:
+1 because you are fighting a battle
+2 if you control the contested region and it is a capital (Lower Thames Valley, Upper Thames Valley )
+1 if you control the contested region and it is not a capital
+2 if you control the Royalist capital (Upper Thames Valley) and it is adjacent to the contested region
+2 if you control the Parliamentary capital (Lower Thames Valley) and it is adjacent to the contested region
+1 for each other friendly controlled region adjacent to the contested region
Update
Battle: +1 because you are fighting a battle
Regions: +1 for each nearby region under friendly control, either the contested region or adjacent
Capitals: +1 for each nearby capital under friendly control, either the contested region or adjacentNote: the capitals are Oxford in the Upper Thames Valley and London in the Lower Thames Valley. A friendly controlled Capital region provides two campaign cards, one for the region and one for being a capital.
Finally, a word about the other Parliamentary player, Jamie. Unfortunately, Jamie is always tied up at work or home and hardly ever manages to make it to game night. This is why you often see games with Chris and Adam playing and me in umpire mode. We live in hope that Jamie can join us more often in 2025.
| Game | Year + Round | Location | Game Size | Royalist | Parliament |
|---|---|---|---|---|---|
| 1 | 1642 Early | East Midlands | Small | Adam Strategic Defender Tactical Attacker Defeat |
Chris Strategic Attacker Tactical Defender Victory |
| 2 | 1642 Early | Wales | Small | Steven Strategic Attacker Tactical Attacker Defeat |
Jamie Strategic Defender Tactical Defender Victory |
| 3 | 1642 Late | South-East | Small | Adam Strategic Attacker Tactical Attacker Victory |
Chris Strategic Defender Tactical Defender Defeat |
| 4 | 1642 Late | East Anglia | Large | Steven Strategic Defender Tactical Defender Victory |
Jamie Strategic Attacker Tactical Attacker Defeat |
| 5 | 1643 Early | Upper Thames Valley | Small | Adam Strategic Defender Tactical Defender Victory |
Chris Strategic Attacker Tactical Attacker Defeat |
| 6 | 1643 Early | Wales | Small | Steven Strategic Attacker Tactical Defender Victory |
Jamie Strategic Defender Tactical Attacker Defeat |
| 7 | 1643 Late | Lower Thames Valley | Small | Adam Strategic Attacker Tactical Defender Victory |
Chris Strategic Defender Tactical Attacker Defeat |
| 8 | 1643 Late | Lower Thames Valley | Small | Adam Strategic Defender Tactical Attacker Victory |
Chris Strategic Attacker Tactical Defender Defeat |
| 9 | 1644 Early | South-East | Large | Adam Strategic Attacker Tactical Attacker Defeat |
Chris Strategic Defender Tactical Defender Victory |
| 10 | 1644 Late | South-East | Small | Adam Strategic Attacker Tactical Attacker Victory |
Chris Strategic Defender Tactical Defender Defeat |
Where to get Tilly’s Very Bad Day and Populous, Rich and Rebellious
Both are available for download as PDFs:
Tilly’s Very Bad Day (PDF)
Populous, Rich and Rebellious – English Civil War Campaign (PDF)