To celebrate the completion of my Liberators armies Andrew Coleby and I played the Alternative Chacabuco scenario from Fletcher (2006) using the Liberators QPR. Andrew was the Patriots / Argentineans. I was the Royalists / Spanish. Our biggest problem is that we only get to play in two hours sessions and this game was split over two sessions.
Figures
The figures are largely from Grenadier Productions. For Part 1 of the game I was short of artillery for the Patriots and used some spare Royalists and a couple of Carlist War guns to fill the gap. By Part 2 the correct Patriot figures had arrived.
Table
The scenario give San Martin the strategic advantage and has the Royalists deploy first. The table, more or less, follows the map given in the scenario. The fields were approximations to those on the map. I tried to ensure each was at least 3″ x 3″ on the table. I used hedges to delineate each field. This was particularly important near the Chacabuco farm where several features are adjacent. I used additional hedges to suggest rows of vines within the vineyard.

The photo above was taken at the start of the first Argentine move so, mostly, shows the initial deployments.
Royalist Deployment
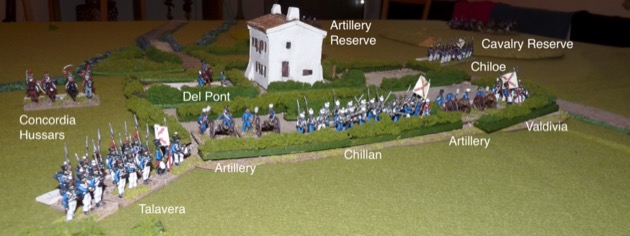
I decided to put a strong line of defence in the vineyard and fields in front of Chacabuco farm. This comprised three battalions (Talavera, Chillan, Valdivia) and two artillery batteries. A squadron of the Concordia Hussars was the local reserve on the right flank behind Talavera. On the other side of the farm, in the middle distance in the photo, I placed the Chiloe battalion between the farm and the left flank hill. A long way behind Chiloe were another two artillery batteries, on the small hill, and the other squadron of the Concordia Hussars. My main cavalry force on the far side of that hill right at the edge of the table – two squadrons of the Frontier Dragoons and the Carabineros de Abascal.

The defensive line in the vineyard and fields at Chacabuco farm comprised three battalions (Talavera, Chillan, Valdivia) and two artillery batteries.

The Chillan Regiment and an artillery battery were in the vineyard in front of the farm.

In the field to the left of the vineyard and the Chillan Regiment was my smallest battalion, two stands of the Valdivia Regiment, and another artillery battery. Being small meant these units were quite manoeuvrable but I had no idea how long they would stand up to combat.
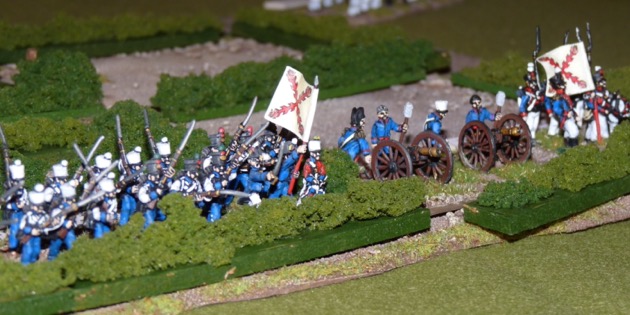
The Talavera Regiment was on the right of the line, outside the vineyard. I adopted this position so the battalion would provide enfilading fire on any Argentineans advancing towards the vineyard. Of course, as it turned out, Andrew didn’t oblige me and this position turned out to be quite exposed.

I had a relatively small centre echeloned back from the main line in the vineyard. The Chiloe battalion was deployed between the farm and the left flank hill. Another mistake as they couldn’t provide support to the front line troops, nor were they supported by the other troops nearby.

I had two artillery batteries and a squadron of the Concordia Hussars a long way behind Chiloe. Okay, it seemed a good idea as the artillery could shoot from the small hill. But I quickly realised they were too far back to influence the battle.

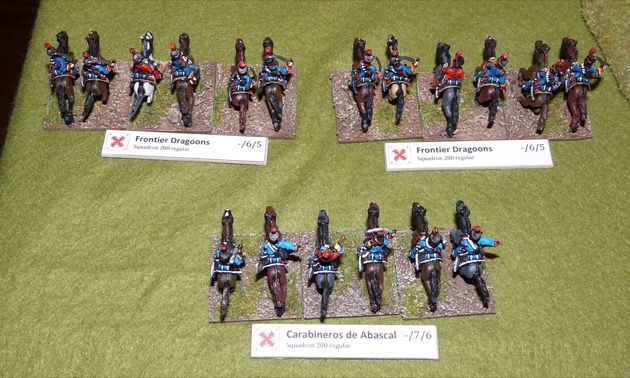
I had my main cavalry force on the far left flank. This comprised three squadrons: two from the Frontier Dragoons and one from the Carabineros de Abascal. I knew they would be out classed by the Argentine cavalry so I thought a wide position would make them a seeming threat even if they didn’t have any real bite.


Argentine Deployment
Andrew deployed his Argentines with Soler’s Division poised to strike to the right and O’Higgins to head left. He basically didn’t intend to directly face the Royalists in the farm at all. In other words my strong defensive line was too strong to tempt him, so he went for my weak flanks. Fair cop.

Soler’s Division was on the Argentine right flank, as per the scenario deployment guide, and basically in march order facing towards the far right.
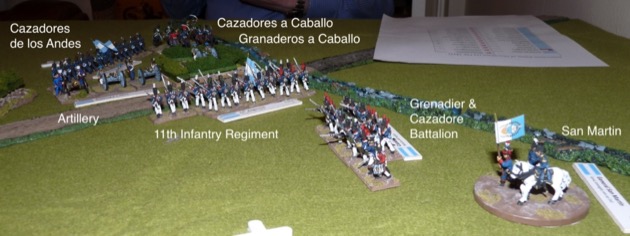
The Cazadores de los Andes were at the front in skirmish order. The Argentine cavalry were between the skirmishers and the river, with the Cazadores a Caballo de la Escolta del General leading and a squadron of the Granaderos a Caballo behind them. The artillery were behind the Cazadores de los Andes, limbered. The other two infantry battalions, the 11th Infantry regiment and the converged Grenadier and Cazadore battalion were more towards the centre.

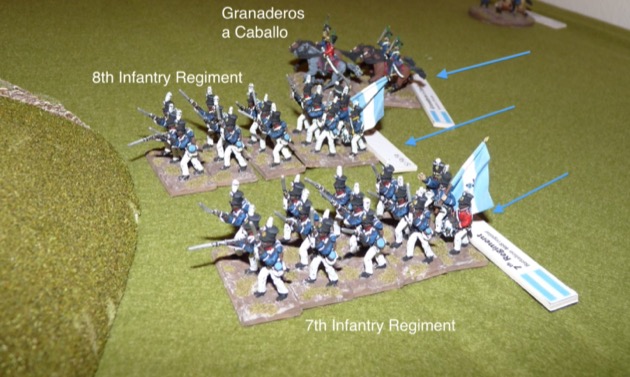
O’Higgins had the two black regiments (7th and 8th) in column on the left flank. Behind them were two squadrons of Granaderos a Caballo.

The Battle – Part 1
As the Argentines advanced the Royalists attempted to redeploy in response. The Chiloe battalion advanced along the road to the left of the farm complex. In the forward left field near the farm the Valdivia battalion (two stands) began to swap places with the artillery battery in the same field.

Further back the two batteries of Royalist artillery on the small hill limbered up. I’d realised they were too far back to influence the game so wanted to bring them forward to more closely support Chiloe. The squadron of Concordia Hussars near them would also advance.

You can see from this table shot that the two armies started quite a long way from each other so it took many turns for the Argentiines to get within striking distance of the defenders.

As Soler’s Division advanced they spread out to cover the entire Argentine right flank. The skirmishers advanced along the edge of the field near the road. The cavalry headed for the extreme right flank. And the artillery advanced in between.

O’Higgins’s infantry approached the large hill in front of the Royalist right, his cavalry threatened to envelop the hill to either side.
Meanwhile the Royalists continued their redeployment on the left of Chacabuco farm. Chiloe, the artillery from the small hill and the squadron of Concordia Hussars all advanced near the road. In the corner field the artillery battery continued to swap positions with Valdivia.

And on the other side of the farm Talavera pulled back to line up with the troops in the vineyard.

As the following shot shows the two armies were edging together.

Andrew continued to push forward his two flanking attacks. In this photo you can see him moving the 11th Regiment towards the fields near the road. On either side of the fields are the Cazadores de Los Andes (far side from the road) and the Converged Grenadier and Cazadore battalion (on the road).

On O’Higgins’s flank the first of the infantry battalions heads over the steep hill whilst the other three units make a bee line for the gap near the table edge. To Andrew’s horror troops on steep hills move very, very slowly.

This shot shows Soler’s division as the infantry advance towards the fields. In the middle distance you can see the limbered artillery and in the far distance the cavalry advance.

The Royalist evolutions on the flank of the farm continued.
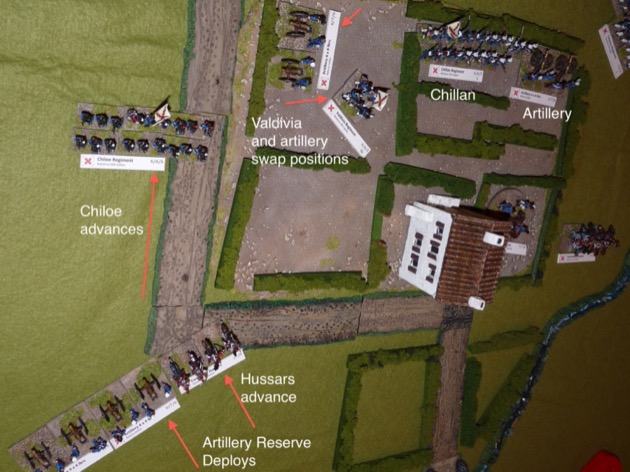
But more significantly I thought I’d take some of the pressure off Chiloe and Valdivia by advancing my cavalry reserve. Not too far mind you. I was pretty sure the two Patriot squadrons facing them would make short work of my cavalry.

And on the other flank, facing O’Higgins, I was still vacillating about what to do. So Talavera advanced! Um – not a good move.
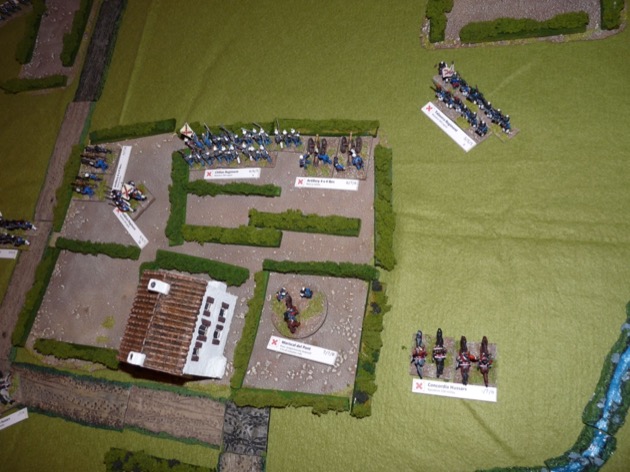
My lone battalion, Talavera, was advancing to towards two Patriot battalions backed by two squadrons of elite cavalry. What was I thinking?

The fanciful manoeuvrings of Royalists facing them (Valdivia, Chiloe, the artillery and Concordia Hussars) seemed to inspire Soler’s division to do the same. Or perhaps it was the implied threat from my cavalry reserve. Anyway the Patriot artillery deployed and the cavalry withdrew! Morale victory to me. Meanwhile the Cazadore de Los Andes, still in skirmish order, swung in towards the field – which, as we’ll see, exposed their flank to Chiloe.

Finally my left was starting to look a bit more solid as Chiloe came into line with the troops in the field and vineyard. The Concordia Hussars were not far behind and the artillery reserve deployed to discourage any mad rush by the Argentine horse.

My right flank didn’t look so good. Here you can see Andrew’s four units of the O’Higgins division bearing down on Talavera. By the way, this shot also shows where the table diverged from the map: the river should close the gap between the hill and the table edge.

Another shot of the same troops but from ground level. As you can see the first squadron of the Granaderos de Caballos are crossing the river.

Here we see the troops of the Patriot centre advancing. They’re all from Soler’s division. In the near ground you can see San Martin with the converged Grenadiers and Cazadores battalion. Beyond them the 11th Infantry Regiment has entered the rear field. In the left of the photo you can see that the Cazadores de Los Andes have also entered the fields, still with their flank to me.
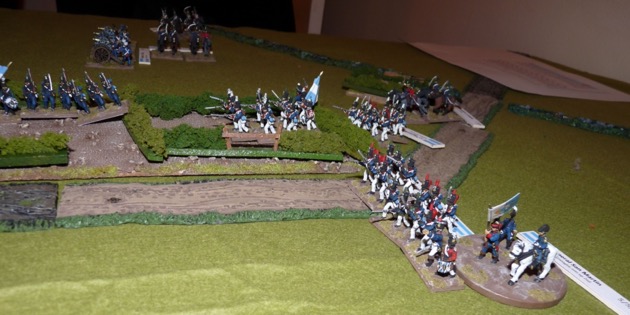
Another shot of the entire table. You can see in the centre how the skirmishing Cazadores de los Andes are advancing laterally across the table exposing their flank to the nearby Chiloe Regiment. On the left the large opposing formations of artillery are deployed to batter anything coming their way.

And on the right Talavera is advancing towards the on-coming horde of O’Higgins. Andrew sent his Granaderos a Caballo across the river in a flanking manoeuvre. Actually it is a mixed blessing for me as it took some pressure off Talavera but opened up other risks. The advance of the Granaderos a Caballo exposed them to fire from my artillery in the vineyard.

Soler’s Division continued their complicated convolutions. The cavalry circled around behind the artillery but most significantly the Cazadores de los Andes continued across my front. I couldn’t resist and sent Chiloe forward to the end of the field to have a go at them.
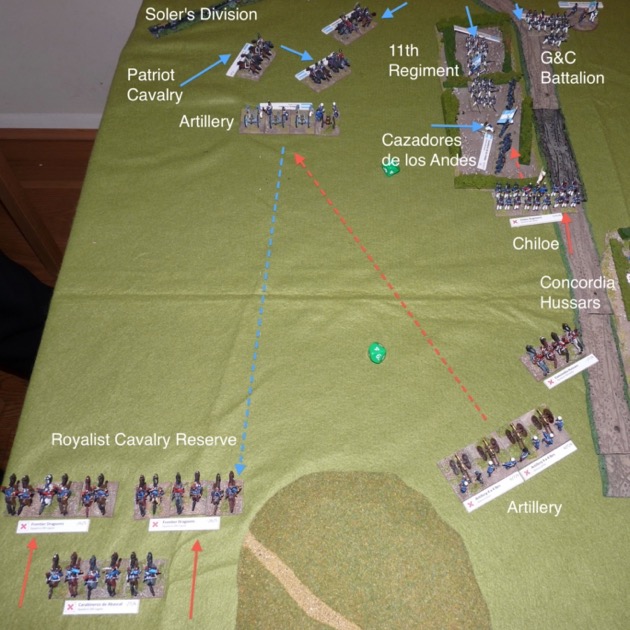
With the Argentine Cazadores de los Andes exposing their flank so invitingly the Chiloe Regiment couldn’t resist and charged.

My artillery in the vineyard had a successful shot at the Granaderos a Caballo across the river, making them quite brittle in any future combat. This may have influenced Andrew in how aggressively he would use them.

This top level shot shows the two fights developing in the fields to the front left and front right of the farm complex. In between you can see I’ve advanced the Chillan regiment out of the vineyard into the area between the fields. This was to enable to deploy them either left or right depending on the level of threat.

And while the fight continues the Patriot cavalry circled.

It was only after the game I realised the skirmishers fair very badly during melee in Liberators QPR and we played this just as a normal melee. The skirmishers took a casualty and withdrew.

Conclusions from Part 1
Andrew had to leave after only two hours so we put the game on hold until he could visit again.
These were my interim conclusions from half way through the battle.
Firstly I’d say the table is too big for the game. The map is for a 6′ x 4′ table. I think this is bigger than necessary because:
- It took a long time for the forces to engage
- The ends of the table will never be used
I think the table could comfortably be reduced to 4’x4′ by just using the middle sectors of the map.
The Battle – Part 2
Andrew and I played the second half of the battle after a gap of a couple of months. And as promised we played on a small table (4′ x 4′).
The following shot shows the new table and a summary of the movements by all of the troops during part 1.
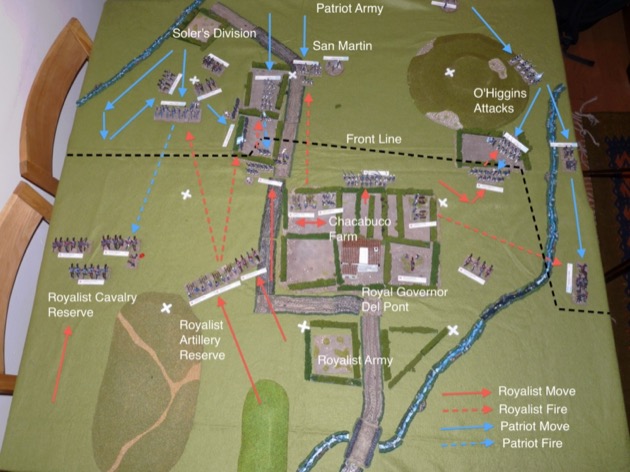
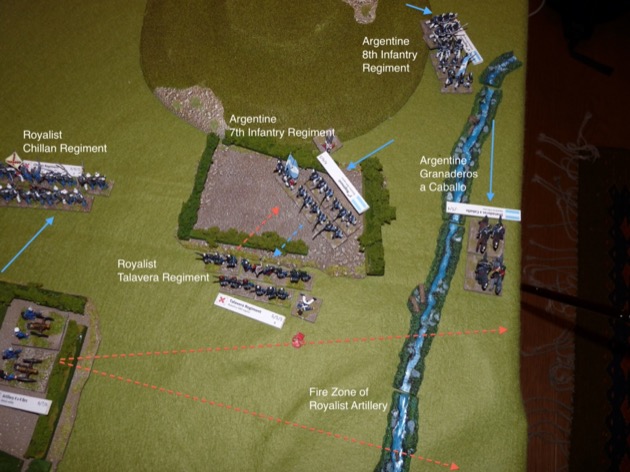
The Argentine 7th Infantry Regiment advanced into the field against Talavera on the right flank. The Royalist Chillan Regiment moved out of the vineyard to offer support to Talavera. Meanwhile the flank march of the Granaderos a Caballo continued … but for the second squadron it didn’t advance very far. Fear of the Royalist guns in the vineyard held them back.
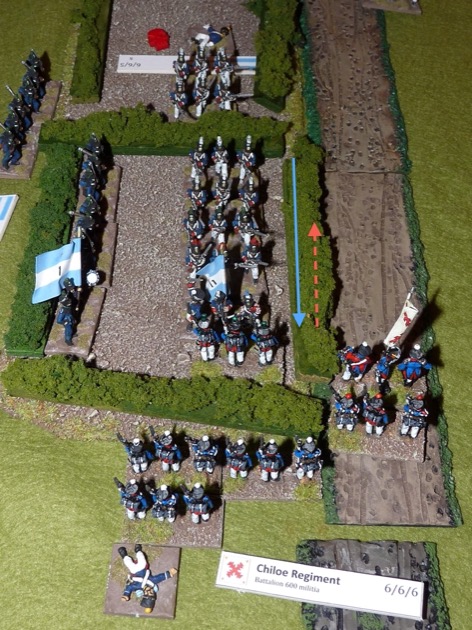
In the centre the Argentine 11th Infantry Regiment, in column, charged the front of Royalist Chiloe, in line.
Nearby the opposing artillery were sniping. Andrew’s priority target shifted around a bit – here it is the Concordia Hussars – but I consistently shot at his artillery.

Glorious Chiloe disordered the 11th with musketry as they charged in, inflicted more casualties, and won the melee. But then Chiloe failed its morale test and withdrew leaving the 11th with possession of the fields. Aaaaargh!

Back on the other side of the table the Chillan regiment joined with Talavera on the edge of the fields and poured musket fire into the Argentine 7th. The 7th promptly broke and fled.

But, this being Liberators QPR, the 7th immediately rallied near San Martin.

Having defeated the Argentine 7th the Chillan regiment advanced into the fields to threaten the 8th. Bad move. Movement in difficult terrain, particularly in line, is very slow. As it happens Andrew began to withdraw the 8th back behind the hill. The two opposing infantry regiments probably helped that decision but what you can’t see is the reserve squadron of Concordia Hussars has moved up near Talavera to join the impending attack.

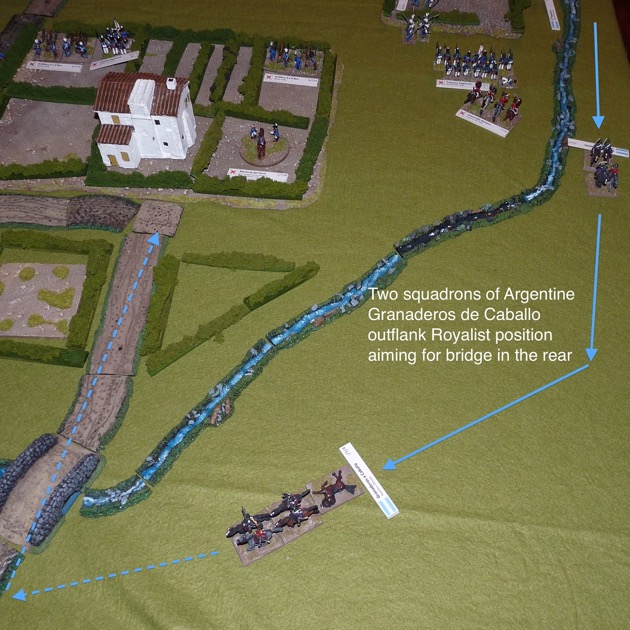
Over the river the forward squadron of Granaderos a Caballo continued its flank march. The second of the two squadrons gave chase when the Royalist artillery swapped back to face the emerging threat from the Patriot centre near San Martin.
Having cleared the fields near the road the Argentine 11th Infantry Regiment and their neighbours the Cazadores de los Andes deployed into a wider formations facing the Royalists up the road. The 11th stayed in column, but a wider one. The Cazadores formed line. I pulled the Concordia Hussars back to a position near my artillery. This meant my artillery had a new priority target … the Cazadores.
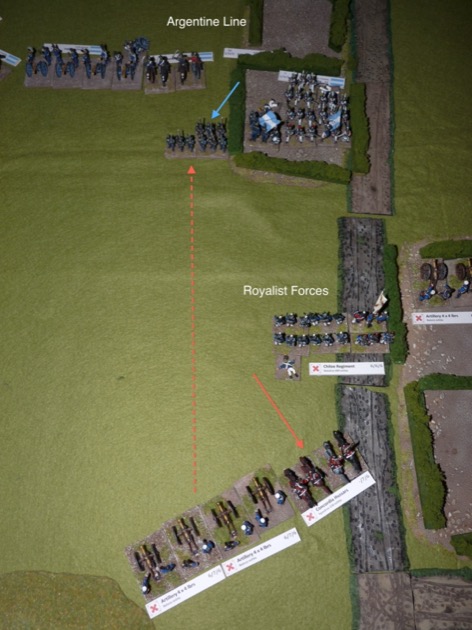
Concentred artillery fire quickly broke the already depleted Cazadores de los Andes.

Unfortunately, the rout of the Cazadores exposed the Royalist Chiloe regiment to fire from the Patriot artillery in addition to that from the 11th Infantry Regiment. This broke them. Chiloe had put up a good fighting during the day but luck was against them.

Unusually, for a lack lustre commander, Del Pont managed to rally Chiloe near the Chacabuco farm. I faced them towards the rear where the Argentine Granaderos a Caballo were like to come from.
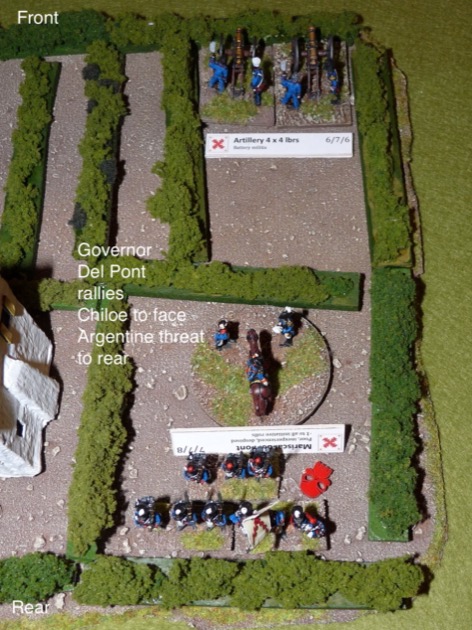
With the Argentine 8th Infantry Regiment pulling back I figured it was safe to leave that flank to Talavera again. The Chillan regiment about faced and headed out of the fields.

More shuffling happened on the far side of the table. I pulled my cavalry reserve back to avoid fire from the Patriot guns.

Finally the first squadron of the outflanking Argentine Granaderos a Caballo reached the bridge in the rear of the Royalist position.

But that was as far as we played it. We’d run out of time again.
Conclusions
After two sessions of two hours each, Andrew conceded defeat. To me it seemed, at best, a minor victory on points. I routed two of his units. He got one of mine. I was still firmly in position around the farm. But he had two squadrons of cavalry in my rear. It could have gone either way if we had continued. But we rationalised my victory away as San Martin deciding to withdraw on that day, with his army largely intact, rather than continue with a full on assault.
We played the Liberators Quick Play Rules (QPR). They had a good period feel but weren’t “quick” by DBA standards. The first two hours of play involved manoeuvring to contact. Admittedly it took us longer to do this as we were learning the rules as we went along. After another two hours we’d only really played out half the actual fight.
Being more proficient in the rules would have sped things up. In particular we would have known what was a good initial deployment and avoided some unnecessary movement. In particular I put my artillery reserve too far back initially and spent quite a bit of game time bringing them forward. A better deployment would have meant closing to contact faster.
After session we made one change to make the game faster. We cut down the table to 4′ x 4′. I’d recommend this for others as well.
Based on advice from John Fletcher we played several QPR house rules:
- Casualty Markers: This was probably the most radical of the house rules. We didn’t play casualty (stand) removal and substituted casualty markers. Units continued to fight at full strength until routed. That made all units, particularly large units, more resilient. This in turn meant the game took longer as units were on the table longer.
- Basing and stand width: my 30mm wide bases seemed to work but then I’ve never tried with John Fletcher’s varying base sizes.
- Two Deep Infantry Line: a bit of a fudge but worked fine. The units, hence armies, fought on a narrower frontage – one that is in keeping with the nominal ground scale.
Overall, it was fun but a bit slow.
But next time we’ll try Liberators HOTT. 🙂
References
Fletcher, J. (2006). Liberators! Supplement 1: The War in the South. Grenadier Productions.

