
I’ve been gearing up to pay Dung Farm from Hit the Dirt for a couple of years now. I posted my Balagan version of the Dung Farm a few weeks back and, as you might recall, the table has lots of Ravines, thorn fields and thorn thickets. It took me a while to collect this additional kit. Plus the Kiwis in Italy. But finally it all came together – scenario, terrain, and figures. And Chris, Jamie, and Adam turned up to play. This is, of course, Crossfire for the Italian Campaign.
Summary: Really good game. Interesting challenges from ravines and thorns. The British need to use the terrain to their advantage. Chris and I, as the Germans, won.
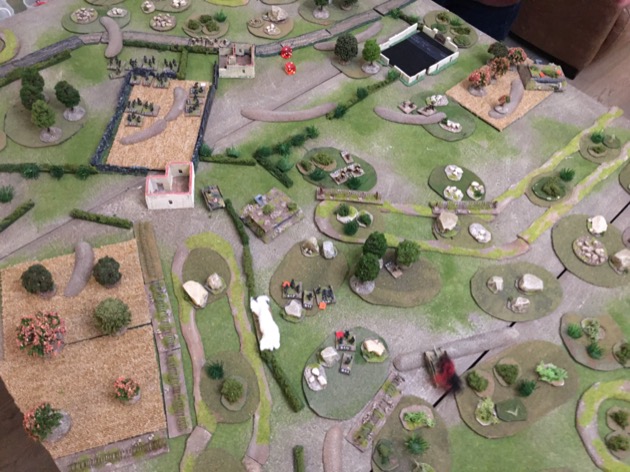
Table
The historical battle was fought at a farm. A pig farm, hence “Dung Farm” to the Brits.
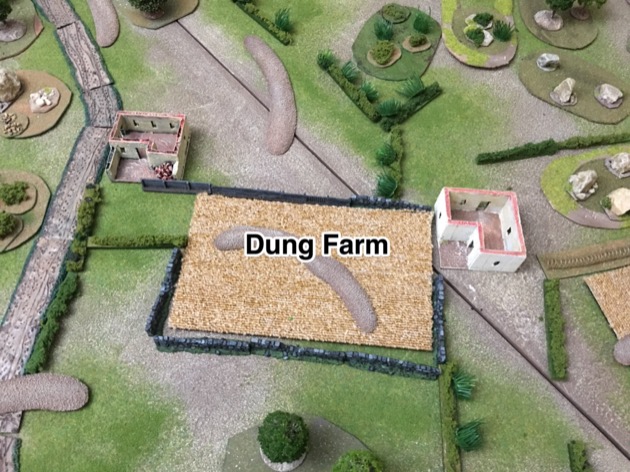
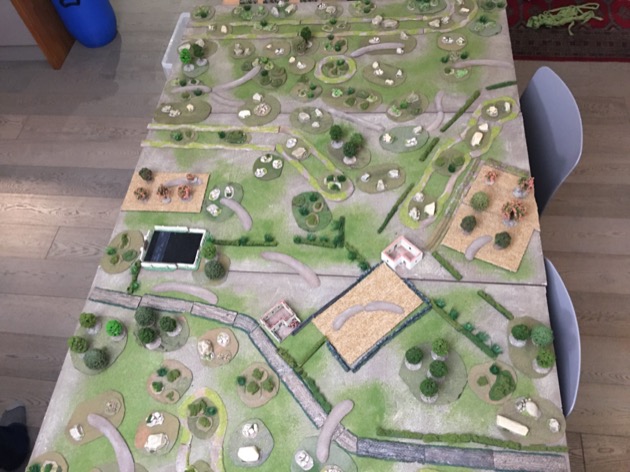
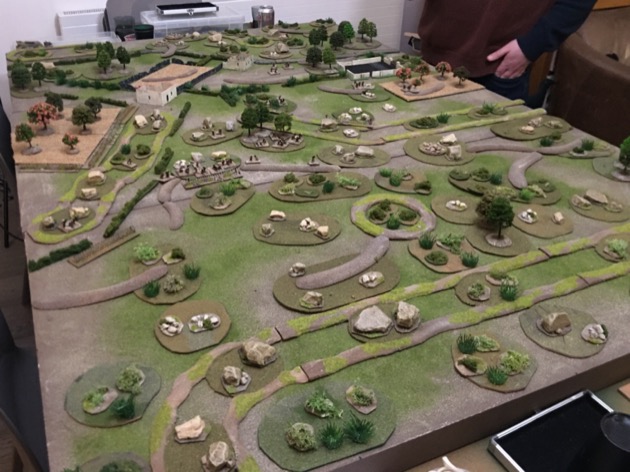
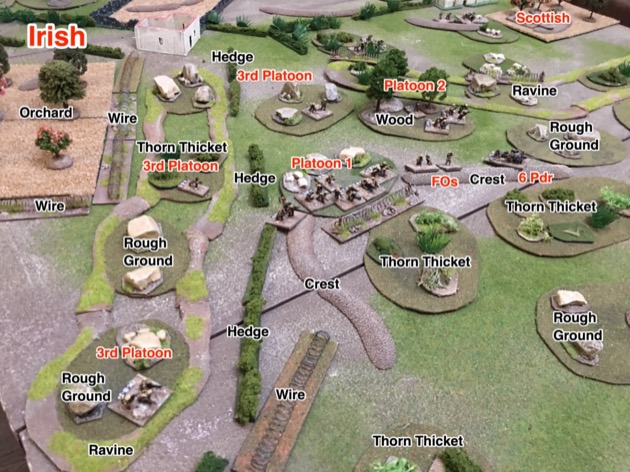
I think the table was quite impressive. It did take about an hour to set up, but I reckon it was worth it. My ravine system featured heavily in this game, which is no surprise given I made to ravines specifically to play this scenario (and for my Burmese table).
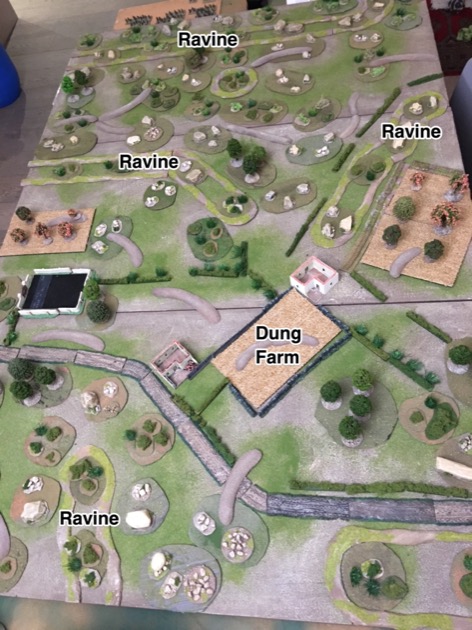
There is a lot of terrain, so what might not be obvious is that the lines of fire are very long. There is very little blocking terrain. Hedges, thorn hedges, woods, crests, and buildings block LOS. But stands can happily shoot across rough ground, thorn thickets, and ravines. I tell you, as one of the German attackers I was thinking, “how are we going to attack across that?”
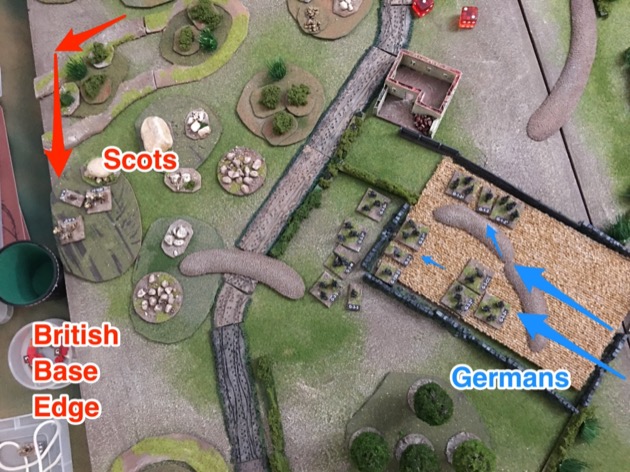
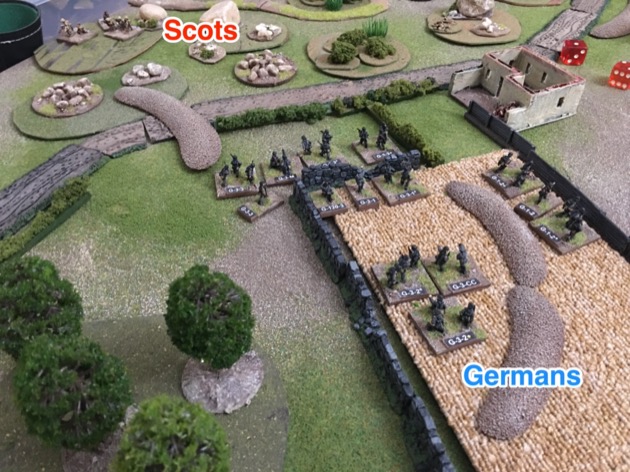
Deployment
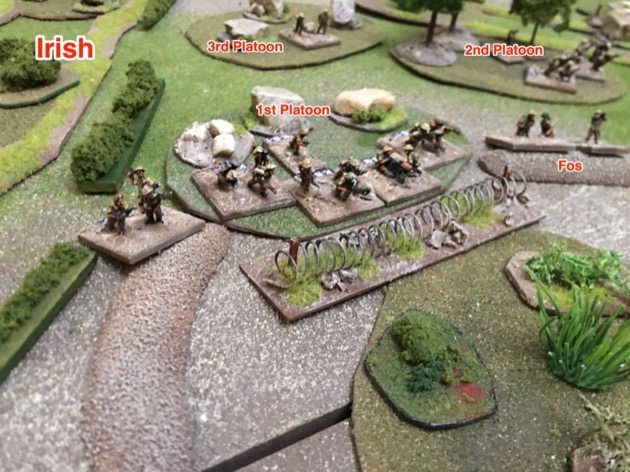
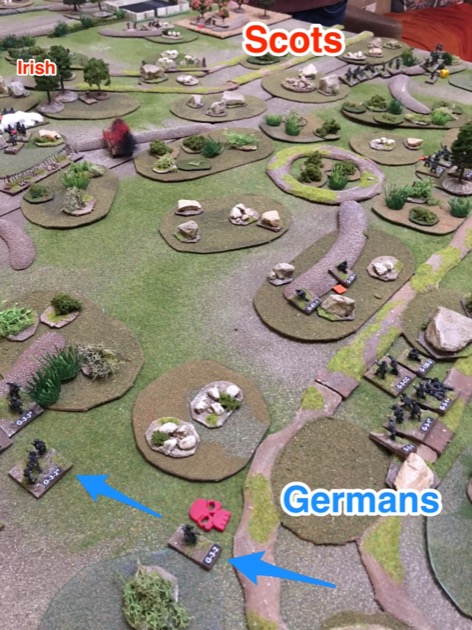
Jamie got Company D, 1st Irish Guards. and chose to deploy relatively forward, within Line of Fire of the German deployment ravine. He was on the German left, so facing my 4th Company.


It was only when I started looking at the terrain with a view to fighting in it that I realised it was nasty. In addition to actual barbed wire, the British was sheltering behind quite a few thorn thickets, as in natural barbed wire.
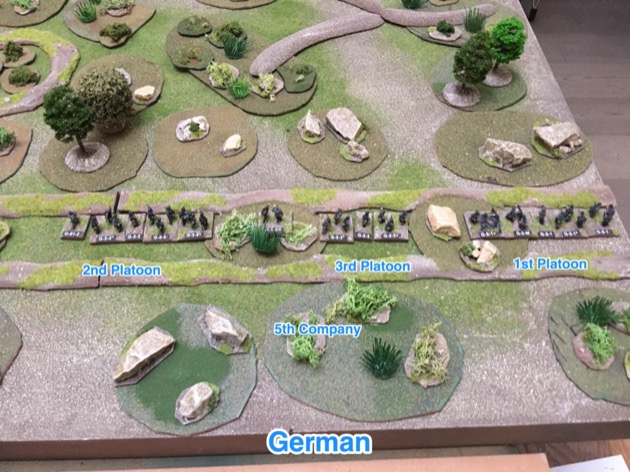
Like all battles, one platoons is at the front. In this case it was the 1st platoon of the Irish Guards. These guys would take the brunt of the German attack.
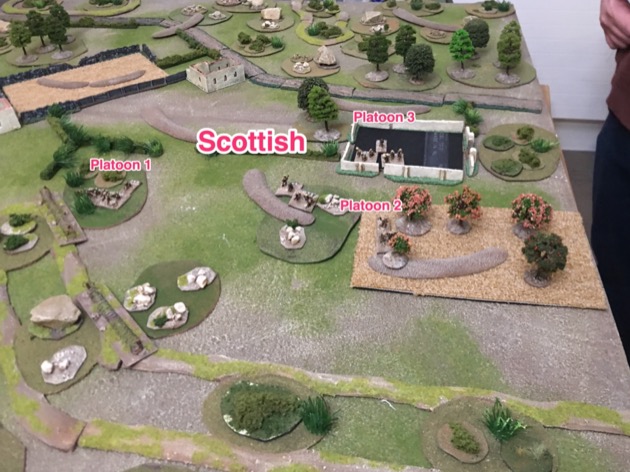
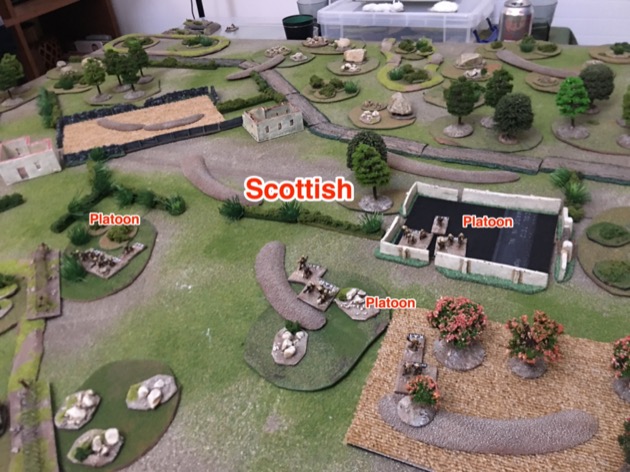
Adam’s Company B, 6th Gordon Highlanders, were around the walled cemetery and facing Chris’s 5th Company on the German right.
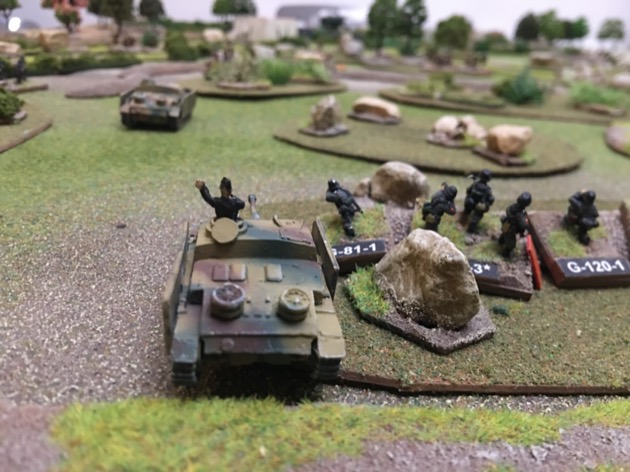
Our Germans deployed, visible, in the big ravine near our table edge. My 4th Company were on the left. I’d opted to take the StuG platoon from the beginning of the game. The way I looked at it, Jamie’s forward deployment meant he was exposed to my the StuG’s firepower.

Chris’s 5th company were on the right.
We kept the 6th Company and Battalion HQ off table as a reserve.

05:30 Hours
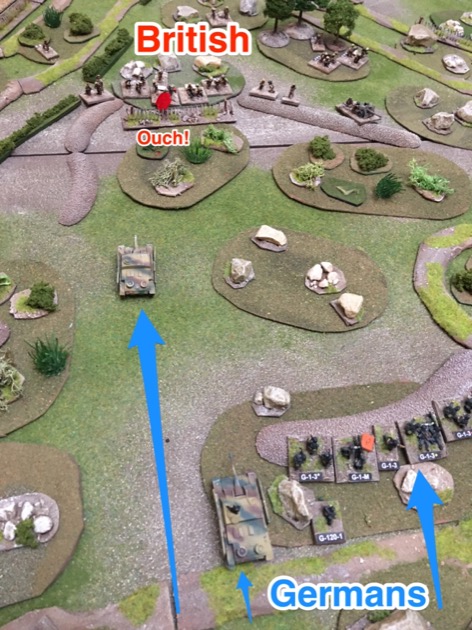
I kicked off the game by advancing my StuGs out of the ravine to threaten Jamie’s Irishs. And they got a kill in the first initiative. In my House Rules for Guns and MGs on Vehicles I let the main gun and machine guns shoot as a fire group. That makes them quite potent, hence the kill.
Once of the StuGs headed towards the hedges blocking off the ravine over on that side.
Meanwhile the one of my platoons knocked out the Irish’s 6-pounder gun.

And the Irish retaliated by taking out an HMG team.
06:00 Hours
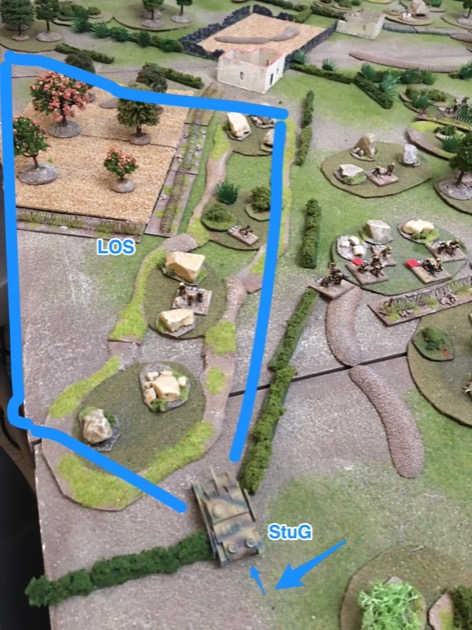
The lines of fire were vast, so getting out of the ravine required a bit of care. Or, more specifically, some smoke.
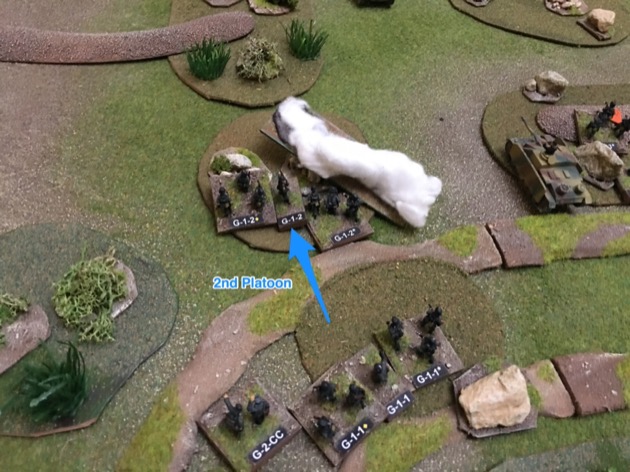
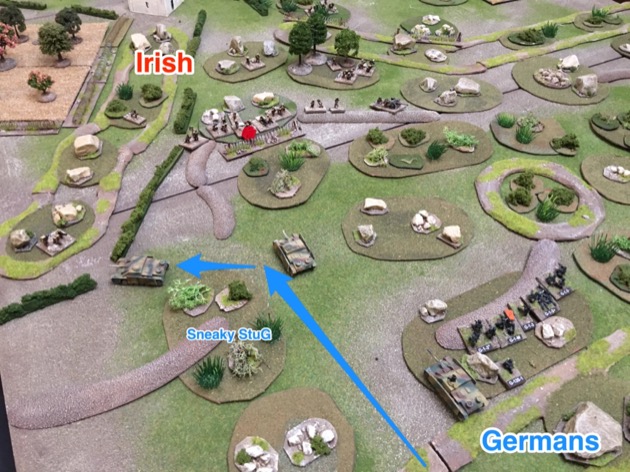
The sneaky StuG did a quick shuffle and suddenly had the whole ravine to its front covered by fire. The Irish stands in the ravine weren’t coming out. And no other stands were going to reinforce them.
Okay, I took a lot of photos of my German 4th Company and the Irish facing them. But Chris (5th Company) and Adam (Scots) were also active. Chris’s role was to demonstrate against the Scots and tie them up. He did a great job. It all started by a series of advances.

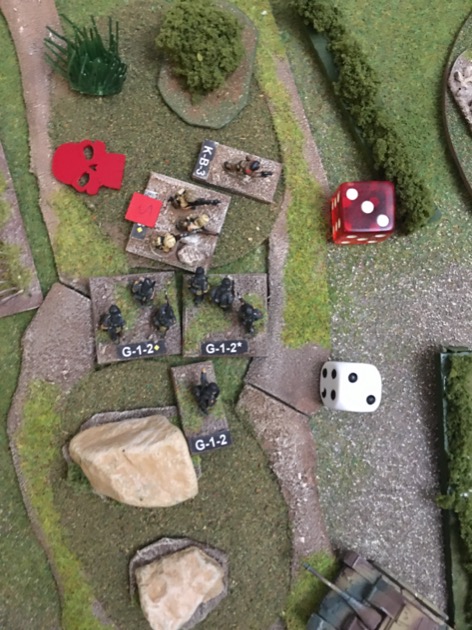
Back on the left, I moved a platoon up the the StuG on the ravine, and immediately realised I had a problem. A couple of the stands had line of sight into the ravine but could also be shot at from inside the ravine … in the open. One stand wasn’t on the lip of the ravine and couldn’t be shot at, but nor could it shoot. Ravines are tricky.

Chris decided the best way he could help my attack was by knocking out Irish elements in the centre of the table. So he started chewing on them. First to go was an FO.

Then a 2″ mortar team.

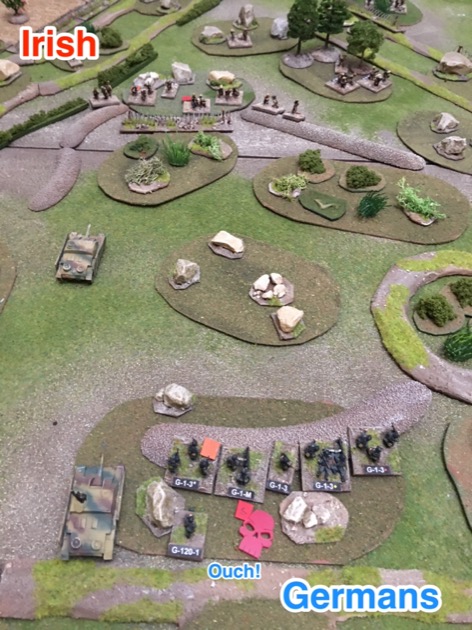
The Irish were rather peeved and shot up my of my rifle stands.

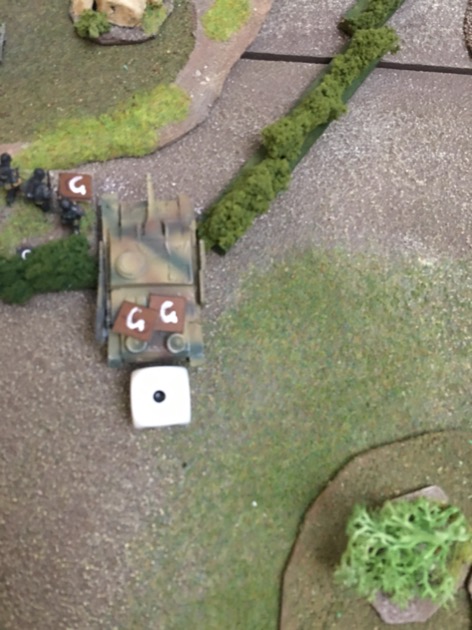
And this was when the mud rules came into effect. My already bogged StuG tried to move again and got permanently bogged! Mutter, mutter.
On the far side of the table, Chris pushed his troops forward.

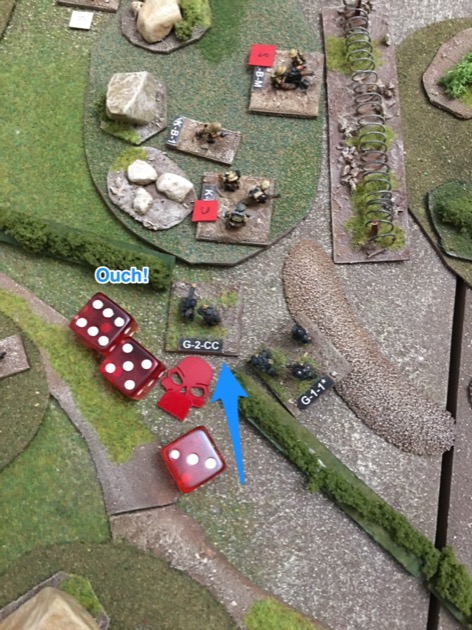
In Crossfire, close combat is faster than a fire fight so, with some suppressions, I saw an opportunity against the Irish. A squad and my company commander took out an Irish squad.

My rash company commander charged forward again, found himself in LOS of some Irish and got killed.
Rather stupidly I think tried to move my squad forward and got the same result. Doh!

Finding that close assaults are not all they are cracked up to be, I resorted to the heavy guns and started pounding with my StuG again.

It took out the suppressed machine gun.

On the far side of the table the Scots killed a squad from Chris’s 5th Company.

I don’t often do table level shots, but they do look cool. In this case I lined up behind two of the StuGs.

By this stage we (the Germans) had made advances, but not very far. All of my stands that had advanced into the Irish lines had been eliminated. This made the game rather gritty and realistic.


I wasn’t entirely reliant on the StuGs for killing power. My mortars also took their toll.
06:30 Hours
Chris played a brilliant supporting act. At times he poked at the Scots. At times he picked off some Irish. In this case he got an Irish squad in the middle of the table.

07:00 Hours
Earlier in the battle Jamie had tried to withdraw one of the squads from the front platoon. It successfully did a retreat move out of the rough ground, but then got caught by reactive fire, facing away from me, in the open. Suppressed at the time and then finished off by close combat. Finally, I was breaking into the Irish lines.

Oh, man! A long range Scottish Piat sniper got my StuG! This is one of the things I find odd about the standard armour rules … infantry anti-tank weapons can fire across the table. Not sure about that, given my ideas about ground scale in Crossfire.

No matter. I pushed on and destroyed another Irish squad in close combat.

I figured I had to do something at the ravine on the extreme left. So I moved my only stand that was out of LOS into LOS. It got PINNED, but so what. I could now do a crossfire with the platoon.

07:30 Hours
Time passed quickly.
08:00 Hours
I was finally doing alright and Chris and I decided to bring on 6th Company to reinforce my success.
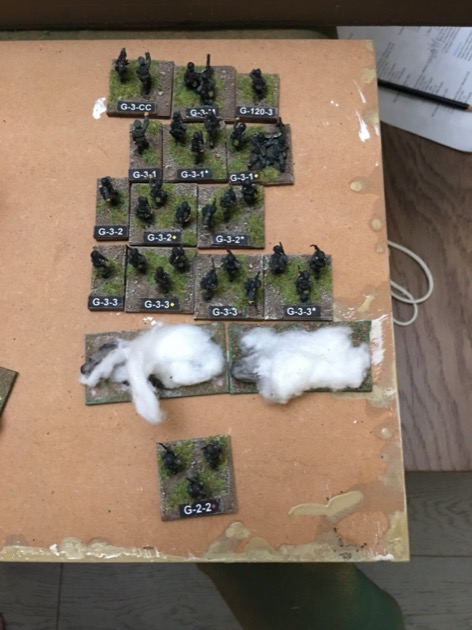
6th Company came on in the ravine and then moved off towards the left. But once again I was caught out by the long LOS on this table, and a Scottish sniper killed my trailing PC. Annoying.
Adam revealed his Scottish bunker, hidden in an orchard on the far right flank.

And I discovered Jamie’s Irish bunker just in front of my leading squad. Hidden in the open – this is one grey area in Crossfire. Can a bunker, or in fact stands, be hidden in the open. Now wasn’t the time to debate that so there was no mid-game legalistic challenge.

08:30 Hours
Chris kept up his pressure on the Scots.

09:00 Hours
My 4th Company charged the Irish in the ravine over on the left. They were in a thorn thicket but carelessly left a corner exposed. So I hit it.
This is when 6th Company took over from 4th Company. I assaulted the Irish bunker from the flank so the defender couldn’t shoot at me. And then piled in three squads and a commander to made it a done deal.

One of StuGs rolled past but got bogged down.

It didn’t matter because my 4th Company had pretty much destroyed the Irish and had given 6th Company a clear run to the British base line. Well, almost clear run. Adam brought a platoon of Scots over to shoot along the base line. With the Operational Zones house rule we were using they couldn’t enter the Irish zone, but they could shoot into it.
I wasn’t quite sure what to do about that. In the same way Adam couldn’t move into my zone, I couldn’t move into his. So 6th suddenly found themselves unsure what to do.
Luckily Adam took his platoon away from the base edge and advanced towards my position.

09:30 Hours
That left the base edge unprotect and I could infiltrate my entire 6th Company, with 4th Company to follow.

End game
That was the end of the game. We’d taken fairly modest casualties.

We still had the battalion HQ in reserve.

Despite the Irish deploying forward, the battle had covered pretty much the entire table.


Observations and Conclusions
We had a lot of firsts. This was the first game for these players in the Italian Campaign. The first game with my new Kiwi figures (for British). The first time I used my Ravines, thorn thickets and thorn hedges. The first time we played a Crossfire game in mud. The first time, in a long time, we played a big (battalion sized) game of Crossfire.
It was awesome.
Italian Campaign
It has been years since I played a Crosfire game in the Italian Campaign – the Reconnaissance Before Pontecorvo with John McLennan was the last time. My current wargaming crew all post date that game so haven’t done anything in that theatre. I think things are going to change. As Jamie said, “now I’m really interested in the Italian Campaign.” I’ve started buying more books about the campaign.
Kiwis
I’m still basing and flocking my new Kiwi figures. But it was great to get them on the table. I feel like my Kiwis in Italy Project is actually getting somewhere.
Ravines
Ravines are really cool. I like the modular models I made, which is a relief. But the presense of the ravines changes the game quite a lot. It really gives it a more 3D feel. Suddenly visibility is a bit tricky.
Thorns
The thorn hedges didn’t come into play but Chris got tangled up in the thorn thickets. They are nasty. Chris had squad hung up on the thorns which really interfered with his strategy.
I didn’t go into any thorn thickets, but it affected my game play anyway. There were relatively few paths forward that didn’t go through thorn thickets, so my attempts to avoid the thorns constrained my options.
Mud
The mud rule about not exiting and entering a terrain feature didn’t come into play. That might be because we forgot about it, but I also suspect it just didn’t matter much. This rule only matters if somebody is shooting at the moving stand. And that didn’t happen so often, and when it did the moving stand got stopped.
But the bogging of the StuGs are very significant. Jamie chose to deploy forward. Even so two of my StuGs got bogged down and one of them permanently bogged. If Jamie had deployed further back General Mud would have dealt with my armour far more effectively than his Piats.
Big game
This was the first time, in a long time, we played a big (battalion sized) game of Crossfire. I think the Paper Factory – A Crossfire Battle Report from Krasny Bor was the last one. It takes a bit longer but it is a great experience.
Operational zones
We’ve played operational zones before, so nothing new there, but this time I tried to simplify the rules. I for example removed the option to redefine the operational zones during the battle. That made a difference. I think both Adam and I would have taken that option if it had been available to us. Something to think about.
Brilliant report and a great looking game.
That looks like it was a fantastic game. Inspiring stuff for sure.
Cheers,
Pete.
Thank you for sharing! It was very interesting to read about a 2v2 game, as it offers new tactical considerations and problems. Did you play simultaneously, or did you wait for both players on one side to lose the initiative? So did you prefer playing with the simplified operational zones or the original ones?
We played the simplified Operational Zones in the scenario special rules. But after play testing, we could have used the ability to shift the operational zone, which is in the original Operational Zone Hous rules.
You missed out the 2/7 Middlesex machine gun company supporting the Gordon’s !!