
I’ve had a go at gullies and depressions before. But they look too much like hills. So I decided to have another go modelling just the edge of the depression. Then I took this concept further and modelled a modular ravine system. I featured both of these when I asked, How does my Burmese battlefield look? In this post I share a bit more about how I make these features.
Depression
I did the new depressions first. I had the idea to redo my depressions for awhile. And the Breakout at the Hinge convinced me I had to do something. My last attempt at modelling a depression had the entire feature on a piece of hardboard. So even the sunken bit was above the table top. This time I decided to make the sunken bit as low as it could go, i.e. the level of the tabletop. So basically the depression feature only has the lip of the actual depression. Unfortunately this is still raised above the table top but the effect is definitely better than the previous one.
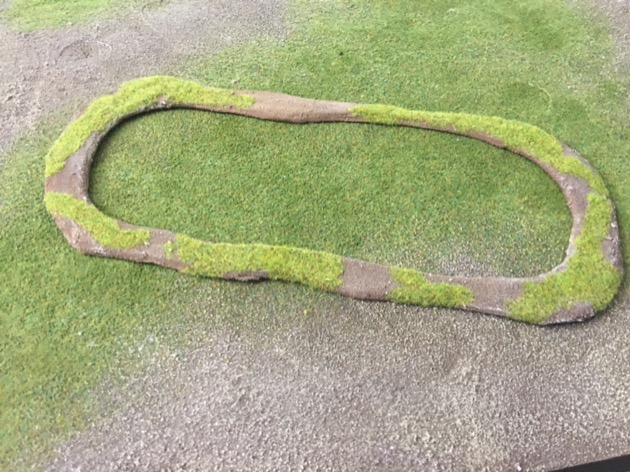
I think the bigger depressions work well enough. The small (6″ / 15cm) depression looks a bit too much like an overgrown shell crater. But it’ll do for game purposes.

The depressions are designed to have my normal terrain templates inside. Specifically a couple of 4″ round templates.

In hindsight I wish I had included area terrain templates as part of the depression. That is what I did for the ravines that follow.


Ravine or gully
Ravines are a new concept for me in my Crossfire games. Because I am building up forces for the Italian Campaign I had a look at some of the Hit the Dirt scenarios. The Dung Farm scenario features ravines. Kind of like long depressions.

So I made some. My previous wargaming gullies were solid features and my first attempt at modelling crossfire depressions were the same. These were functional but didn’t look right.
This time I decided to do a modular ravine system. I thought about modelling just the edges of the ravines, like I did with the depressions above, but two things stopped me. From experience I knew I had to put area terrain templates inside the features and I knew the unanchored edges would just float all over the table. So to reduce float I combined the ravine edges with the area terrain templates that they needed inside. This provided structural integrity for the features. I went with 3″ x 4″ (7.5cm x 10cm) area terrain templates along the length of the ravine features. This is smaller than my normal terrain templates but I wanted the ravines to be no more than 4″ (10cm) across.
I started by designing the ravine sections. I played with the Dung Farm map and came up with a set of modular ravine sections that allowed me to draw Dung farm. Then I added a few.

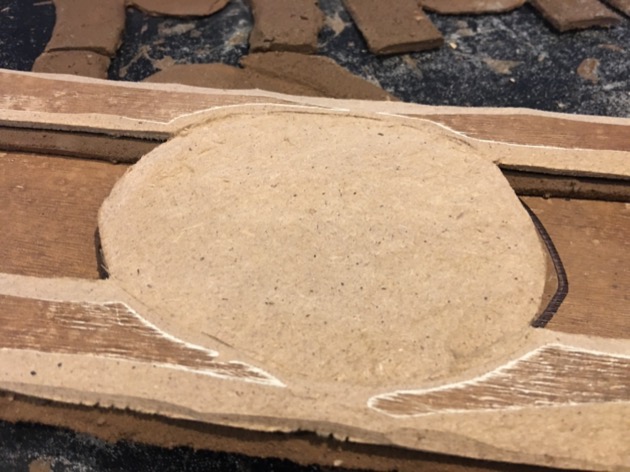
I made the ravine sections out of hardboard. Only because I knew I could carve it with a craft knife. And that is exactly what I did. The photo shows three of my 18″ (45cm) ravine sections. I draw the ravine on the hardboard. Then I cut it out. Then I sanded the edges (but not the area terrain templates) and painted using flat earth (see flocking style).

The edges of the ravines were the thickness of the hardboard (about 3mm). I carved back the area terrain templates to half that thickness (1.5mm). This is rather a brutal process.
I made quite a lot of ravine sections. I flocked the area terrain templates like my normal terrain templates – this is a different colour to the static grass I use for my flocking style. The distinction is deliberate to make the area terrain templates obvious.

I like the way the ravine has bends and curves. I took the following photos before I placed all the other terrain for my Burmese battlefield post.


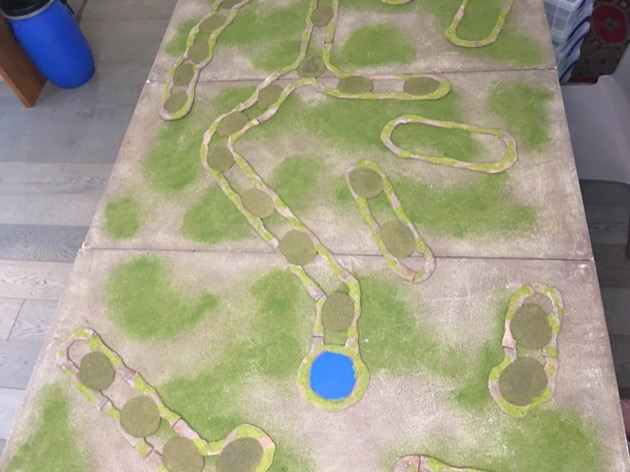


And finally a reminder of what they look like on table.


