
Jamie Wish and Chris Harrod played “The Embankment” (KB4F), the third game of Krasny Bor, featuring the Blue Division in an epic Crossfire campaign. The Spaniards were defending the area of the Leningrad-Moscow Railway line – the Embankment – against overwhelming odds.
Summary: Jamie’s Soviet both infantry and armour – broke through the thin Spanish line. This will make the fourth battle tougher for Chris.
Setup
The Embankment is the front table battle in Zone 4. My recommendation for two players is to jump from Zone 1 to Zone 4 leaving the fighting around El Bastion to later int he campaign, and the finale in Krasny Bor itself to the end.
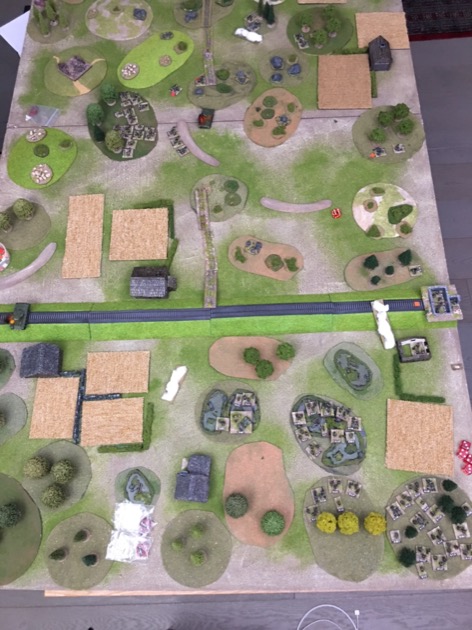
As usual with the my Krasny Bor games, the table is 6’x4′.

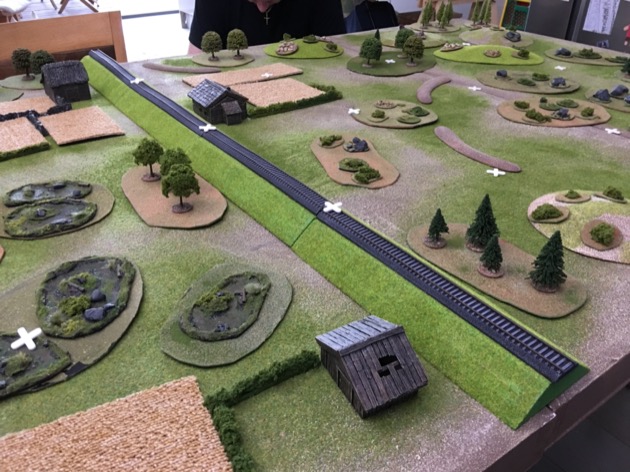
The dominant feature is the railway embankment down one side. This was custom made for me by S&A Scenics. The embankment splits the table into two unequal sections.

The orders of battle were based on pre-campaign decisions.
Soviet forces
- 10 x Pre-planned Bombardment
- 3 x Battalion Waves (1, 2 and 3) from a Rifle Division (Morale = Green)
- Battalion Wave 1 has reserves:
- From Central Reserve: 1 x KV-1 tank platoons: 3 x KV-1 E
- From Division Reserve: 1 x Pioneer Platoon;
Spanish forces
- 1 x Leg Infantry Company
- 1 x Machinegun Company: 3 x HMG; FO for off-table 81mm Mortar (12 FM)
- 1 x Anti-tank Battery: PC(+1); 4 x 5 cm Pak38 ATG (optional tow each)
- 1 x FO for off table 10.5 cm (Heavy) Artillery (4 FM)
- 3 x Snipers
- 12 x barbed wire section (120 by 30mm)
- 1 x Minefield
- 1 x Bunker
Not much of the Spanish deployment was visible. Just a long, long stretch of barbed wire and the bunker.

Chris placed the bunker on the railway embankment at the table edge. This gave him line of sight along the entire length of the embankment, smoke allowing. You can see the bunker in the picture below, on the far edge of the table.

Jamie: “I won’t give away too much of my plan. It is very subtle.”
As you might recall the Soviet goal in the front table scenarios is to penetrate the Spanish line and infiltrate troops so they have a better chance of winning in the rear table battle. Jamie set up accordingly.

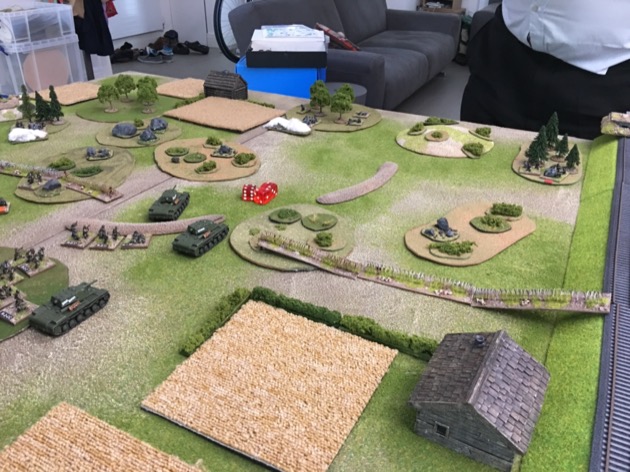
Jamie placed the bulk of his infantry on the flank, over the railway embankment.

In the centre Jamie placed what I initially took to be a holding force. Enough to keep the Spaniards pinned in the centre and over extended across the whole table.

The Game
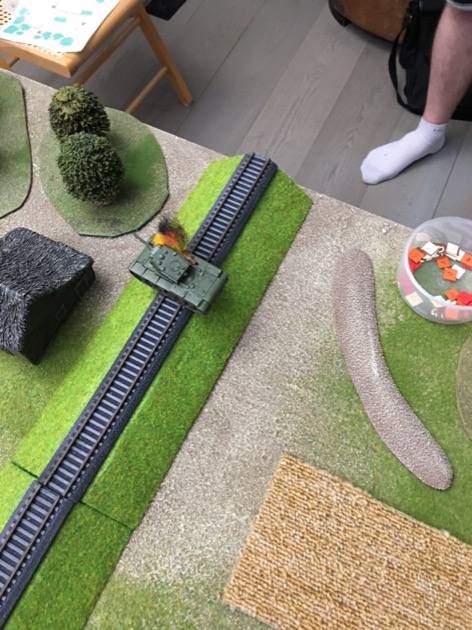
Jamie launched his attack in the centre. All his tanks (KV-1s) were here. There are many great thing about tanks in Crossfire but one of them is breaching wire by driving across it. Who needs sappers?

Jamie then flipped to the flank force. This is part of Jamie’s gaming style, his focus jumps around. The flank attack, although large, got off to a slow start. Jamie want smoke to shield his attack.

Back in the centre another KV-1 rumbled forward and more wire disappeared under its tracks.

As the tanks rolled forward, Spaniards started fighting back. In particular a Pak38 opened up on the KVs.

Jamie had a company of infantry to support the tanks and started bringing them forward.

Back on the other side of the Embankment, Jamie extended the frontage of his attack.

This revealed more Spaniards. But there were precious few on that side of the railway line.

Jamie had two companies in his flank attack. A real right hook.

Jamie flipped back to the centre and pushed more troops forward. More Spaniards were revealed.
Jamie didn’t have tanks in his flank force, so had to resort to sappers to breach the wire.

Pretty soon we’d discover whether the bunker was sufficiently strong to stop the Soviets.
[I really should make a custom bunker to straddle the embankment]

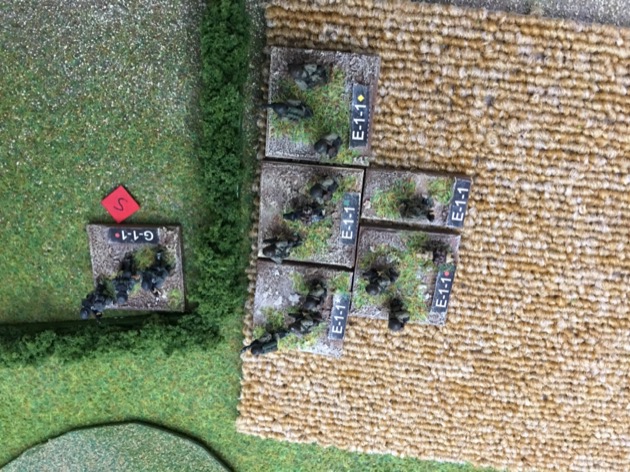
As I mentioned, Jamie had two companies in his flank attack. All that Chris had facing them, for the longest time, was three stands.

That didn’t make it easy for Jamie. He still had to find a way to get close. And that required smoke.

Back in the centre the KV-1s were untouchable. They prevented Chris transferring troops to the now threatened flank.


With his sappers through the wire Jamie pushed them forward. Almost to, but not quite at, the hedge shielding some Spaniards.
Also to the west of the Embankment, the firefight between the massed Soviets and the Spaniards continued.

In the centre a Spanish PAK knocked out a rash KV-1 that advanced with its flank to the enemy.

The Spanish wipe out a Soviet squad to the west of the embankment.


Jamie called in mortar support for his sappers. They got the Spanish squad near the hedge west of the embankment.

In revenge for the knocked out KV-1, the Soviets destroyed the offending PAK.

Casualties in the fire fight to the west of the Embankment were about even … which was bad for the Latins.

The Soviet sappers moved on the house near the embankment and cleared it.

With the house in his hands, Jamie pushed his troops towards the Embankment.

That led to a direct assault on the bunker on top of the Embankment.

All the Spaniards west of the Embankment were now dead or captured.

However, the Spaniards to the east still had some reserved and launched a counter attack to retake the bunker.

Jamie wanted to get a KV-1 off table to support him in the next battle. So he tried a risk manoeuvre and drove it up the Embankment. Admittedly it was as far as possible from the Spanish. But not far enough. A PAK had line of sight and the Soviet tank went up in flames.


But, as usual, the life span of a revealed Spanish PAK was measured in minutes. The Soviets destroyed the latest one to reveal itself.

That opened up a route for the remaining KV-1 to drive off table on the Spanish side of the table. Nothing could stop it.

The Spaniards controlled the bunker but Chris had left a blind spot when he originally placed it. The occupants could not see directly to the west. And that was all Jamie needed to infiltrate the two reserve battalions through the Spanish lines.

Conclusions and Observations
We’d allocated a whole day for this but it only took a couple of hours. In hindsight this wasn’t a surprise as I’d designed the Embankment as an easy Soviet victory compared to other front tables. Jamie had spotted the opportunity inherent in the terrain – the area to the west of the Embankment – and exploited it. That enabled him to get both reserve battalions across the Spanish base line. There was little Chris could do to prevent it once the game started.
As a bonus, Jamie also managed to punch a hole through the front of the main Spanish battle line and drive a single KV-1 off table and into the next battle.
I haven’t used my railway embankment feature very often and already I’ve decided to replace it. The problem is that it is too high – more or less the same height as the hills. It would be better to have a half height version. And if I’m going to get a new one I’ll go for my normal flocking.
I’m also wondering whether I should build a bespoke bunker to go on the embankment. It is such an obvious position to place it in this scenario. We’ll see.
Great write up, looking forward to fighting the next battles!
We just have to find the time.
Interesting to see a railroad ambankment in a game. I have considered using one, or a dike, or something similar. They really define the scenario, though, so it is nice to see how they may be used. I also got the idea to use it, to split the table in two, in a 2v2 game.
I got my first Railway embankment because of the HTD scenario “Ponyri Station”. This scenario neatly divides the table in half using the embankment. It would, for example, make it really easy to convert Ponyri into a multi-player game.
The embankment you see in the photos above is my 2nd generation embankment. I now have a 3rd generation.
The Ukrainian p railway on the embankment has always vexed me – were there tunnels or ramps that allowed movement from be side to the other AND were the train stops also elevated?
This isn’t a Ukrainian thing or even Soviet. Just a train thing.
Railway embankments have culverts to allow movement of foot and vehicle traffic. My Mekensievy Gory scenario features such a culvert. As does Ponyri Station.
Embankments are used when the surrounding ground is low. Tunnels or cuts are used when the surrounding land is high. The idea is that the trains don’t have to go up and down much. They just go flat despite the terrain. Stations can be raised or the embankment might end before entering the town because the town is slightly higher than the surrounding country side.
Embankments can be high or quite low. The model embankment shown here is relatively high. I have since supplemented my collection with a low one.
Do you have game pics from those other scenarios?
sure, just search for what you are interested in.