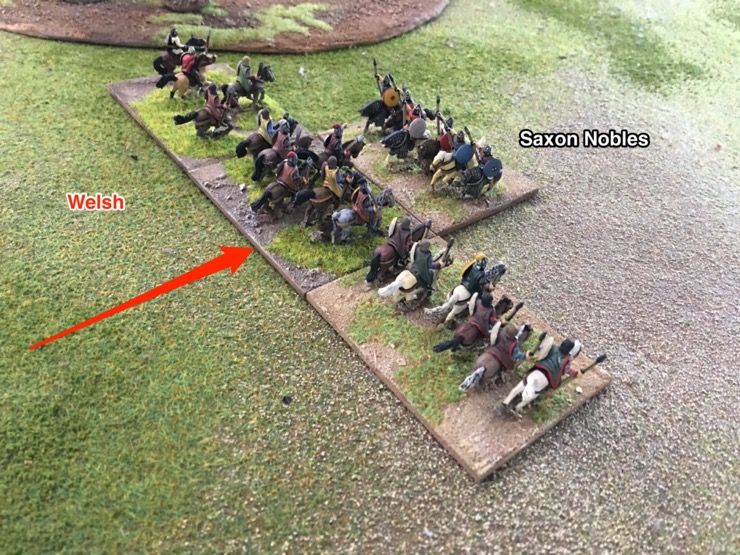
Jamie fancied a bit of Dark Age gaming. So I dragged out my Welsh (Cymry) for Britannia 600 AD and more Fall of Rome figures to make a Saxon army for Jamie.
Hordes of the Things (HOTT) is fast becoming my go to rules for the Dark Ages so this was going to be a bit of Big Base HOTT. Or, more precisely, Arthurian HOTT.
Summary: Grindy dark age affair with lots of flavour. Bad going made the battle bitsy. Arthur took the day.
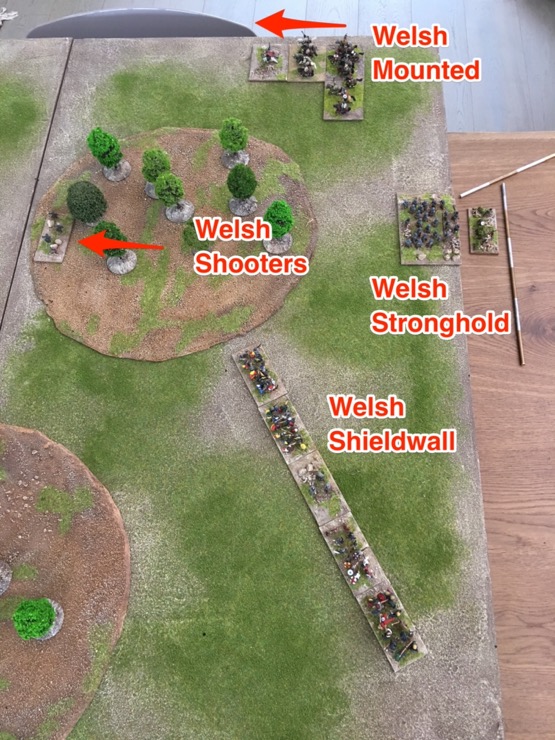
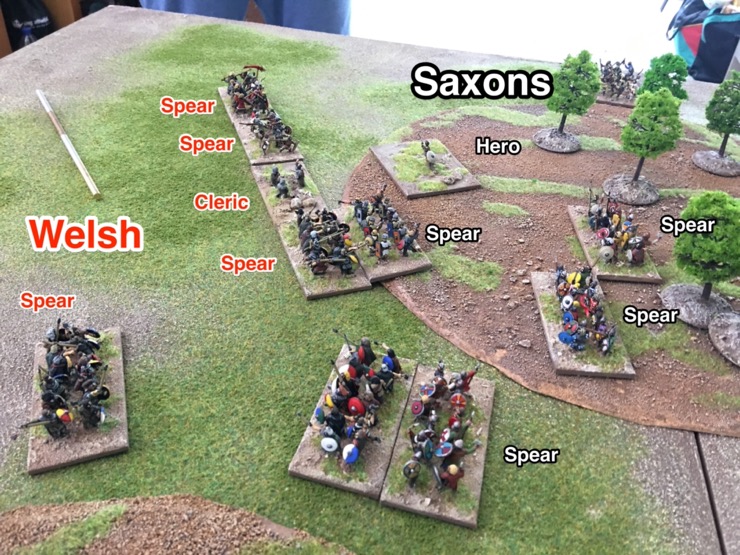
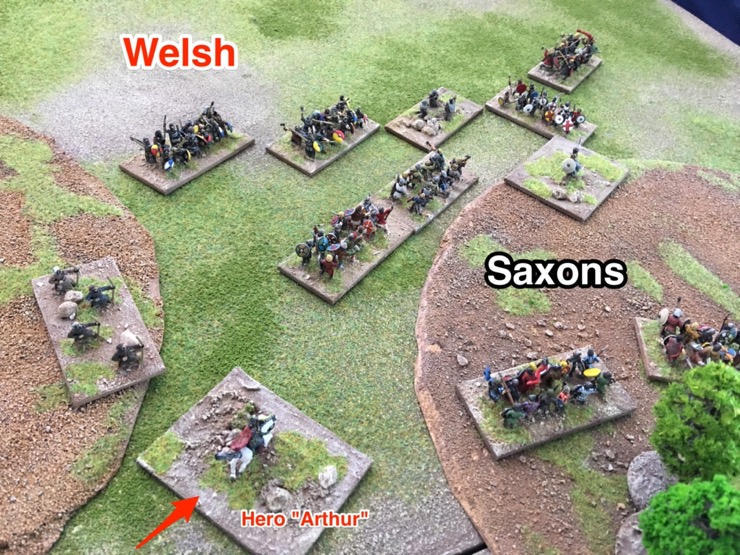
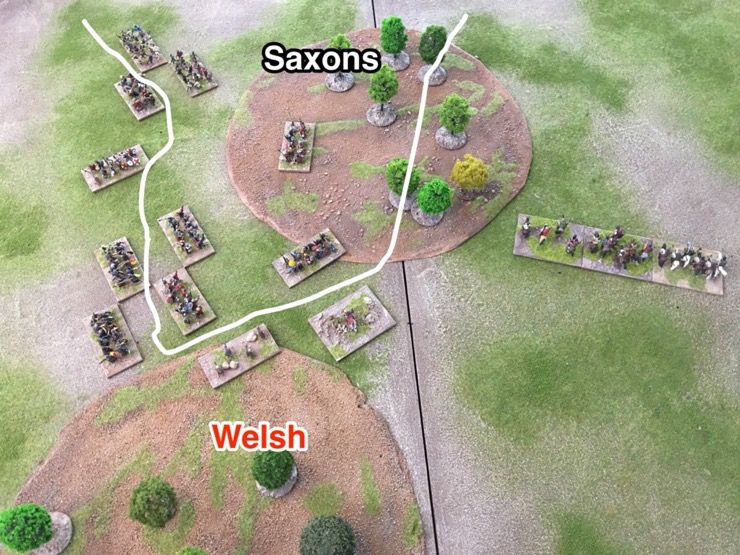
Table and Deployment
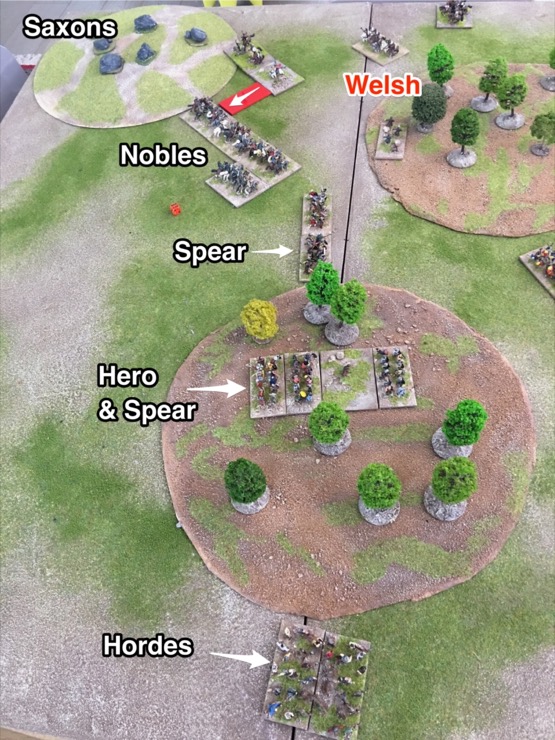
The table was fairly typical for HOTT. Bad going in the middle; in this case a couple of woods. For a bit of variation we had a rocky hill in one corner.
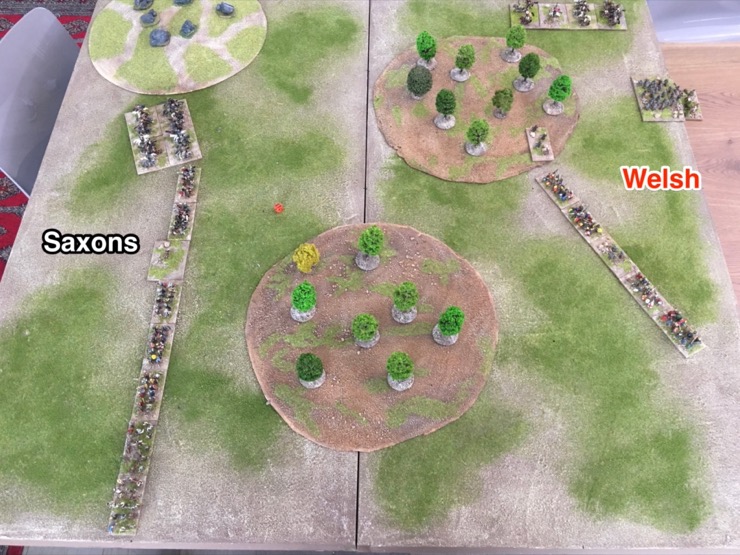
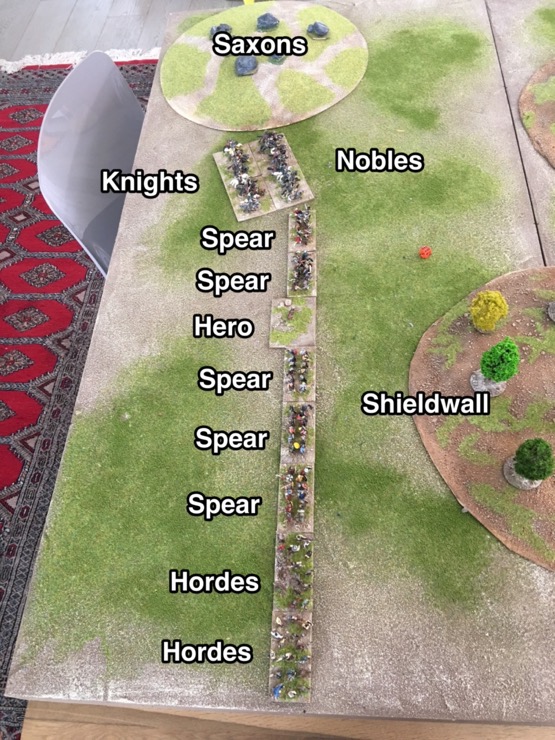
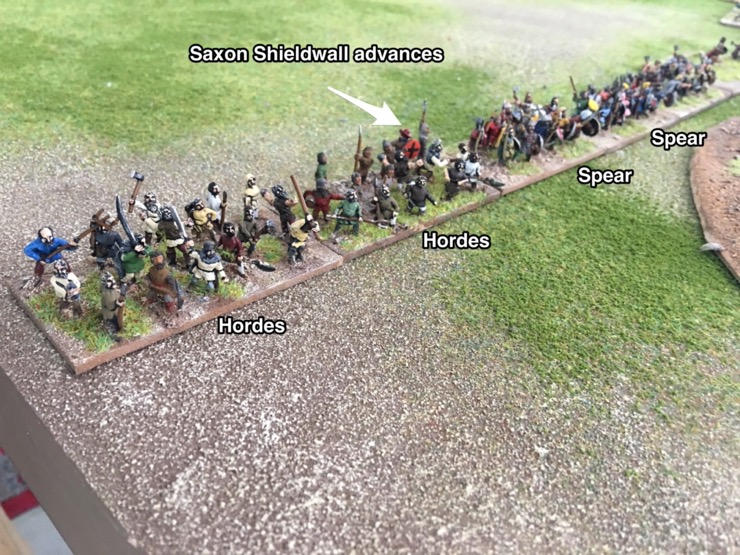
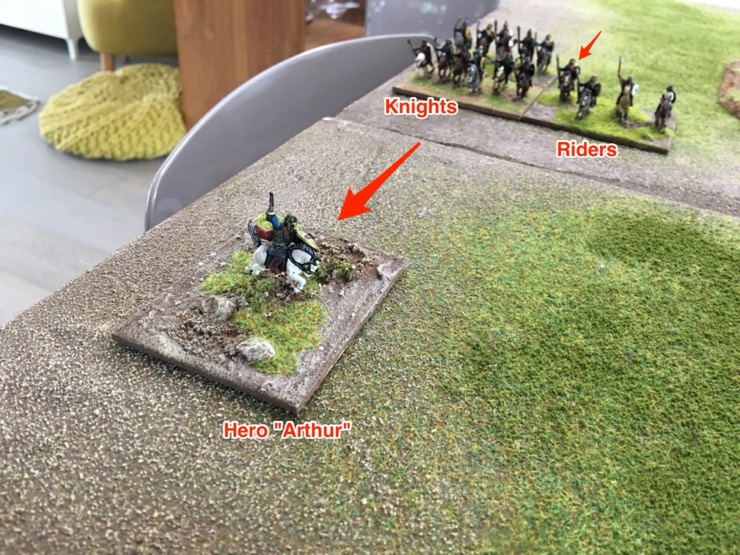
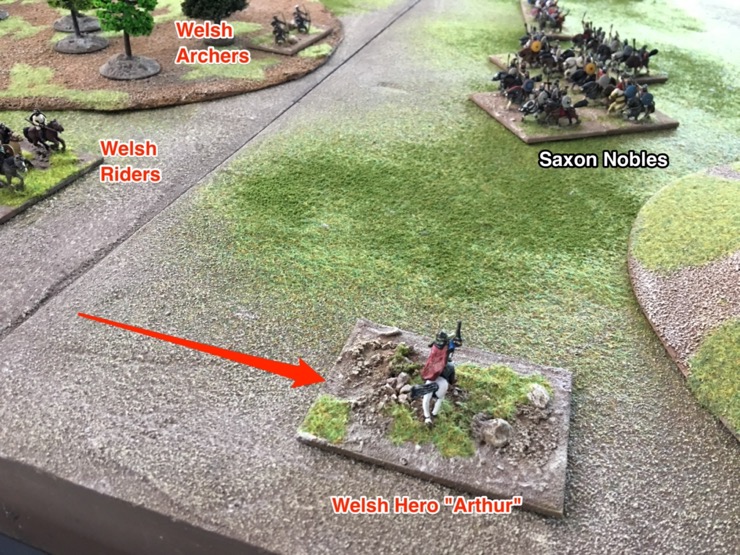
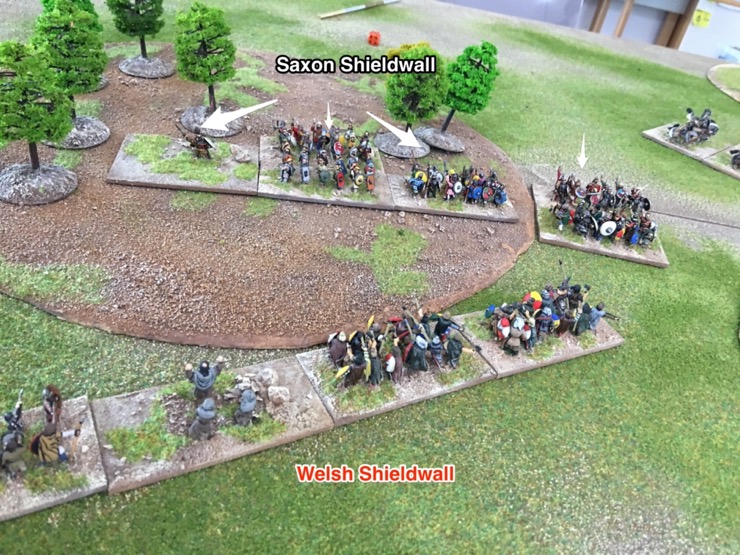
I was the defender and split my forces. Shieldwall (Spear and Cleric) on my left and mounted (Hero General “Arthur”, Knights, Riders) beyond a wood on the right.

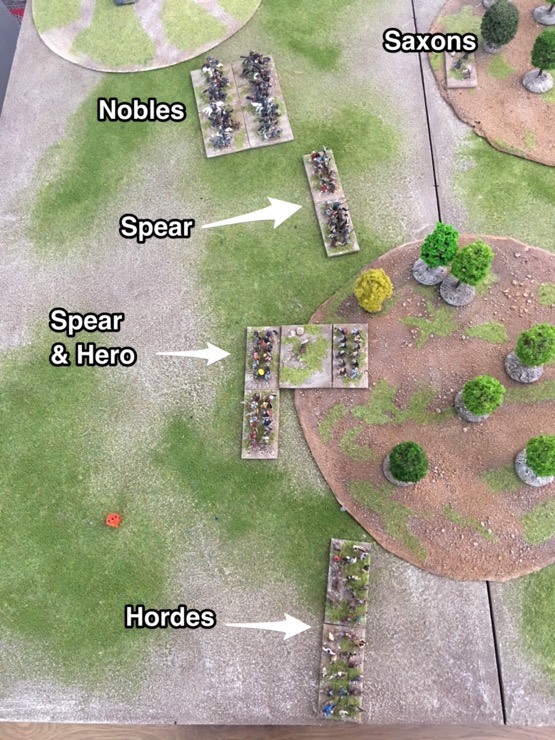
Jamie kind of matched my deployment. Nobles (Knights) facing my mounted, shieldwall (Hero General, Spears, Hordes) in the centre
The battle
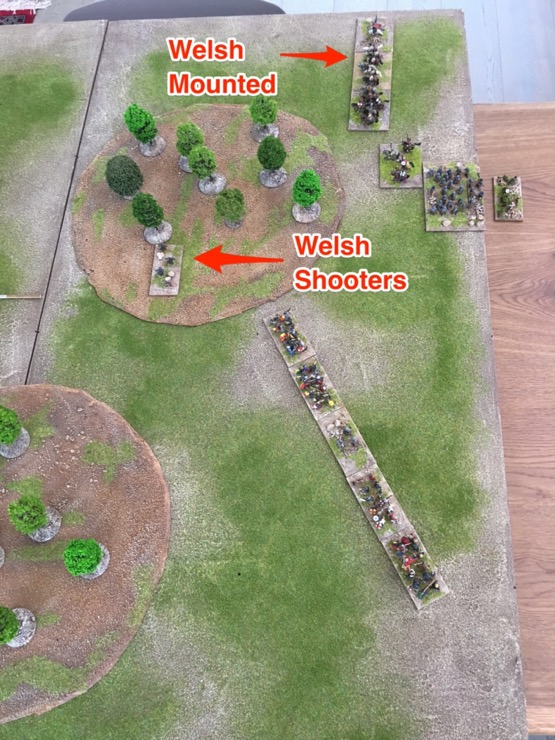
I wasn’t sure I wanted to attack with my mounted, or at least wasn’t sure I wanted to attack immediately, so shuffled them around a bit.
Jamie was more certain of his intentions and advanced all along his front.

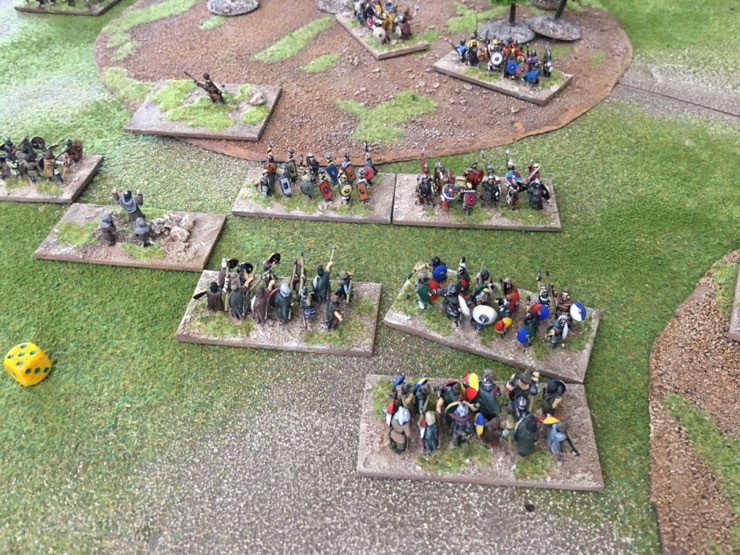
Our shieldwalls were fairly evenly matched but Jamies had Hordes on his flank. This looked a potential weakness, but one I never managed to exploit.
With the Saxons advancing I decided to attack with my mounted. But it took a bit of rearranging to get into attack formation.
My determination to attack was because, unless he stopped, Jamie was going to have to break up his army to deal with the woods in the centre. And sure enough he started to split up his forces.
Seeing that I decided to advance with my all my forces.


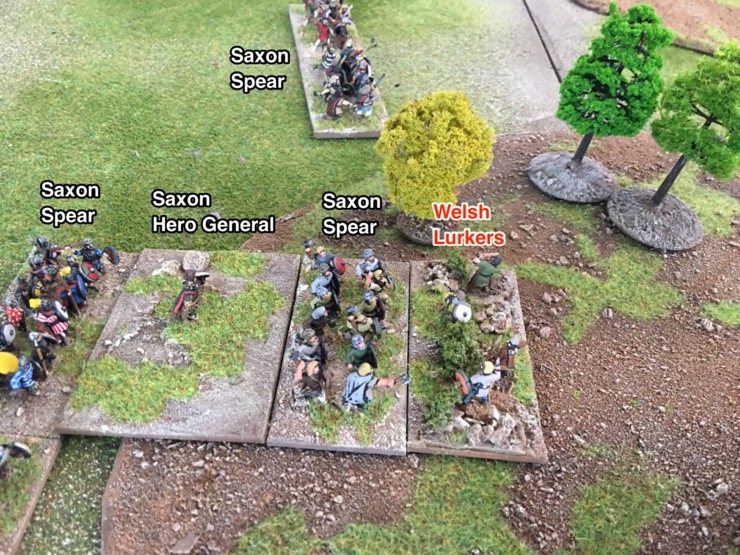
It was long odds but I thought I’d deploy my ambush part (Lurkers) and have a go at the Saxon heavy infantry trudging through the woods in the centre. Didn’t go so well for the Welsh and the Lurkers fled off table never to return.
Meanwhile my army kept advancing.

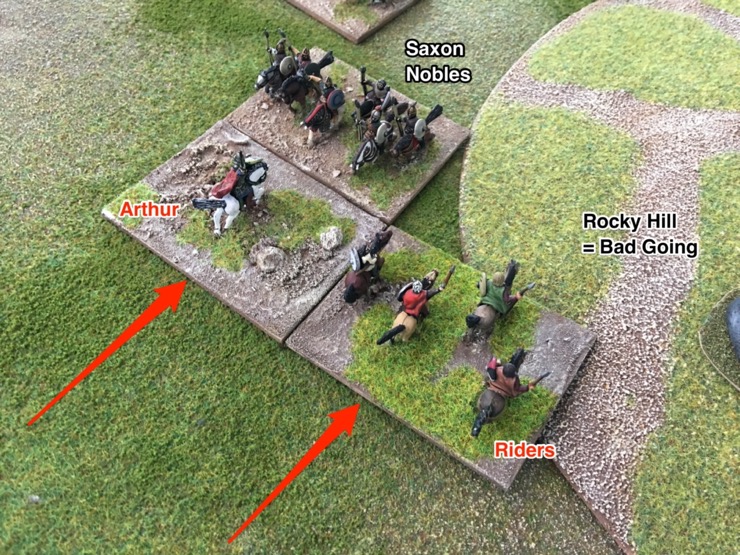
Heroes are quite quick in HOTT and I used that to seize territory. I wanted to attacking between the wood and the rocky hill on the right. So I rushed Arthur forward to give me space to deploy.
However, today was not the day for a lone heroic charge and I brought my other mounted up to support Arthur.
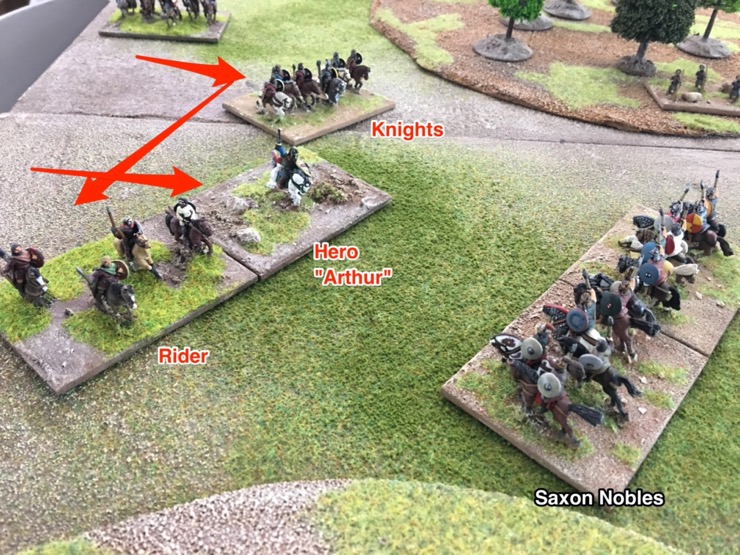
Clearly intimidated the Saxon nobles pulled back.
By this stage we had a good idea what the rest of the battle would be like … bitsy.

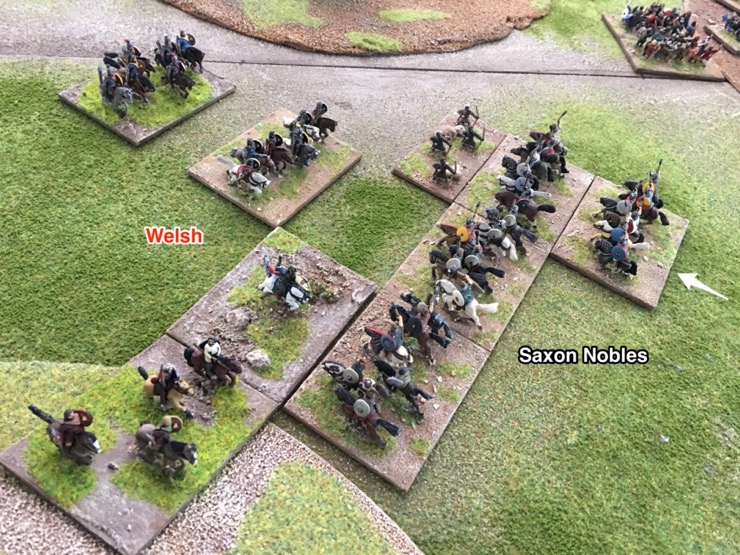
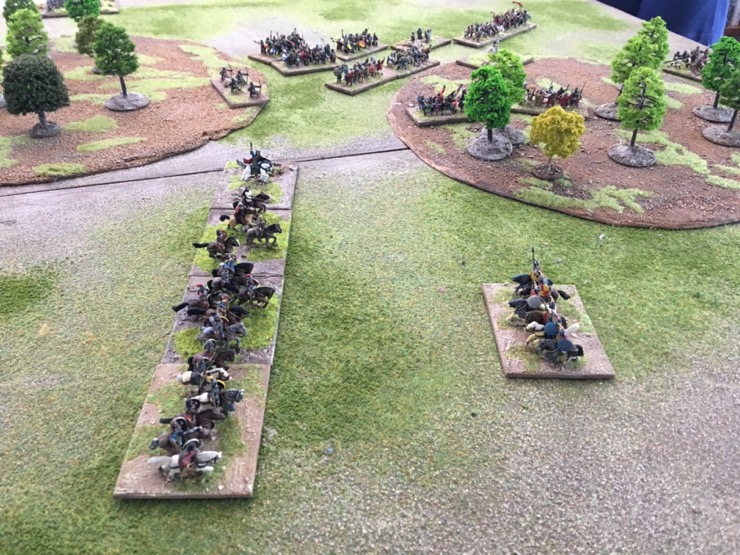
Reinforced by the other Welsh mounted, Arthur charged. I put my riders onto the rocky hill to provide and overlap.
In the centre the Saxon foot were slowing making their way through the wood. It looked like they’d get out before I won on the flank (if I won).

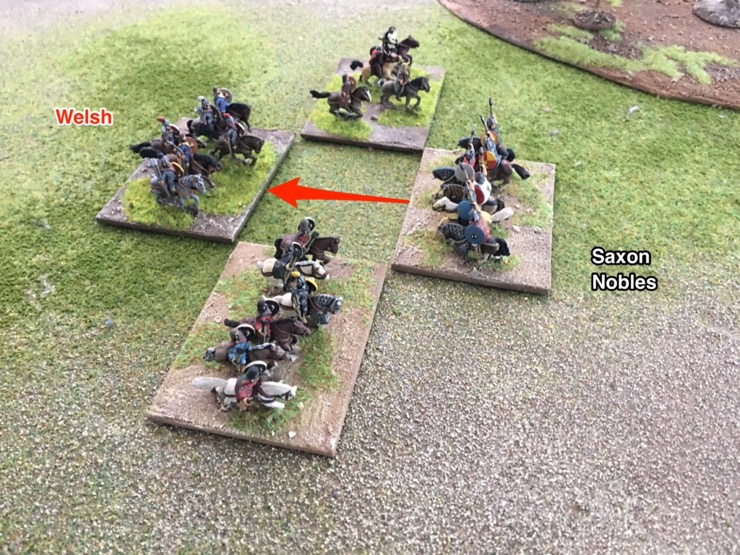
On the right a big cavalry battle emerged.

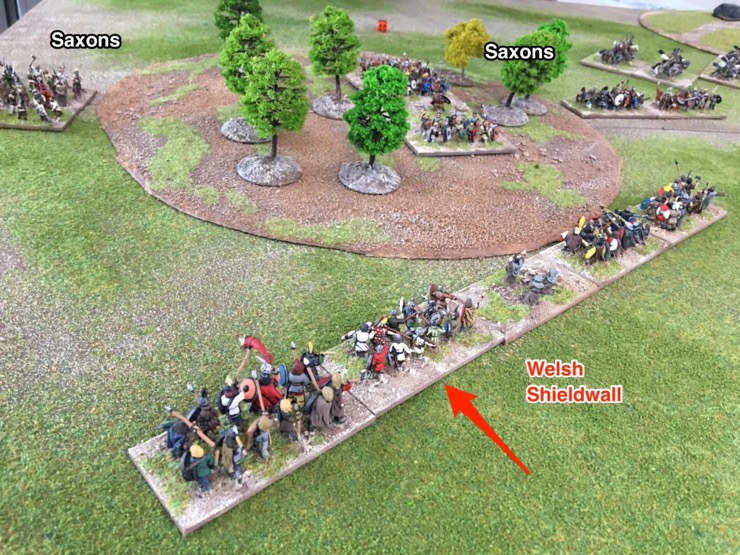
In the centre I didn’t want my shieldwall to fight in the woods. So I advanced to the edge of the woods and waited for the Saxons to come out. They’d be at -2 to close combat factors and would take PIPs to move enough element. Odds I liked.
Slowly slowly the battle lines emerged.
With the Welsh at the edge of the woods Jamie had to form up inside the woods. But it would be a challenge to get his shieldwall into contact as a unit. A challenge that was beyond the command skills of the Saxons.
On the right the cavalry fight continued to swirl around.


A Saxon column was advancing between the woods so I pulled some spearmen back to defend that internal flank.

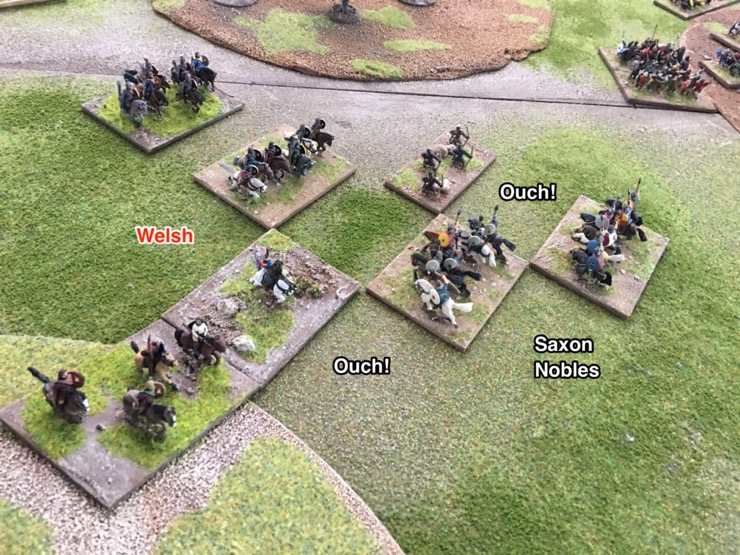
The cavalry fight raged on with charges in both directions.
But finally I broke the deadlock and Jamie lost two Knight elements.
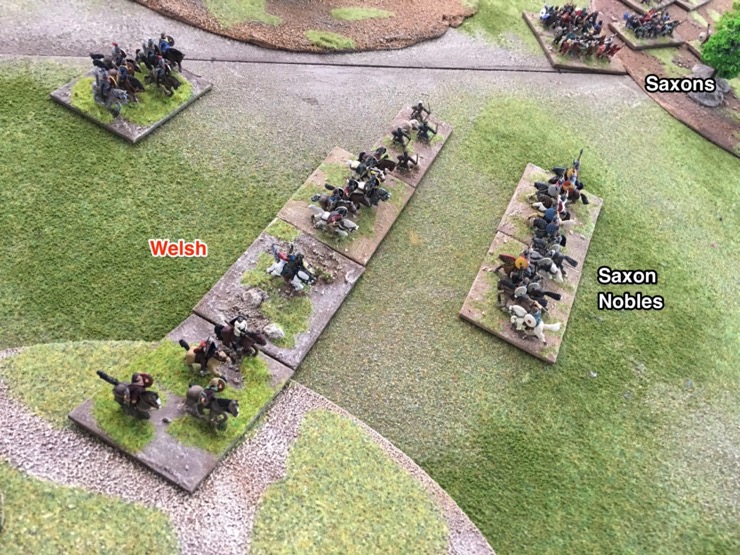
So I got the mounted back together as a unit in preparation for finishing off the Saxon Nobles.
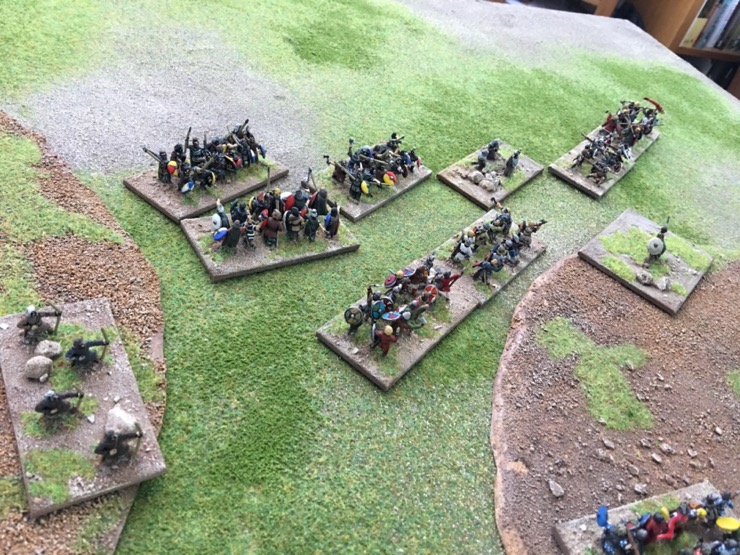
The Saxon infantry were trying to get out of the woods. Initially they were attempting this in an haphazard manner. More like a skirmish than a proper battle.
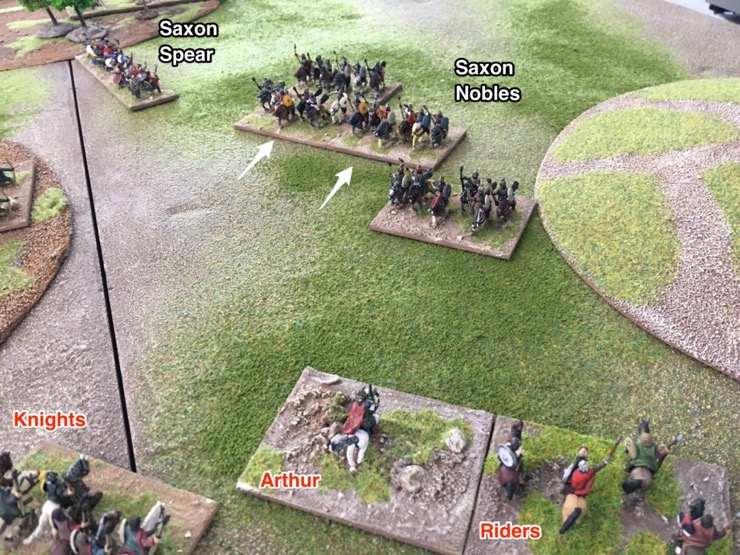
The Welsh mounted charged in again and Arthur got on the flank of the Saxon Nobles.

This was one of the most messy battles I’ve fought.

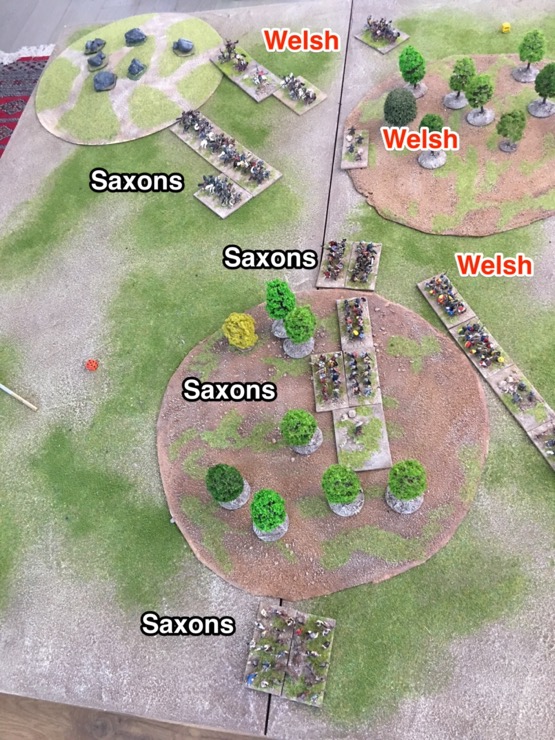
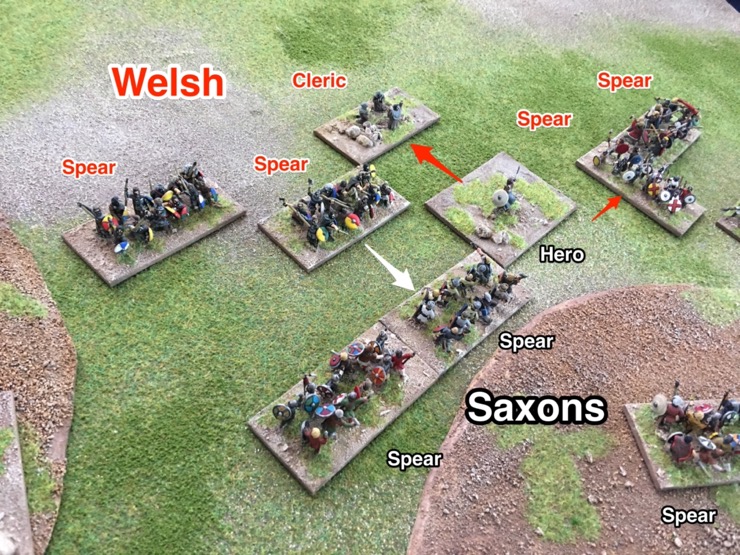
Finally Jamie got most of his infantry facing mine and out of the woods. Still not a formal battle line but getting there. Shieldwall-ish rather than shieldwall.

The Saxon Nobles were down to one stand and thoroughly outnumbered. How long could they last?
Back in the centre the infantry battle ground on. I’d moved my archers back through the woods to threaten the flank of the Saxon shieldwall.
I wasn’t confident about the infantry battle and thought I’d bring Arthur over to help. Even if this was just to make the Saxons a bit nervous.
The cavalry battle wasn’t going as I expected. Clearly three to one odds did not daunt the Saxons. The bounced the Welsh Knights in the first bound even with two overlaps.
Finally, after quite a lot of skirmishing, the shieldwalls were starting to actually look like shieldwalls.

And the shieldwalls clashed together.
And again.

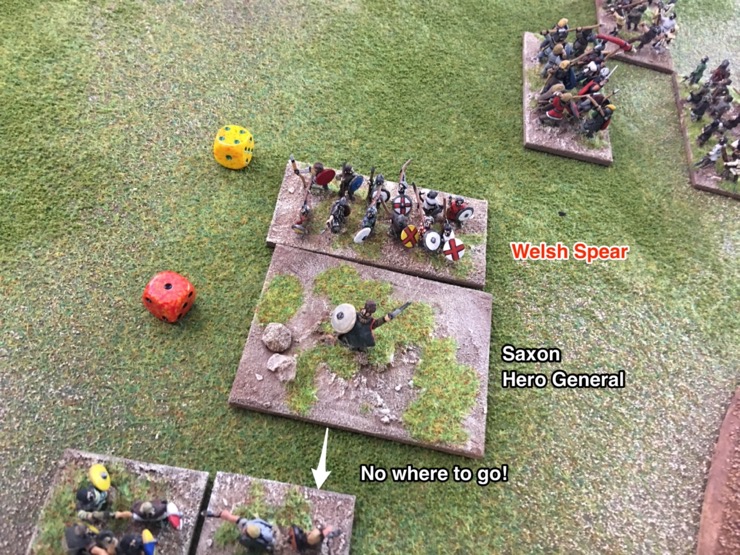
Meanwhile the Welsh mounted charged again. For the final and decisive time.

In the centre the Saxon Hero General died in the shieldwall. Attacked from the flank he had to turn and this prevented him recoiling.
End game.
Observations and conclusions
We enjoyed the game. It swung around and could have gone either way. And it had a nice grindy feel to it that seemed appropriate for the Dark Ages.
I’ve been trying out a lot of rules for the Dark Age and I keep coming back to DBA and HOTT. If anything I think HOTT is even better for historical contests than its historical counterpart. For straight up fighting it tries to be less clever. Something that I appreciate and certainly fits this period.
I’ve already posted about my Arthurian and Reconquista Christian Elements for Big Base HOTT. Heroes, Clerics, and Strongholds really add flavour to historical games in the Dark Ages. In particular a Hero General is awesome in HOTT and nicely simulates the significance of named personalities from the period. And I really love my Religious stronghold comprising massed praying monks, very historical for the period.
I don’t really go in for it myself, but the fantastical elements of HOTT can add even more Dark Age flavour. In this battle we opted to go 100% historical.
There are some oddities about using HOTT for the Dark Ages and this game highlighted one of them. Because there is no light infantry in HOTT I took my Welsh skirmishing archers as Shooters. However, the capability of Shooters is based on Elves from Tolkien. So my Welsh light infantry gained the firepower of massed Elven archers; and they are no slouches in close combat as well. Impressive to behold but not super historical. We now joke about the Elven archers in the Welsh army.
A lovely looking game. Dark Ages HOTT does work very nicely; I used to use HOTT as an alternative to DBA v2.0 for the period. We’ve found that DBA 3.0 does give a nice grindy game now though.
Fun HOTT Fact: That Lurker deployed early on could have appeared on the flank of the Spear, forcing it, and the Hero behind, to turn through 90 degrees to face. Even if they won there would have been a couple of bounds of arseing about with PIPs there to re-establish the original column.
Hi Alan,
I’m happy with both the look and feel of Big Base Dark Age HOTT.
I’m not a fan of DBA 3.0. DBA 2.2 has some silly troop types and DBA 3.0 adds more silliness. In my not so humble opinion.
I knew the fun HOTT fact. But I was worried about being flanked. Of course, the bit I had forgotten is Lurkers flee if defeated so being flanked is irrelevant.
By the way, your own blog is one of the few I follow religiously.
Steven