
Despite the fact I play DBA a lot, I’m always on the look out for a better game system for the Ancients period, including the Punic Wars. So when the guys said they’d be willing to try out Triumph I leapt at the chance.
Armies
We played 40 point armies.
Jamie got Polybian Roman 275 BC to 105 BC and chose:
Roman Army under Triumph
- 1 x Javelin Cavalry – Roman, Gallic, Spanish, and effective allied horsemen
- 2 x Bad Horse – Italian allied horsemen or hamippoi (light foot mixed with cavalry)
- 6 x Elite Foot – Legionaries
- 3 x Light Foot – Velites
- 2 x Skirmishers – Skirmishing bowmen and slingers
- 14 stands
Adam got Later Carthaginian in Spain 275 BC to 203 BC and chose:
Carthaginian Army under Triumph
- 2 x Elephants – African elephants
- 4 x Javelin Cavalry – Numidian, Spanish, Poeni or Libyan horsemen
- 3 x Heavy Foot – Libyan heavy infantry armed with spears
- 2 x Heavy Foot – Poeni settlers
- 3 x Light Foot – Libyan, Moorish or Numidian javelinmen
- 14 stands
Table
The Romans (Jamie) got a greater Invasion Score so the Carthaginians (Adam) were the defender. That meant an Arable Battlefield Topography. Mind you it would have been Arable either way.
The Romans also got a higher Manoeuvre score and got the Tactical Advantage with an Advantage Score of 2. Jamie and Adam rolled for the number of terrain pieces. A score of 7 in Arable meant 4 terrain pieces and option of coast. With the Tactical Advantage Jamie got to choose the terrain and could move the number of terrain pieces score up or down. His chose less terrain and went with a steep hill, wood, and village.
But, despite losing on both the Invasion and Manoeuvre scores, Adam threw 1 on his Manoeuvre roll and hence got the option of a flank march.

Deployment
Adam took the option of a flank march and withheld his Numidian Javelin Cavalry for this. Most of the other troops went into the Carthaginian centre sector. Adam, as an experiment, put his Libyan javelinmen (Light Foot) in front of his battle line.
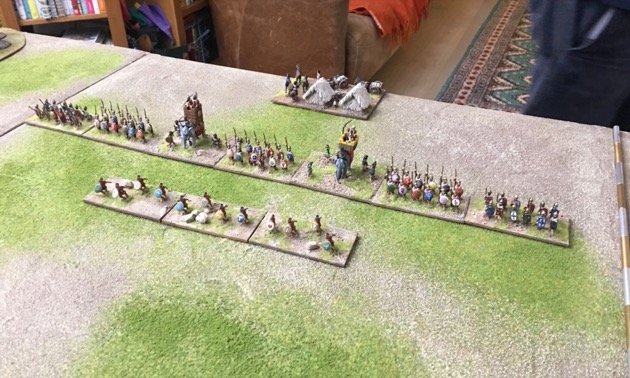
Jamie had his skirmishers within his battle line, and lined up opposite the Carthaginian elephants. Skirmishers, you see, get a +2 tactical factor against elephants.

Jamie has velites (Light Foot) and Italian cavalry (Bad Horse) out on his right flank.

The Battle
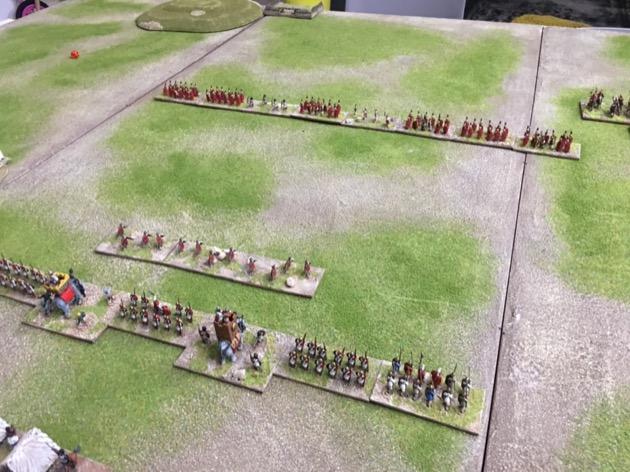
Jamie kicked off by advancing his battle line. One of the interesting things about Triumph is that any troops can march, i.e. move more than once in a turn by spending PIPs. No more slow grinding approach.

That meant the battle lines approached each rather quickly.
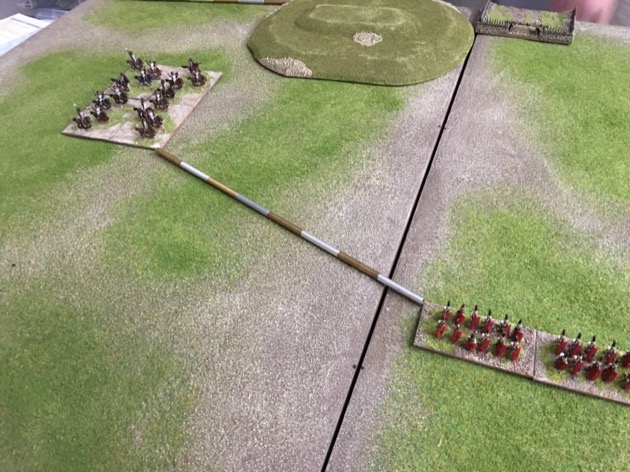
Another interesting thing about Triumph is that flank marches can and must arrive on the first turn. No more waiting, unhappily, for the magic 6 allowing the flank march to arrive.

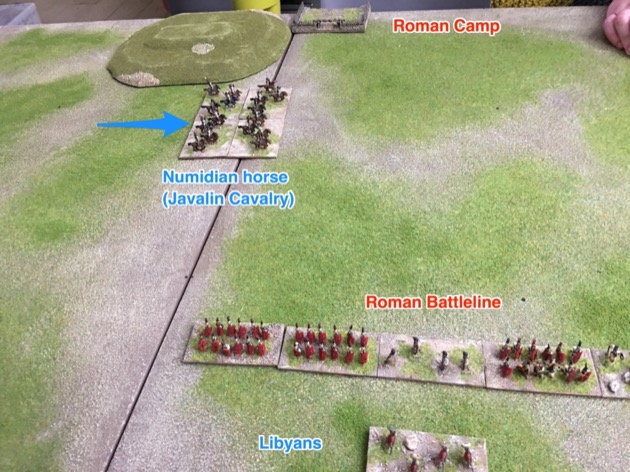
The Numidians were headed for the Roman camp, beyond the hill. Unfortunately for Adam, his Numidians could not benefit from the march move as their desired path led past the hill and they bumped into the 8 MU (4 base widths) of the enemy, which is the limitation on marching.
Out ahead of his battle line, Adam’s Libyan javelinmen faced the ongoing Romans alone.

Jamie got to charge the Libyans. It was an experiment but I did suspect that it wasn’t going to end well for the Libyans. My reading of Triumph had already revealed that “Light Foot”, despite looking like skirmishers in this case, were just ineffectual heavy infantry.


So the Libyans started dying. Okay, it didn’t help that Adam was fond of throwing 1s. One down.

Two down.

And the third survived with a recoil. True to my suspicion Light Foot do not form a good skirmish line. They form a terrible brittle battle line. Particularly if outflanked.

That might have gone quicker than Adam hoped, but really the Libyans were buying time for the Numidians to find the Roman camp.
I can’t remember who closed to contact the second time, but who ever initiated it, it ended with the sole remaining Libyan javelinmen facing skirmishers in Roman service. As good as it was going to get. And the Libyans survived.

Unfortunately for Adam’s plans, Jamie brought his Roman (Javelin Cavalry) and Allied Italian (Bad Horse) to face the Numidians.

Meanwhile, the last Libyan javelinmen died.
Adam split his Numidians. One stand headed for the camp. The other three faced the Roman and allied horse. Although the numbers were even the odds were in Adam’s favour.

So a line of three Numidian Javelin Cavalry clashed with a line of Roman (Javelin Cavalry) and Italians (Bad Horse).

The camp fell the Numidians. That was worth 8 victory points, to balance against the Libyan javelinmen.

Unfortunately for Adam, some Italians killed one of his Numidians. That was enough to give Jamie the game.

Conclusions and observations
Well, it was actually a pretty disappointing game. Adam lost, not through bad generalship, but just through shear bad luck. That was an impressive series of 1s.
In terms of the rules themselves, I liked them. They are well written and (mostly) clear.
I liked the obvious similarity to DBA. But I liked the differences too. I liked the bigger table (6′ x 4′), different way of choosing/placing terrain, and variable sized armies due to using a point system.
But it has to be said, I think the troop types and hence army lists suck. At least for the Punic Wars. “Light foot” that equate javelin armed skirmishers such as Libyans with massed infantry such as Iberians. Suck. “Javelin Cavalry” that lump together Numidian horse, Libyphoeni horse, and Roman Cavalry. Suck. And lists that make Italian Cavalry “Bad Horse” and the Romans in the same army the better quality “Javelin Cavalry”. Suck. I could go on but that was enough to outrage me.
Despite my niggles, I liked the game and we’ll play again.
And when we play again I’m going to need much bigger terrain templates. My Crossfire Terrain Templates are tiny. So I had to dredge out my Field of Glory Terrain for this game (my god, it has been 10 years since my failed attempt to love Field of Glory). But even this is too small. Triumph needs bigger features.
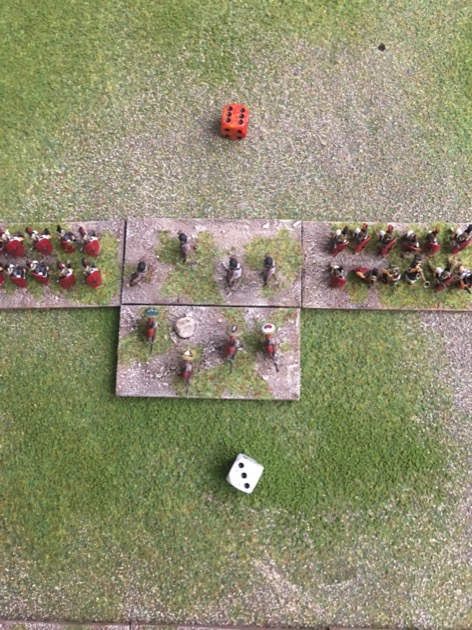
And the guys thought my Roman camp was boring compared to the Carthaginian one. No tents, and men wandering around. I did this to allow a scenario with the Roman camp in the middle of the table (I have two of them that go back to back). But I now think I need a nice looking diorama as well. Clearly Baueda Wargames is going to get some more money from me.