I quite like the Alternative Chacabuco scenario from Fletcher (2006). It isn’t historical but it is small and reasonably balanced so is a good choice to try out a new set of rules. As it happens I’ve been wanting to try out March Attack by Crusader Games for a while so once again Chris Harrod and I faced each other around Chacabuco Farm. Chris was the Royalists / Spanish. I was the Patriots / Argentineans. It was the first outing of my Liberators armies now they are all on Big Bases.
I’ll describe the battle and then make some observations on the game, March Attack and the scenario. The summary about March Attack is that the rules are optimised for Corps level actions and hence gloss over of details at the level of the manoeuvre unit (battalion, regiment). That speeds up the rules but at the cost of flavour that is significant for the small South American Wars.
Tweaks to March Attack
The scenario uses a ground scale of 1 inch is 40 yards. March Attack assumes 1 inch is 60 yards. So I increased all distances (ranges and movement) by 50% (rounded up). For example, Engagement distance is normally 9 inches but I made it 14 inches.
My Liberators cavalry are based as single stand squadrons but March Attack has two stand regiments. I could have combined the squadrons into two stand units but instead chose to run them as single stand units in Line.
For this game I ignored the skirmisher rules of March Attack. Needs a bit more thought.
Deployment
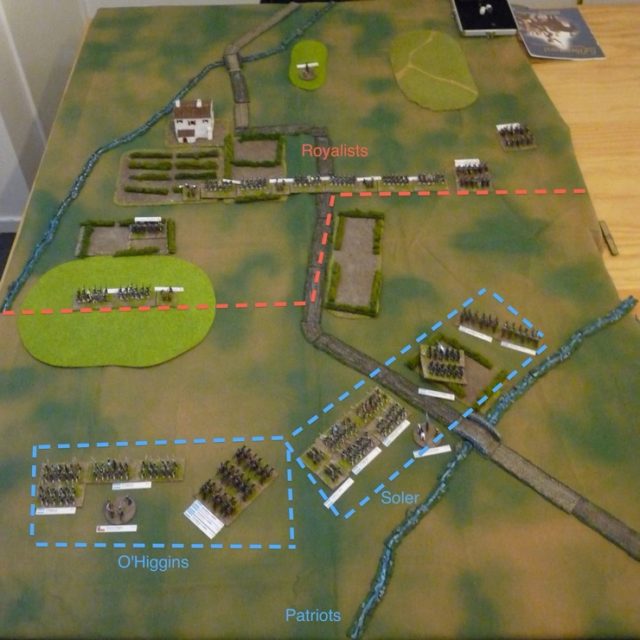
There seemed little advantage to defending the fields (rough going) in March Attack so Chris decided to deploy forward. He more or less lined up along the front edge of the Royalist deployment zone.

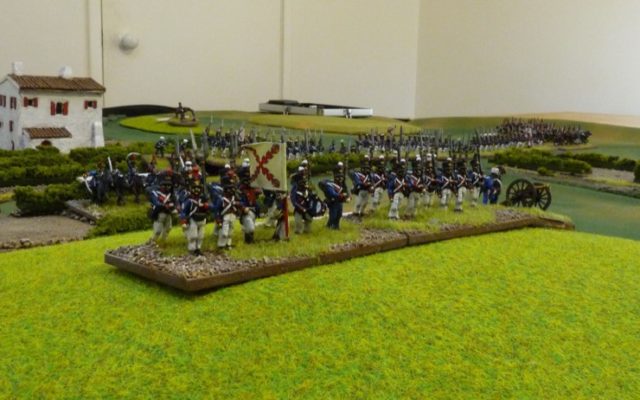

I was constrained by the Patriot order of battle with two divisions deploying in different zones. This configuration didn’t match what I wanted to do. I wanted my cavalry on the open right flank and my infantry in the centre and left facing Talhuilaca Hill and fields. So I set up my troops to allow me to do a switch-a-roo in the first turn. It did mean my deployment was very confused but strategic movement is awesomely long in March Attack and I was hoping to use the long movement rates to sort out my mess in the first turn.


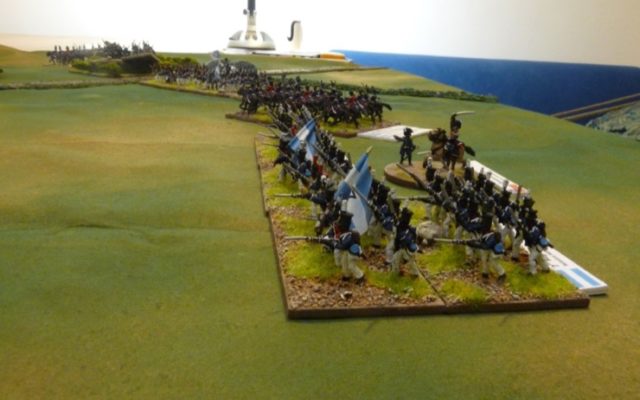

Turn 1 Patriot
I had assumed I’d be able to use Strategic Movement to do my switch-a-roo. Unfortunately, as soon as I started to move I realised that because Chris had deployed so far forward I was “Engaged” hence restricted to Tactical Movement. None-the-less this reduce movement was still sufficient to swap my infantry and cavalry around in the centre.
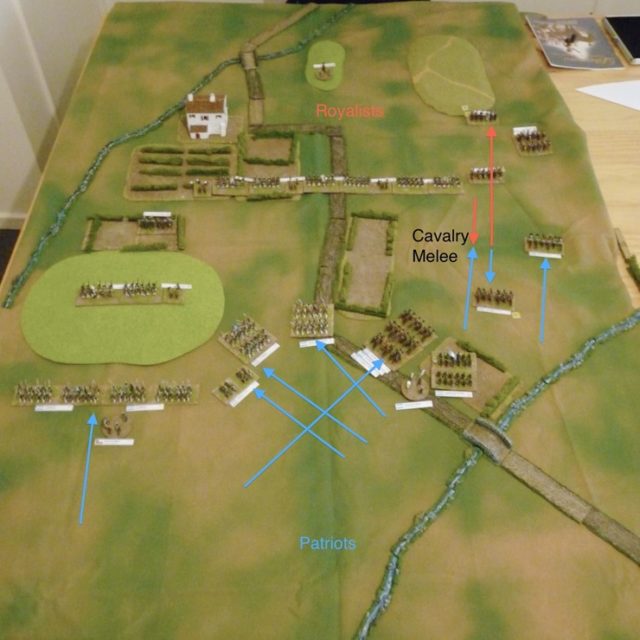
Also because the battle lines were so close one of my squadrons of Granaderos a Caballos started the game within charge reach of a squadron of Frontier Dragoons. Charge. Counter-charge. Melee. At that point I realised my superb Patriot horse, the cream of the Army of the Andes, had the same combat value as the Royalist running dog regulars. Combat value 3 versus combat value 3; both medium cavalry. Very disappointing. But my disappointment didn’t last long. We threw evens and in March Attack that means the superior quality troops win. So the Granderos a Caballos pulled through. The Frontier Dragoons retired with casualties. They also disordered the second squadron behind. My guys recalled blown.

We immediately liked the feel of the cavalry battle on the flank. Big movements. Momentary impact. And even the winner had to take a pause for breath. Felt right.
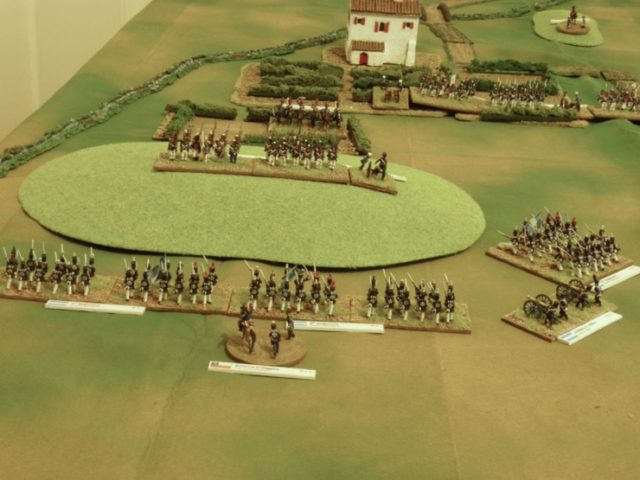
On the other flank I closed in on Talhuilaca Hill. I got both the 7th and 8th regiments into line so when they climbed the hill they’d have more fire power.
Turn 1 Royalist
Not content to sit and wait Chris advanced every where. The one exception was on Talhuilaca Hill where the Valdivia Battalion started to retire down the hill leaving the artillery to face the advancing infantry alone.

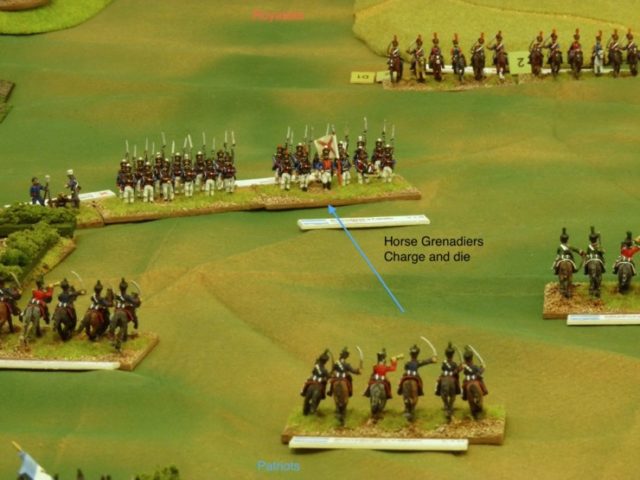
On my right flank Chris’s second squadron of Frontier Dragoons charged the Argentine Cazadores a Caballo de la Escolta del General. Same pattern as the first melee. Charge. Counter-charge. Melee. Disappointment. Drawn roll. Veterans take the laurels.

Turn 2 Patriot
My cavalry reserves deployed on the right flank. One regiment got a bit cocky and charged the Chillan Battalion. Chris won this little battle by inflicting 2 casualties in defensive fire and then routing the chargers in melee. Unfortunately, we got some of this wrong. The big mistake was that the combat value of infantry firing at charging cavalry is halved twice, so 12 down to 3. That makes the difference between two automatic hits and a 50% chance of one hit. But we only noticed this when it was too late and we’d moved on.
Having re-read the terrain rules again I realised that my infantry lines were going to take an age to climb Talhuilaca Hill. So to went back into column and steamed towards the hill.
The 11th Regiment coming up from the centre charged and broke the Royalist battery on Talhuilaca Hill.


Turn 2 Royalist
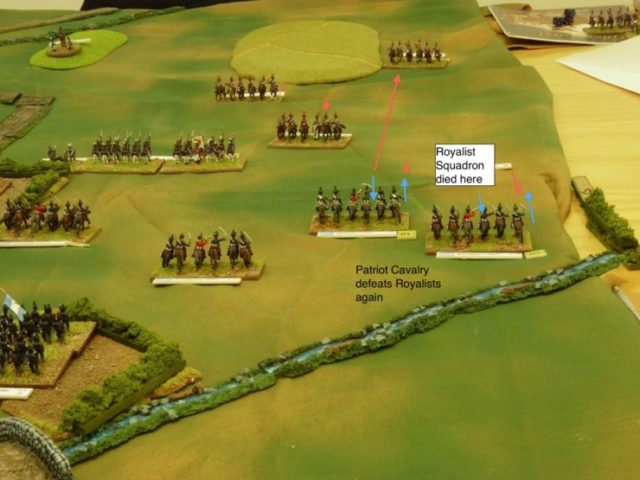
Chris thought he may as well charge with his cavalry before they got swamped by my massing Patriots. Unfortunately for him the Patriots again showed their mettle and drove off one squadron and destroyed the other.

Turn 3 Patriot
Three battalions of Patriot infantry engaged the Valdivia battalion on Talhuilaca Hill and destroyed them by musketry. Admittedly this was easy enough in March Attack since Valdivia was only CV 2, i.e. only need two hits to kill them, and my infantry inflicted 2 hits automatically.

On the cavalry wing I brought all my units into line. That included bringing the Cazadores de los Andes out of the field in the background to face the Chillan Battalion. And because I’d seen what they’d done to cavalry earlier in the battle I withdrew the squadron facing Chillan.


Turn 3 Royalist
The we found the rule that said infantry firing at charging cavalry are halved twice, i.e. their musketry becomes ineffective. So as soon as Chillan moved my nearest squadron charged and broke them.

With three units lost out of nine Chris took a Major Formation morale test and got a Retire (3) result. Everything took 3 hits, many units instantly routed as a result, and the survivors withdrew backwards. Chris conceded. After the game I realised I’d read the table wrong and actually it should have been a Disorder (D2) result instead. that would have been bad but not an automatic loss.

Observations, Insights and Conclusions
It was a fun game. Not least because I don’t often get a spare five hours to devote to wargaming. But my wife gave me a pass and I took full advantage of it.
Scenario oddities
I’ve played this scenario a lot and every time I do I have major questions around victory conditions and Patriot deployment. And today I’ve added a third question about sub-commanders.
There are no victory conditions so by default we resort to army morale collapse from whatever rule set we’re using. Luckily March Attack has such a rule. But it would be nice if the scenario had provided some guidance. I can’t help thinking that Chacabuco Farm or the road to Santiago have to be significant in the victory conditions. However, breaking the opposing army guarantees control of both so perhaps it is fine as is.
The scenario gives the Royalists complete freedom of deployment in their part of the table but the Patriots are restricted. O’Higgin’s division deploys to the left and Soler’s Division to right. Each division is a mixed force with both infantry and cavalry (and artillery). The question is why? Why impose this deployment? Particularly as it is a what-if scenario, there is nothing in the context that suggests the Patriots should have less flexibility than the Royalists in deployment, the Patriots don’t really have a numerical or qualitative advantage so limiting their deployment is a bit harsh, and the proposed deployment isn’t very good given the terrain. The cavalry should be in the open ground on the right and the infantry facing the hill and fields on the left. Next time I must remember to give the Patriots free deployment in their zone.
As I mentioned the Patriots hare divided into two divisions under O’Higgins and Soler. There are two things I find odd about this. Firstly, O’Higgins has a role in the game but Soler doesn’t. Because of the Patriot order of battle our games find San Martin leading Soler’s division rather than taking an overall role in the battle. The second odd thing is that although the Patriots are divided into divisions the Royalists are not. We noticed this in this game because in March Attack the Army morale is affected by the morale of the component Major Formations and the Royalists only have one Major Formation, i.e. the whole army.
Our rule mistakes
Being new to March attack we did fumble a bit with the rules and that slowed us down. We also made a couple of significant mistakes:
- We didn’t notice the “half effect twice when shooting at charging cavalry” rule until I’d already lost a cavalry unit in a frontal charge on a battalion in line. The second time around, after we noticed the rule, the line got slaughtered when another squadron of Patriots charged them.
- When Chris lost his third unit and we had to check for Major Formation morale I read the Morale chart incorrectly. Chris’s army should have been “Disordered (2)” not “Retired (3)”. The former is inconvenient but survivable. The latter was disastrous. In fairness to Chris we should try this scenario again and see how he goes.
Corps versus Brigade level game
March Attack is designed for a Corp a side. The example French order of battle in the rules includes 15 infantry battalions, six cavalry regiments and six artillery batteries – 27 units grouped into four divisions. Some of the rules are there just because this is the target force size. For example, the fire combat calculation is just that, a calculation. Six CV automatically causes 1 hit. You only roll for the residual CV between one and five. This rule is obviously there to speed up play; you don’t want to spend much time on resolving combat for a unit when you’ve got about 30 units a side.
Our game was much smaller. The Royalists only had four infantry battalions, five cavalry squadrons and four artillery batteries. This is a mixed division so roughly half the size of the force the rules assume. The Comte de Lobau, commander of the French VI Corps in 1815, might not be too concerned about how the 1/5th Ligne in the 1st Brigade of 19th Division is doing, but in 1817 San Martin is very interested in how the Argentine 8th Infantry Regiment in O’Higgins’s Division is faring. With only 13 units you almost want to spend a bit more time on resolving the combat – it adds flavour.
Poor ratio of real time to game time
It took five hours included finding the kit, setting up, playing the game and eating pizza in the middle.
We played three turns which in March Attack means 60 minutes. Five hours to one hour is not a very efficient ratio of real time to play time. I’m sure we could improve on this with practice.
Infantry get little advantage when defending bad going in March Attack
In South America infantry often headed for bad going when confronted by superior cavalry. March Attack doesn’t really encourage this. March Attack also gives few advantages to infantry defending bad going against other infantry, for example the “up hill” modifier present in many other rules is absent from March Attack.
The terrain in the scenario included hills, fields, a vineyard, a BUA, and rivers. We classified the fields as rough ground in March Attack and the vineyard as an orchard.
Generally March Attack makes terrain fairly unpleasant to be in, whether attacking or defending. Bad going slows movement for everybody this is is roughly proportional to the base movement rate in the open. Because Cavalry have a longer base movement they will still move further in bad going. Seems odd.
Only the vineyard (orchard) and farm house (BUA) provided cover to shooting. The hills and fields did not provide cover. So a defender expecting a shooting match wasn’t encouraged to be in them.
In March Attack there is a risk of disorder when a unit charges in/through some terrain – all the terrain on table. So defending infantry can hope that any chargers will be disordered. but it is only a hope. By default cavalry will disorder on 1-4 on 1d6 when they charge in bad going and infantry will disorder on 1-2 on 1d6.
So cavalry charging in bad going are likely to become disordered. This is counter balanced by the fact that unsecured infantry lines – those within squares or columns on each flank – are disordered by charging cavalry. Being in bad going does not change this. So cavalry charging infantry in bad going might be disordered but the infantry they are facing are also likely to be disordered. So infantry don’t get an terrain advantage when facing cavalry.
On balance Chris didn’t see sufficient reason to try to defend the fields and came out to fight. He did deploy troops on Talhuilaca Hill but not to defend it seriously – only as bait to tie up a greater number of my troops.
I think this area of the rules need to be addressed to fit with South America.
I’ve got various options for next time:
- Give the fields in this scenario boundary hedges, which are linear obstacles in March Attack, provide cover and restrict movement even more (I may even have done this in earlier games with this scenario but I couldn’t quite remember)
- Automatically disorder cavalry in any bad going
- Penalise cavalry movement more when in bad going, e.g. 1/4 speed
- Penalise infantry movement less when in bad going, e.g. 3/4 speed
- Ignore infantry disorder due to charging cavalry when the infantry are entirely in bad going (partially or completely?) or behind a linear obstacle
No ridge lines
Hills are one of the difficult things to simulate in miniature wargaming. Chris assumed Talhuilaca Hill had a ridge line and that he could be “on” the ridge and shelter “behind” the ridge. But March Attack doesn’t seem to have a concept of a ridge line. The Duke of Wellington might be displeased.
Sweeping cavalry battle
We both liked the feel of the cavalry battle on the flank. Big movements punctuated by brief melees. Losers flung back but even the winner had to take a pause for breath. Looked right. Felt right.
Are the Patriot cavalry appreciably better than the Royalists?
Historically the Patriot cavalry were significantly better than the Royalist cavalry.
But in March Attack this did’t appear true. The Patriots were “V 3 M” (Veteran CV 3 and Medium Cavalry) compared to “R 3 M” (Regular CV 3 and Medium Cavalry) for the better quality Royalists. Two “3 M” units will each have a 50/50 chance of victory in melee. During the game that nominal 50% chance of success didn’t seem sufficiently in favour of the superior Patriot cavalry. I felt there needed to be a more obvious differential in the odds to capture the feel of the period.
But there was, it just wasn’t the base Combat Value. March Attack insists on there being a winner in melee and by default it goes the to higher quality troops, my “V” rather than Chris’s “R”. I benefited from this “draw” special rule three times in the game. After the game I calculated the percentage chances of the Patriot Veterans winning. Patriot 58.3% and Royalists 41.7% with a difference of 16.7%. Maybe that 16.7% is enough, certainly helped in the game.
One stand cavalry units in Line were fine
As I mentioned I used one stand cavalry units instead of two stand units. I treated them as in Line for game purposes. This worked fine. I will consider a further house rule for this situation and give these small units the movement of a cavalry column but otherwise treat them as in line.
Don’t put a line of cavalry behind another line of cavalry
Historically waves of cavalry were very effectively. The Byzantines found this and Napoleonic commanders also found this. Each wave would attempt to break the enemy but if it didn’t succeed it would retire through gaps or down the side of the waves behind. This approach keeps continuous pressure on the enemy.
But don’t try this in March Attack. If the front unit is forced to retire it will disorder the unit behind. Both are then vulnerable to enemy charges and, if left to their own devices, both recover from disorder at the same time. All of which defeats the purpose of having the second line of troops.
Next time I’ll consider a house rule that allows cavalry to retire through other cavalry without inflicting a disorder on the guys behind.
Batteries of 4 x 4lb guns are pants
In Europe batteries would be bigger and/or have heavier guns. Not so in South America. 4 pounders were the norm. In this scenario the Royalist order of battle has four batteries each with four 4 lb guns.
We found that small batteries of light guns are pretty useless under March Attack. At “effective range” they were completely ineffective. The calculation was: CV 2 + 0 for effective range – 2 for light guns = 0. They they were only useful at close range (CV 2 + 2 for close range – 2 for light guns = 2).
In contrast, for no obvious reason, the Patriots had a single battery of seven 4 lb guns. This was at least “effective” at effective range but still couldn’t shoot at long range. (This had CV 4 so was 4 at close range and 2 at effective range).
So the Royalists had half the number of guns of the same calibre but had a much more effective artillery force. A grand battery in miniature. Napoleon would be proud but the Royalist commander would rightfully feel a bit short changed.
| Battery | CV | Close Range Score | Effective Range Score | Long Range Score |
|---|---|---|---|---|
| Royalist 4 x 4 lb | 2 | 2 | 0 | -2 i.e. 0 |
| Patriot 7 x 4 lb | 4 | 4 | 2 | 0 |
I’ve got two choices for next time:
- Combine the Royalist batteries. Instead of four batteries of 4 x 4 lb guns give them two batteries of 8 x 4 lb guns.
- Change the artillery weight modifiers in South America, so a light gun is 0, a medium is +2 and a heavy is +4.
The hills didn’t have contours
March Attack rates hills as being 1, 2 or 3 levels high represented by contour lines. But the hills I used for the game didn’t have contour lines. Undaunted I gave them ratings anyway. Because Talhuilaca Hill is steep and conical I rated it at two levels. The other hills I rated at 1 level.
That was fine until troops started moving around on Talhuilaca Hill and I discovered that March Attack gives movement penalties when a unit crosses a contour. Where was the mysterious second contour line on Talhuilaca Hill? Aaargh!
I don’t actually like the concept of a movement modifier for a contour. It makes movement rather weird on a hill. None-the-less we were trying to use the rules as is so we assumed a contour line at 1/3 of the diameter (18 inch diameter with a contour line at 6 inches from the edge all around).
I’ve got three choices for next time:
- Assume a contour line at some point on the slope as we did in the game. Either 1/2 way to the peak (1/2 of the radius) would make sense as would 1/3 of the diameter.
- Use hill models with two contour lines. I have some but not big enough – Talhuilaca Hill has to be 18 inches across.
- Replace the contour penalty with a general 1/2 speed modifier when anywhere on the hill – as with rough ground.
Defend What?
We agreed that to fit the scenario Chris was on “Defend” and I was on “Attack”. But Chris is quite an aggressive player so wanted an active defence. Reading the rules showed that he had to stay within a certain distance (9 inches pro-rated to 14 inches) from the thing he was defending to satisfy Defend orders. It wasn’t clear to us what he was defending so we assumed his starting positions, i.e. the front edge of the Royalist deployment zone. Just seemed a bit odd. Probably more a problem with our glib order rather than the rules, but odd. Victory conditions within the scenario might have helped.
All those significant distance increments
March Attack uses lots of different distances, all in inches. Bit annoying for me because I have to remember them. Examples:
- 1/2″ distance at which chargers stop to let the defender shoot
- 2″ distance at which commanders get a bonus for issuing orders; tactical movement for infantry in square
- 3″ tactical move for infantry in line retiring
- 5″ tactical move for infantry in line
- 6″ tactical move for heavy artillery
- 8″ tactical move for infantry in column; strategic move for infantry in square
- 9″ Engagement range; distance regimental artillery must stay within of their MF; support distance; skirmish distance
- 12″ distance at which commanders get a penalty for issuing orders; distance commanders must stay within of their MF; distance Commander can attach/detach; maximum skirmish distance; Tactical move for heavy or medium cavalry in line
- 14″ Tactical move for heavy or medium cavalry in column
That isn’t all of the significant distances just a few to illustrate what I’m talking about. The question I have is, why so many increments? The author could have settled on a lot fewer increments (e.g. 3″, 6″, 9″, 12″, etc). The less there are the easier they are to recall.
Big Bases
It was the first outing of my rebased Liberators armies. They are now all on Big Bases. I do like the look of this and it certainly speeds up play.
General impressions of March Attack
I liked the feel of March Attack. They had all the bits that you’d expect for a battalion level Napoleonic set of rules. The game looked right, in our case like the pseudo-Napoleonic game it was. Lines. Columns. Sweeping cavalry charges. Musket volleys. All the right bits. We particularly like the cavalry combat. The best simulation of swirly cavalry fights I’ve come across. And in general March Attack played easily. I can imagine it is great for its intended niche – Corps level actions played in an evening. Clean simple rules optimised for fast play. I liked it quite a lot.
But as written March Attack isn’t really a good choice for the South American Wars of Liberation. The big issue for me is around the focus, or lack of, on each manoeuvre unit. March Attack glosses over much of the detail about a unit. Firing calculation generates automatic hits and after a few turns units evaporate. There really is no morale failure for a unit (and the VeD test doesn’t count). Morale failure happens at the higher level, i.e. Major Formations (MF). For Liberators the entire army might be the sole MF.
I also don’t like the way March Attack treats terrain, at least for South America. The rules penalise infantry and cavalry equally in bad going. That means there is little reason for infantry to apply their historical South American tactic and head for the rough to escape superior cavalry. In March Attack the cavalry will just come hunting for them in the bad going.
I would seriously consider using March Attack for the European wars but for South America I’ll either have to make some serious amendments or look for something else.
References
Fletcher, J. (2006). Liberators! Supplement 1: The War in the South. Grenadier Productions.
Simms, M. (2011). March Attack: Napoleonic Wargames Rules. Crusader Publishing.

