2020 is the year of the Rice Paddy – at least I’ve declared it the year of the Rice Paddy. So I thought I’d make a few. I need them for Burma Campaign, Portuguese Colonial War, First Indochina War, and Vietnam War. Mine are for 15mm wargaming figures, but the same principles apply for other scales.
End Result
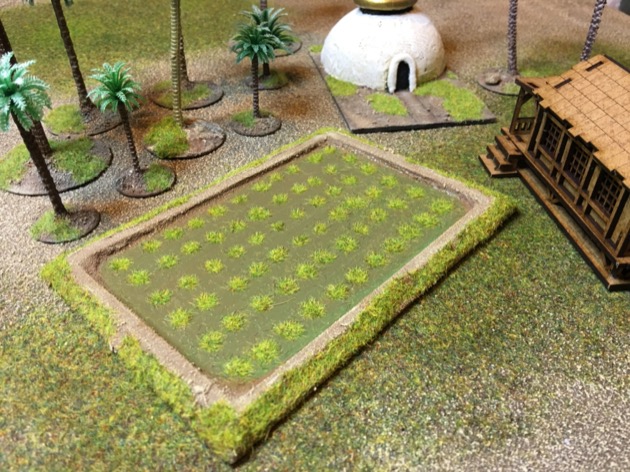
First a shot of my first rice paddy with my homemade Pagoda and some other stuff.
Materials
This is what I used:
- 2mm MDF
- PVA Glue (White Wood Glue)
- 5mm Balsa wood
- Dark Brown Wood Filler
- Sandpaper
- Sand
- Tamiya Flat Earth (XF-52) or the Dulux House Paint equivalent (80YR14140 Extra Deep W45)
- Vallejo (123) 70.847 Dark Sand or Dulux (23YY48254 Medium W45)

- Vallejo (007) 70.837 Pale Sand or Dulux (40YY75216 Light W45)

- Vallejo (075) 70.942 Light green

- Flock
- Coat D’arms 140 Gloss Varnish
Instructions
Step 1: Cut out MDF templates
The first step is the cut up the MDF. I had some 2mm MDF lying around and used that. My rice paddies are for Crossfire so I wanted my standard crossfire templates. I made 4″ square, 4″ x 6″, 6″ square, 6″ x 8″, and 8″ square.
Step 2: Build dyke from balsa
Rice paddies have a dyke (called a bund) around them to keep the water in. Often these have a path on top.
For my dykes I cut up 5mm wide strips of 5mm thick balsa wood. Then glued them about 5mm in from the edge of the MDF templates. The example is a 4″ x 6″ template.

Step 3: Make bank from wood filler
Of course the dykes are meant to have sloping sides, and I used wood filler to create the slopes. I used dark brown filler so it wouldn’t show through later.
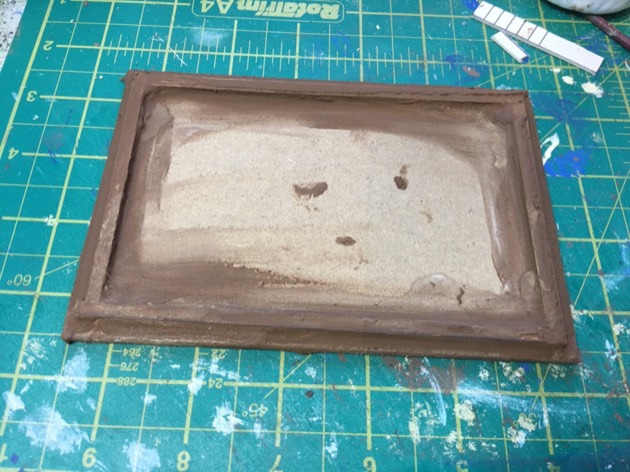
Step 4: Sand the wood filler
The wood filler goes on roughly and I sanded it down. I’m quite messy and some filler got onto the bits where the water will go and I tried to sand this off as well. But the most important bit was sanding down the corners of the dykes so they are less like furniture and more like an earth bank.

Step 5: Paint a Flat Earth base coat
Then I painted everything Flat Earth. The original colour was from Tamiya but I now use Dulux House Paint for this,

Step 6: Glue sand (and then redo base coat)
In hind sight I should have glued sand on the dykes before I painted in Flat Earth. So I glued it on now and then painted the sand with Flat Earth.

Step 7: Dry brush sand
I then dry brushed the Flat Earth with two sand colours. The entire dyke got a Dark Sand although I was sparing on the inner bank of the dyke. The top and outside bank of the dyke got pale sand as well. I didn’t dry brush the inner bank of the dyke too much so that it was darker suggesting depth and/or damp.

Step 8: Paint water a greenish brown
Brett Simpson has an amazing river, featured in Dig in and Wait! A Crossfire Battle Report in the Pacific, and recommended “brown mixed with a little green” for the water.
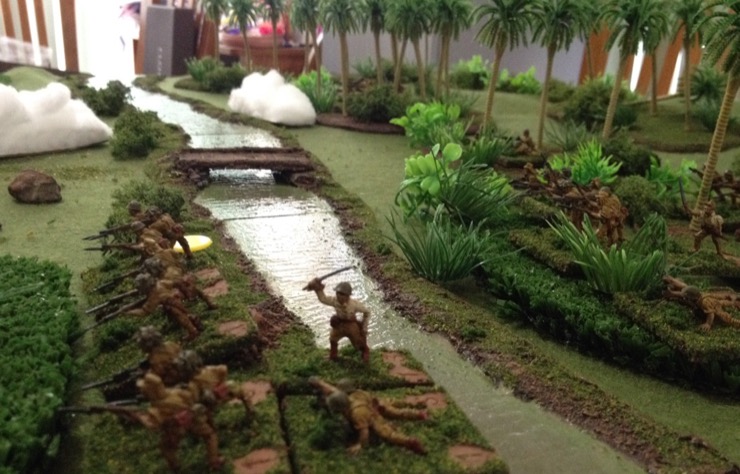
So that is what I did. I used a big dollop of Flat Earth and a touch of Vallejo (075) 70.942 Light green. You can see the rough quantities in the photo. For most of the rice paddies I used two drops of green but for others `I used 1 drop (more brown) and others 3 drops (more green). I’m not sure the variety is obvious or even necessary, but that is what I did.

Step 9: Varnish the water with gloss
I tried a few coats of Vallejo gloss and gave up. Then I reverted to the Coat D’arms gloss varnish and was much happier with the result. Try 2 or 3 coats to give a nice glossy effect.
Step 10: Flock the sides of the dyke and rice patches
I put static grass on the outside dyke banks. Actually both banks should have grass but I think it looks kind of cleaner with only the outer bank done.
I used small dots of glue in a grid pattern for the growing rice. Then flocked with the same spring static grass.

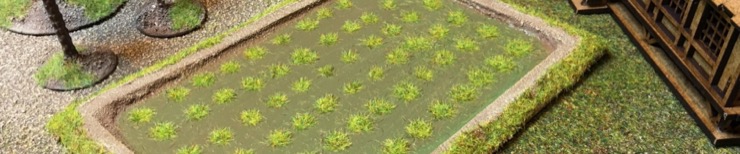
Step 11: Admire
Then step back and admire.

Step 12: Repeat until done
I did some more. I didn’t do the rice patches on the extra ones as I want to find a better way of doing them. Perhaps using grass tufts if I can find something that matches my grass colour (which summer dark green tufts do not).


Suggestions
I had a few thoughts about doing things differently.
I might use Foam Board instead of Balsa Wood next time. I could have cut it into a bank shape without the need for masses of wood filler. I’d still use the wood filler to cover the Foam Board, but I’d only need a thin layer.
Use and electrostatic static grass applicator to get the grass standing up. The trouble with that is the price tag.
Use grass tufts for the rice patches.
Use a water effect rather than gloss varnish.
Steven
Thanks for posting this. I’m due to buy or make some paddy fields myself and this is a great inspiration.
I’ve used used wood-filler on domestic DIY projects but I find it difficult to work (too tacky) and the sanding must be a pain.
Have you thought of using Tetrion filler, possibly with the addition of some PVA? Tetrion is easy to work. You can vary the wetness to achieve an optimum constituency. It sets smooth and if you add PVA it sets like concrete.
You can even add sand while the filler is still wet and later flood paint with a brown wash (the sand soaks it up).
I think it would be easier and certainly much quicker.
Richard
Good looking stuff! 2 things:
1. Use pre-mixed adhesive and grout.The glue is already in it and it has a sandy texture. The one I have is made in the USA but I am sure that there is an equivalent in GB, Color can be mixed in it too.
2.You can make a DIY Static grass applicator form an electric flyswatter an strainer for under $15 (12 GBP)
You tube has a bunch of tutorials and the one I made works great! Here is the URL for the best tutorial
thanks for the tip Dick.