Back in 2014 I blogged about What to use for Crests in Crossfire. To be fair I didn’t really like any of the ideas but the “Long tiny hills” had some merit. So I did a version 2 of them and I’m very happy.
Here is what the version 2 of the crests look like …
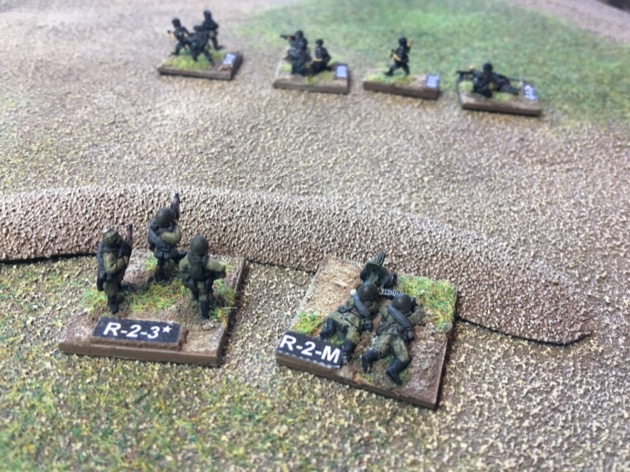
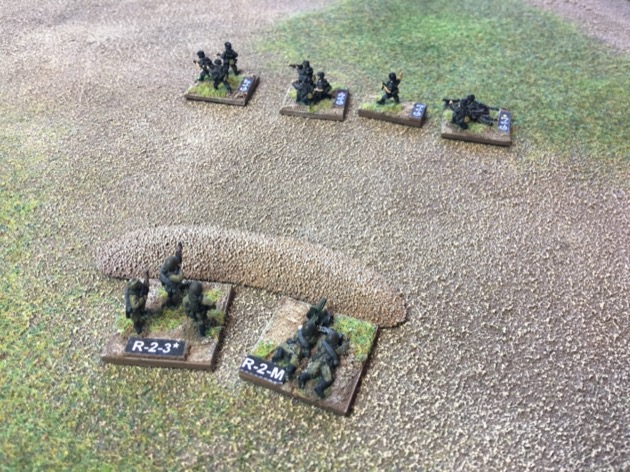
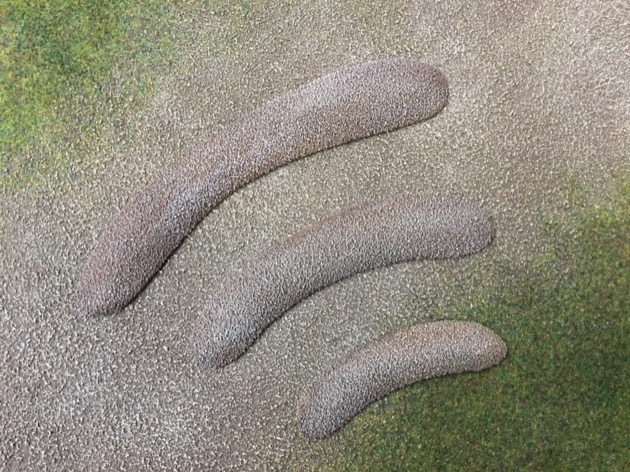
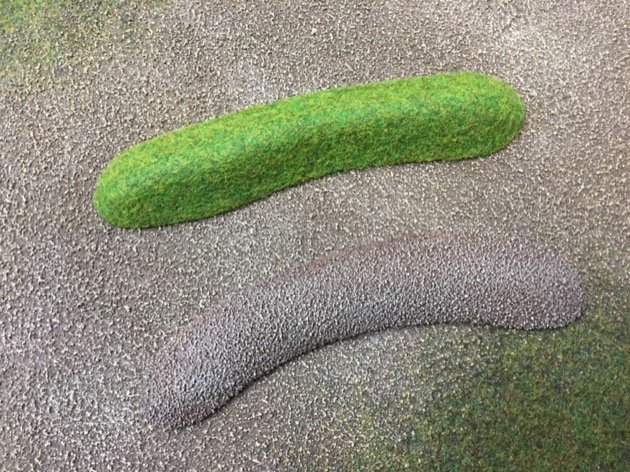
Crests-259 Russians behind 6 inch crestCrests-260 Russians behind 4 inch crestCrests-261 Russians behind 8 inch crestCrests-219 – All sizesCrests-221 -All sizes – top viewCrests-222 – Compare version 1 and 2Crests-223 – Compare version 1 and 2 – top view
The Brief for version 2 of the Long tiny hills
As with version 1, Simon from S&A Scenics made them for me. If you are interested in how they are made, this was the brief I sent him …
Four years ago, almost to the day, I asked you to do some custom pieces – some crests – for my Crossfire games. Well, it is time for version 2. I’d like to explore if you can do this for me.
Version 1 crests: Basically we ended up with “straightish banana shape. more straight than curved. as narrow as possible. They should be as low as possible – lower then your hills – but with an obvious crest line. Backed with MDF and flocked green.” The crests ended up 1″ wide and a crest of approximately 1/2″ You did them in 4″, 6″ and 8″ sections, four of each. I have attached a photo as a reminder. These crests have done good duty for many years
Crests-126 Crests as Low Hills
For version 2, I’d like all the same but (1) lower and (2) aligned with my new flocking style.
The version 1 crests are a little too high. At 1/2″ they are more like little hills than the low undulation a crest is meant to represent. Ideally version 2 would be 1/4″ high (and 1″ wide).
I’d appreciate it if you would sculpt the crests and glue on the sand, but wouldn’t paint, because I’ll end up finishing the painting/flocking anyway.
And this time I’ll probably go for 6 each of 4″, 6″ and 8″ sections.
Because the crests were only 1/4″ (6mm) high Simon made the whole piece out of mdf.
Yes Your latest version is much better and suggests that, by using MDF as the basis, you can make serpentine crests that fit together like roads do. Hmm! I’ll have to try that. Great stuff as always.
Rather than having the crest “bumps” (which I know is Crossfire canon!) have you tried it with crests UNDER the mat, like you might do for hills in other systems? I wonder if you can achieve suitable crests for Crossfire without such an obvious, abstract terrain piece. I have only played a little bit of Crossfire, but given how light it is, it would seem easy enough to designate which bumps in the mat constitute crests for game purposes.
For the same reason I don’t put my hills under the mat … because there is no mat. 🙂 I use four 4×2′ boards. So all my terrain is above the board.
Mind you, that was pretty much also true when I did use a wargaming mat. The only exceptions have been when I did giant hills for a game. These were big slabs of MDF propped up by match boxes, all under the felt mat.


Yes! Lower is better.
Yes Your latest version is much better and suggests that, by using MDF as the basis, you can make serpentine crests that fit together like roads do. Hmm! I’ll have to try that. Great stuff as always.
Rather than having the crest “bumps” (which I know is Crossfire canon!) have you tried it with crests UNDER the mat, like you might do for hills in other systems? I wonder if you can achieve suitable crests for Crossfire without such an obvious, abstract terrain piece. I have only played a little bit of Crossfire, but given how light it is, it would seem easy enough to designate which bumps in the mat constitute crests for game purposes.
For the same reason I don’t put my hills under the mat … because there is no mat. 🙂 I use four 4×2′ boards. So all my terrain is above the board.
Mind you, that was pretty much also true when I did use a wargaming mat. The only exceptions have been when I did giant hills for a game. These were big slabs of MDF propped up by match boxes, all under the felt mat.
Looks good! I use popsicle sticks with a slight berm of rocks or gravel for mine, with a similar result.